Build Your Own Guitar – Days 10-12

This is the entry for Day 12 of a 3-week intensive guitar building course I’m taking through the Australian Guitar Making School.

Click to view Day 9’s entry.

Click here to view Day 8’s entry.

Click here to view Day 7’s entry.

Click here to view all of Week #1.

——

It’s been busy around here! I had a late night on Thursday at the workshop, a night at the movies on Friday and Saturday was…… well, it was Saturday.

So where are things at? On Thursday morning the guitar was still in pieces. It looks quite different now.
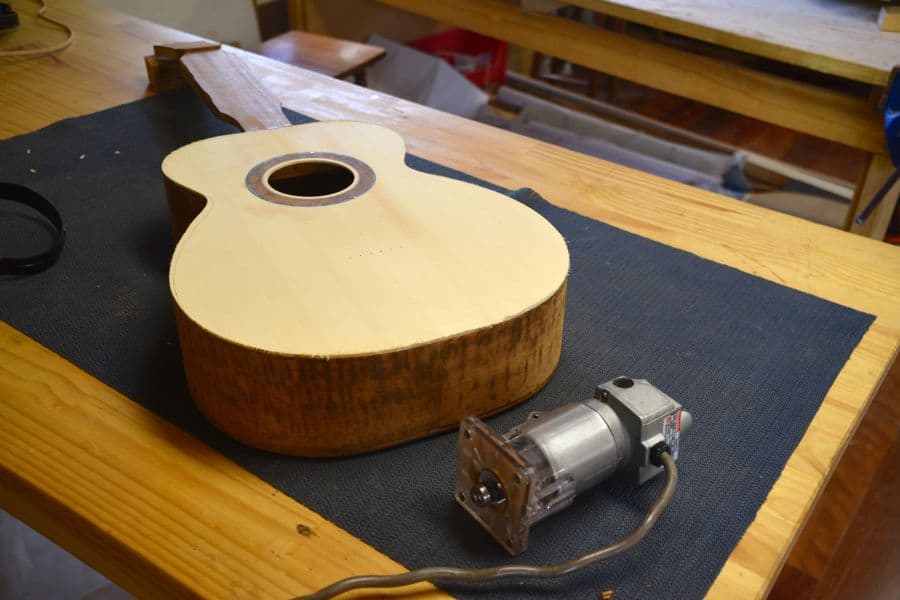
So let me take you through what happened on days 10, 11 and 12……

Day 10

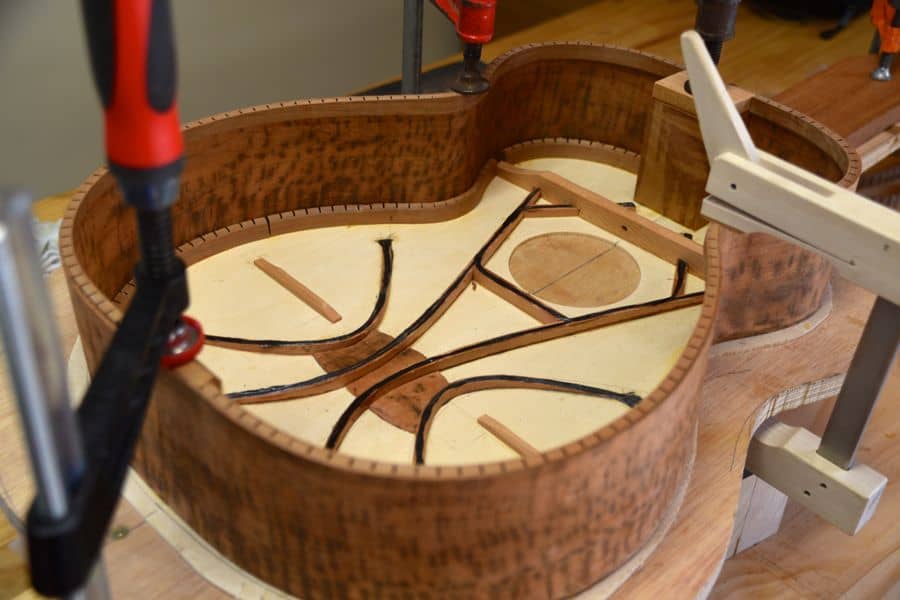
Thursday was the day we ended up attaching the top face of the guitar to the sides. There’s a lot that has to take place before that, though, so what you see here is all in preparation for that moment when the separate parts of the guitar start to become one.

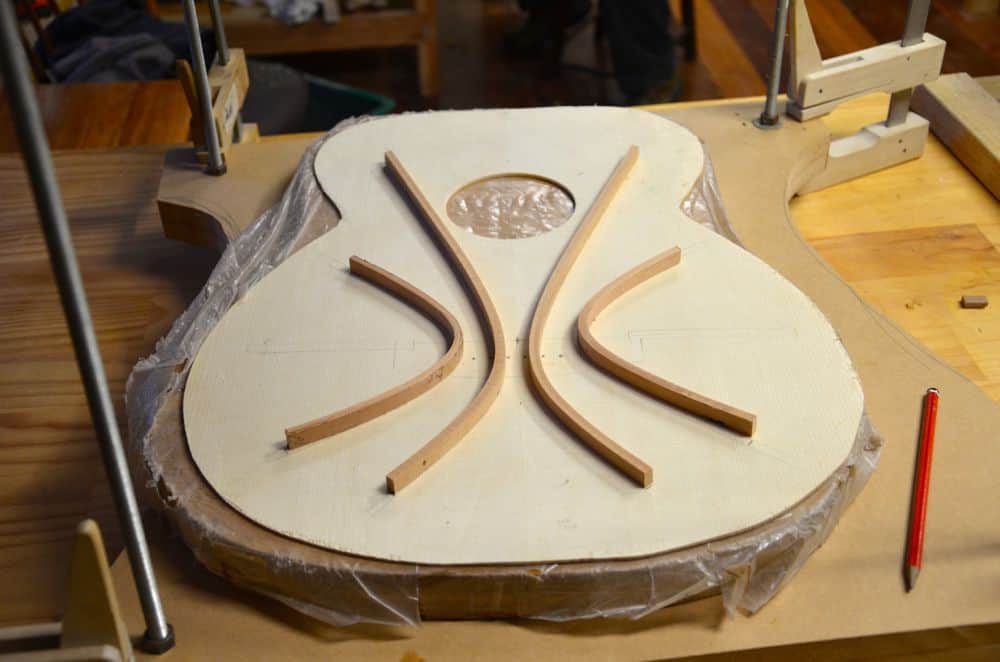
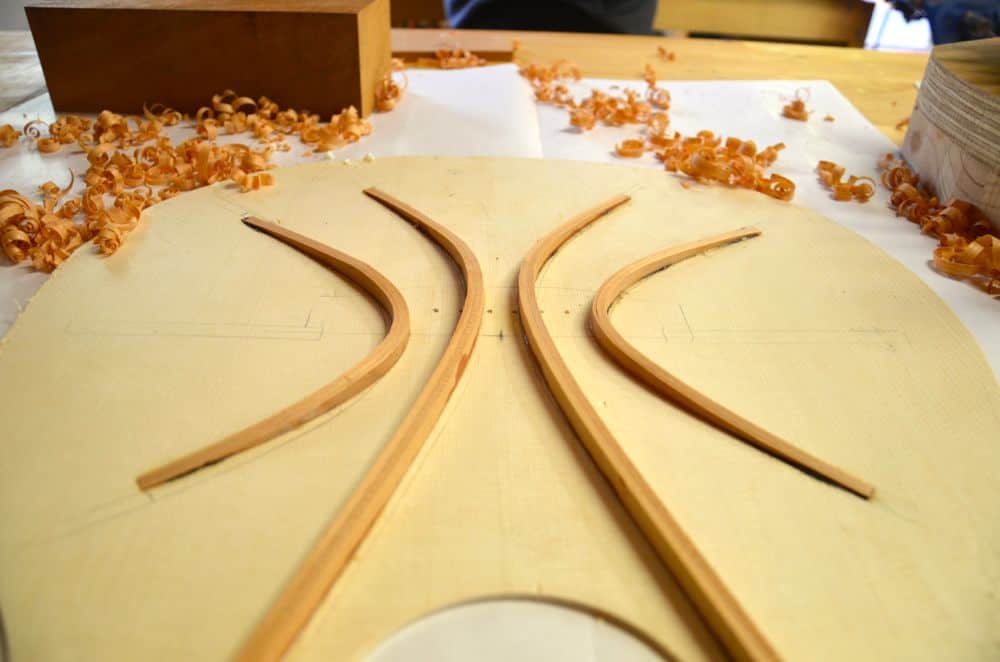
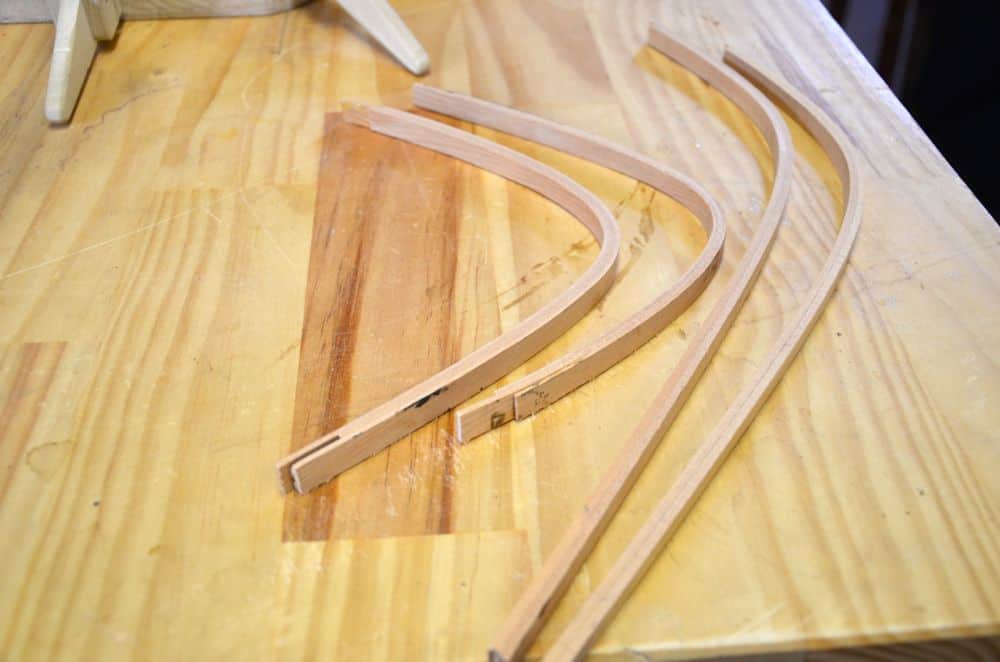
First I had to finish off the falcate bracing that supports the top. As of Wednesday, I had the basics in place with carbon fibre added to the wooden braces:
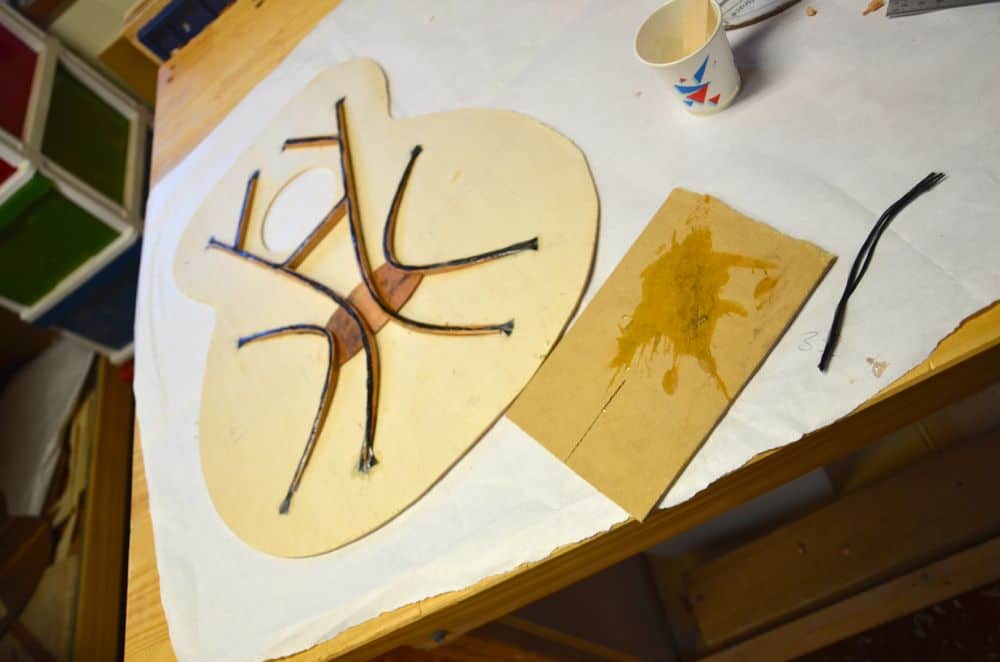
Today – and much of the time we have left – is very much concerned with getting the detailed bits right.

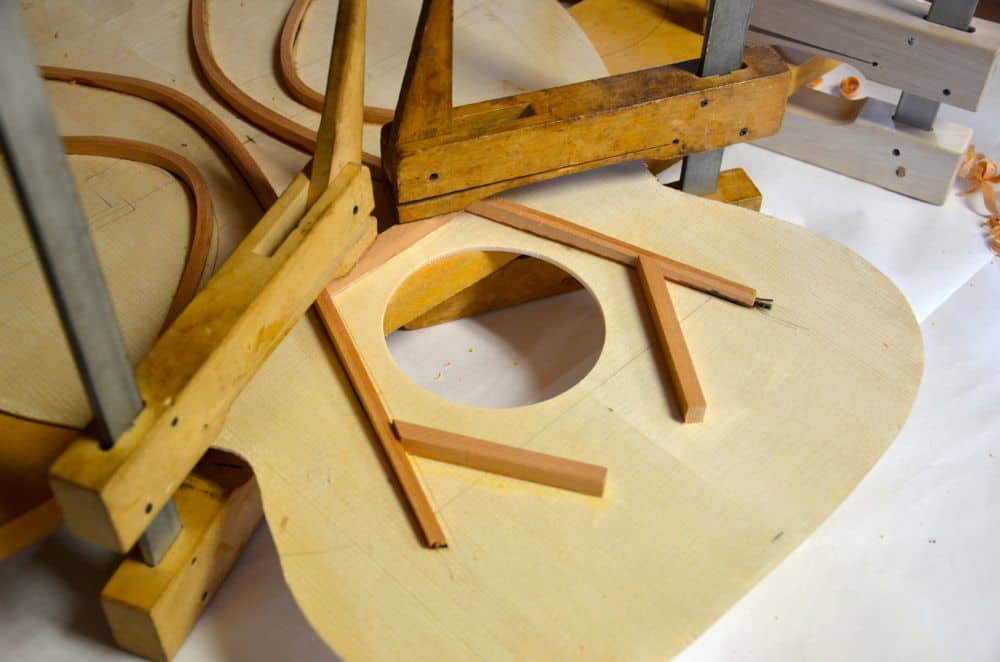
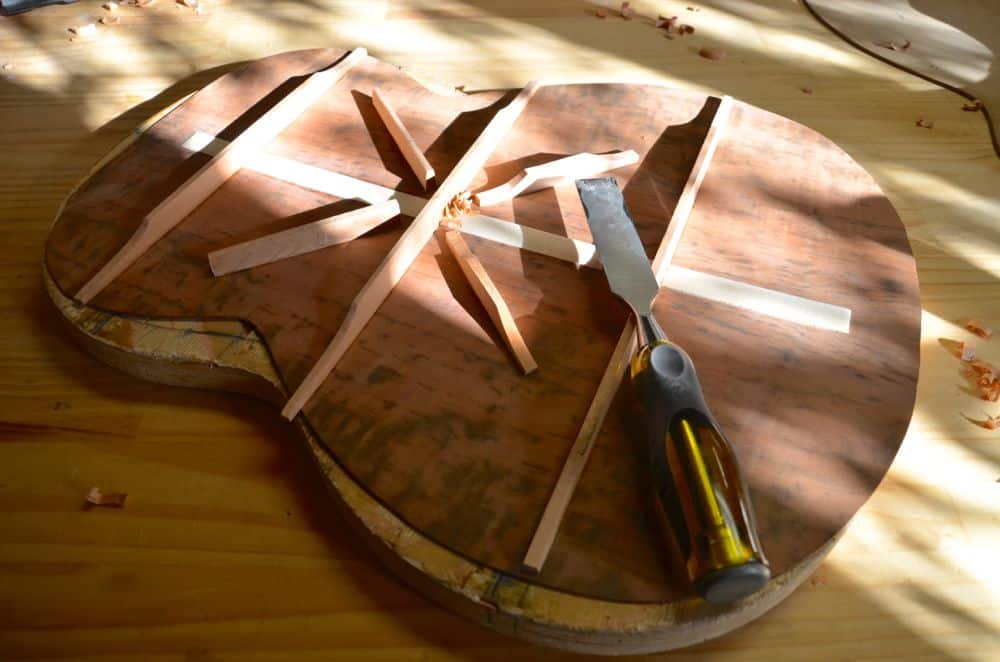
The first job for Thursday was to make another section to go across the top of the Falcate brace, above the sound hole. This was tougher than it looks, with notches having to be carved into the top brace at odd angles to allow clearance for the existing braces.

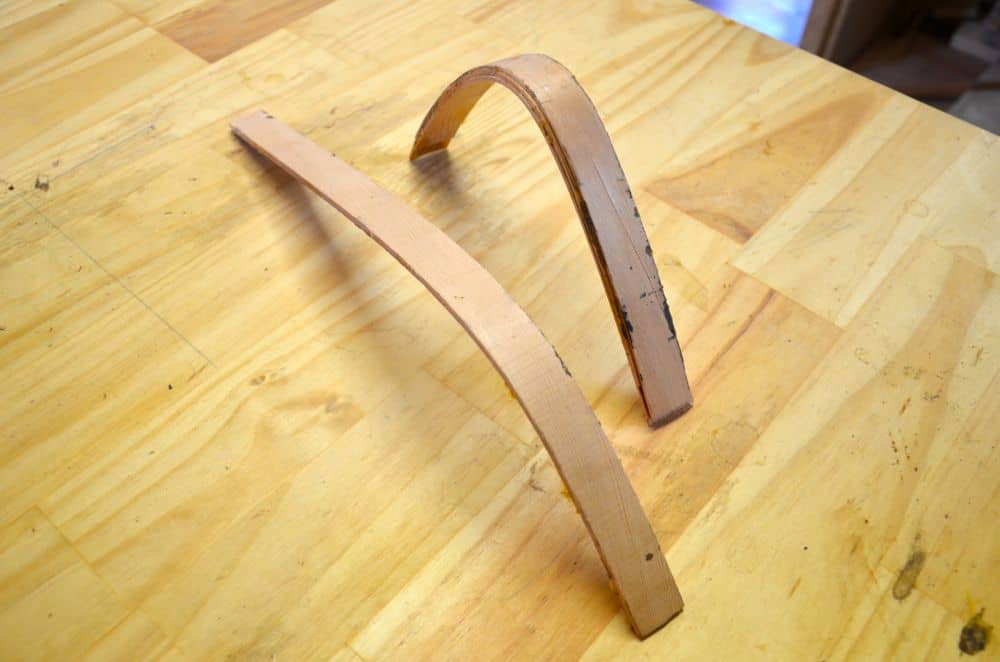
We had to add a couple of small braces to the side of the curved falcate braces and clamp them down. They were tapered after the glue set….
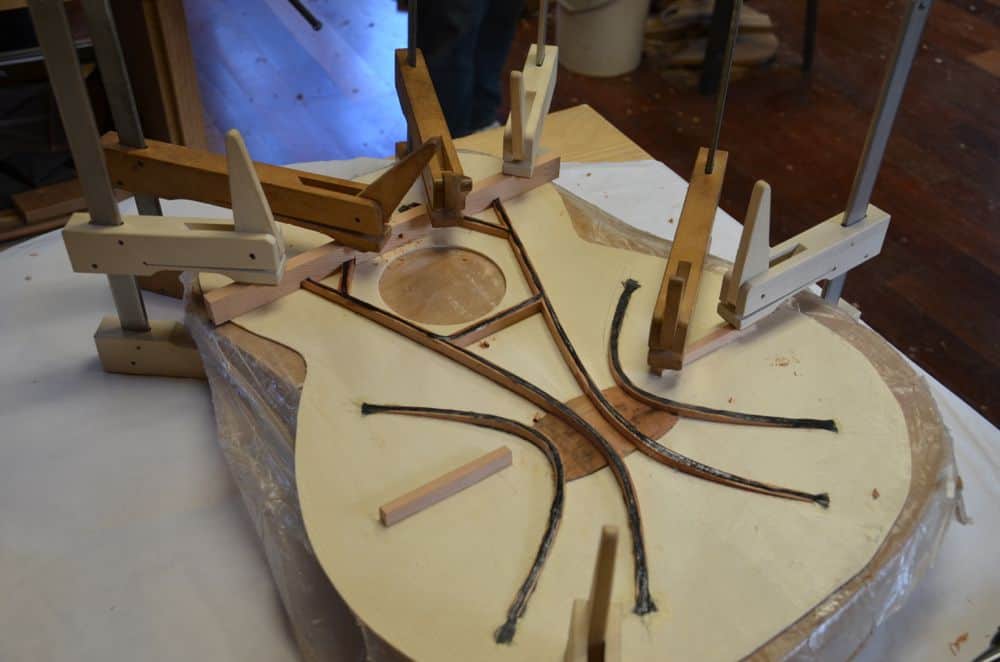
Because the sounds are going to be bouncing around inside the instrument, it’s important to blunt any sharp edges in there. We start with planing down the edges of the block, where the sides meet at the end of the instrument. The top brace on the Falcate brace is also rounded off….

The edges of the top brace are shortened so that they’ll fit within the sides when the top is attached…..
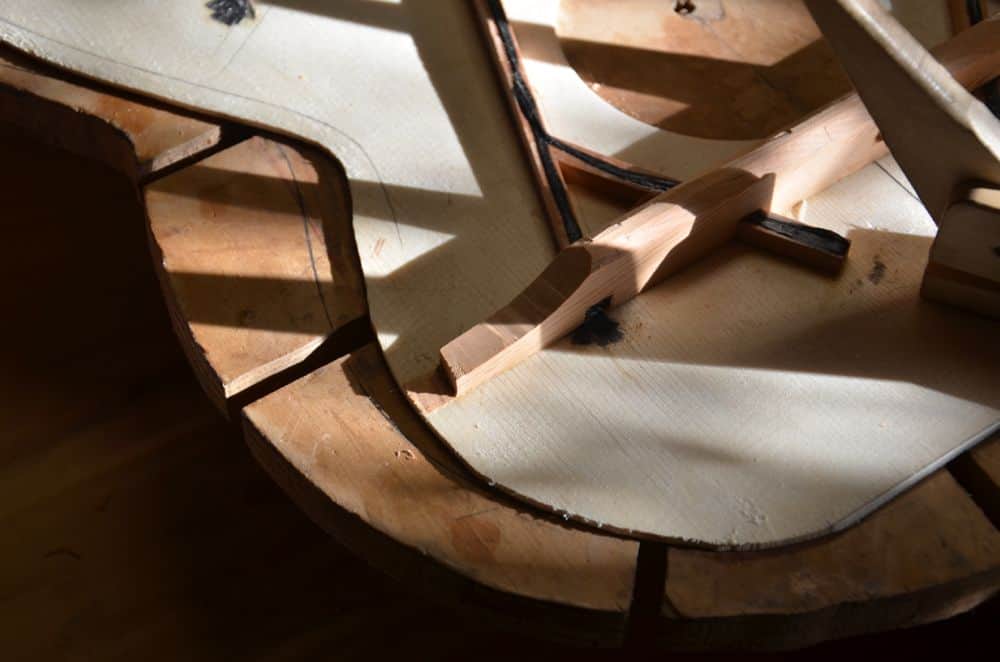
After taking a bunch of measurements and making sure everything’s in the right place, we’re ready to attach the top to the sides of the guitar.

A day earlier I made some kerfing, which is positioned and then glued at the meeting point of the sides and the top. You have to apply glue to the kerfing and then put it in place and push it hard into the joint with this stick before clamping it in place for the glue to set overnight.

The next morning, the glue has set and the top face is now attached to the sides! The instrument is starting to take shape.
——

Day 11

It’s all starting to happen a little quicker now. The front was attached yesterday and all of a sudden there’s a 3D instrument that looks like an actual guitar!

As you can see from the photos, above, the top is made to protrude from the sides when it’s attached, so we use a router to take off the excess…..

The next job is to make preparations for the back to be attached.

The sides and kerfing have to be planed to make sure the surface is smooth. I make some small braces to sit along the sides of the guitar, from top to back. These are glued and clamped in place.

The back of the guitar has bracing similar to the top. Small notches are made in the kerfing to allow the braces to sit in the kerfing, which adds strength when the back is glued on. The braces on the back of the guitar also have to be trimmed so that they sit inside the kerfing.

Next I added a coat of shellac to all the inside surfaces, taking care to ensure that the shellac doesn’t go near the surfaces about to be glued…..

Next came a proud moment – adding the label to the back. I named the guitar, put my name on the label and the date our course will be completed.
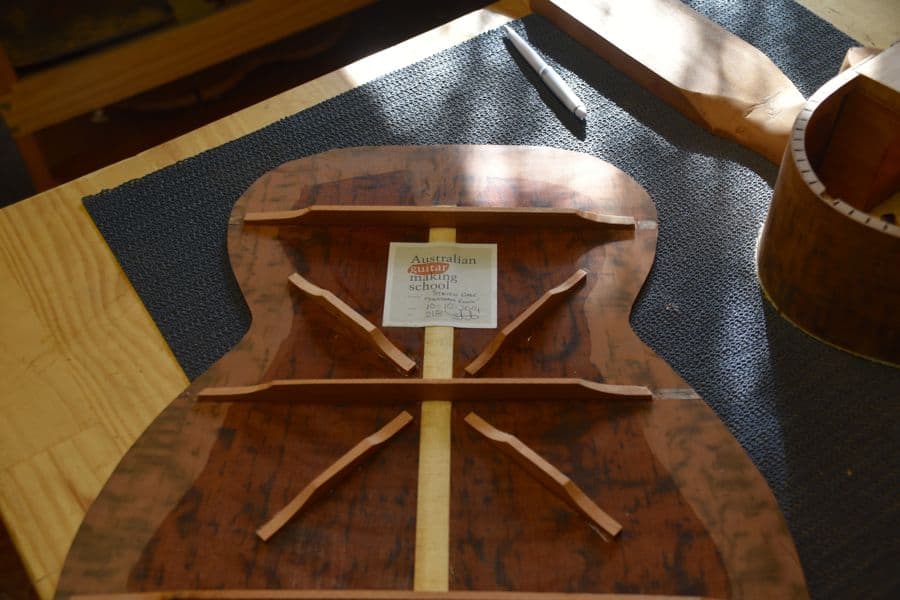
I’ve named the guitar Stratovarius Viggen. “Stratovarius” is a twist on the famous violin maker, Anotonio Stradivari and in honour of Strato, our teacher for this course. “Viggen” is my nod to Saab and Sweden, two of the very important influences in my life in the past decade. I have a few more flourishes to come in relation to this, too.

Strato said I should sign the inside of my guitar. I asked him to sign it, too.

His response was “but you’re the one who made it”. To which I replied, “I might have made it, but you’re the one who made it good.”

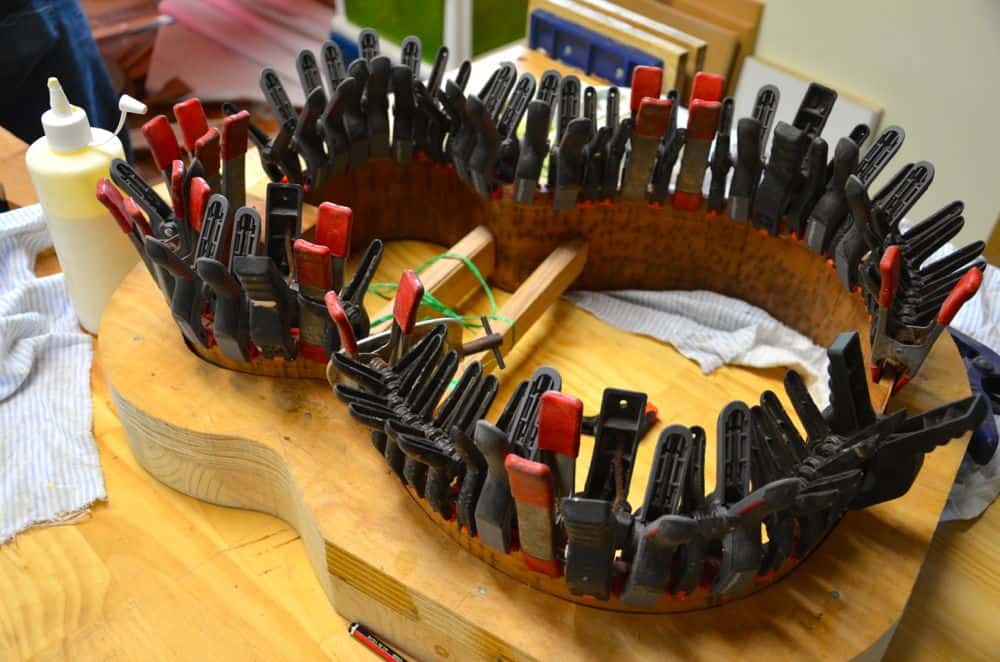
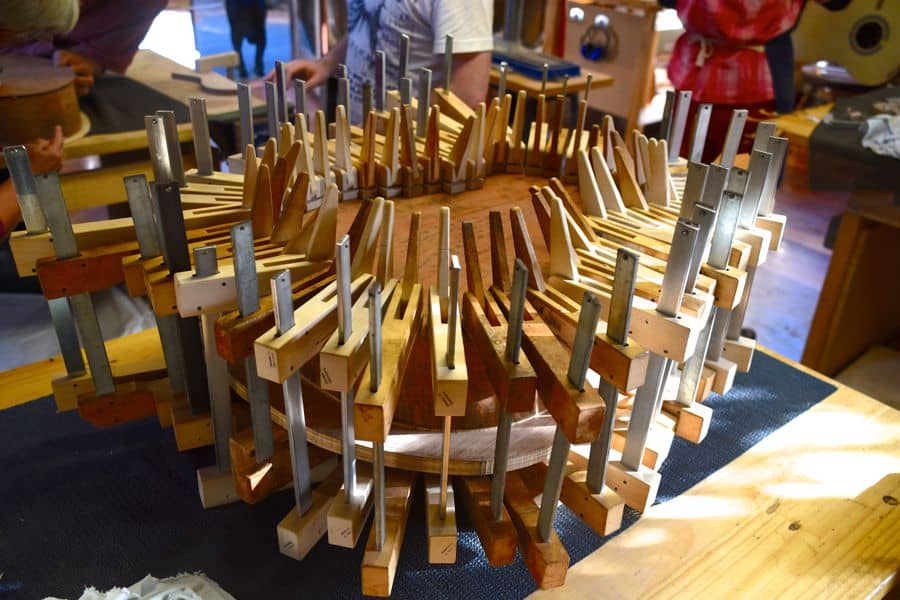
With all of that said and done, it was time to glue the back down. You add glue, and then apply a LOT of clamps……
——

Day 12

Saturday was a short day.

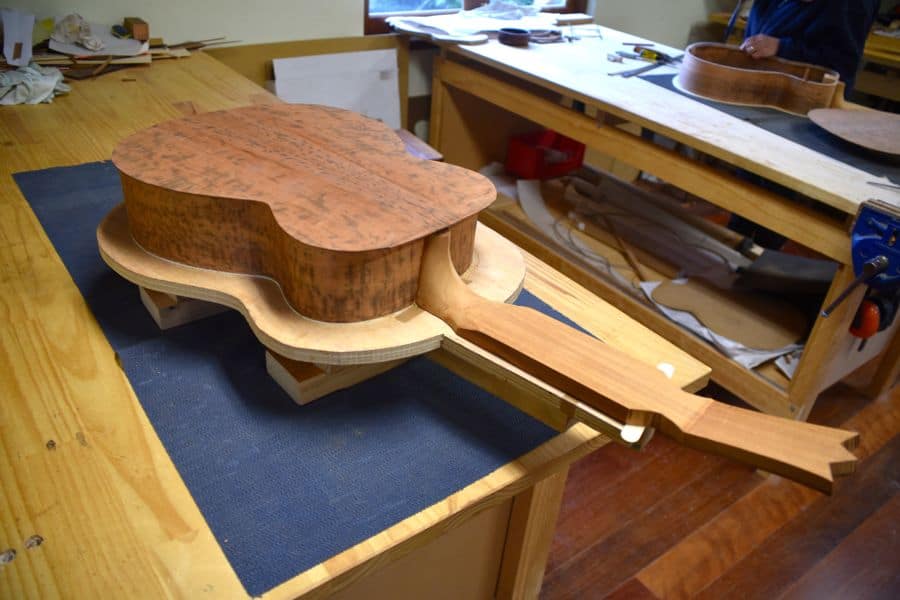
The first job was to apply the router to trim the excess from the back of the guitar. Here’s the excess. I don’t have a photo of the routing, unfortunately (getting slack!)
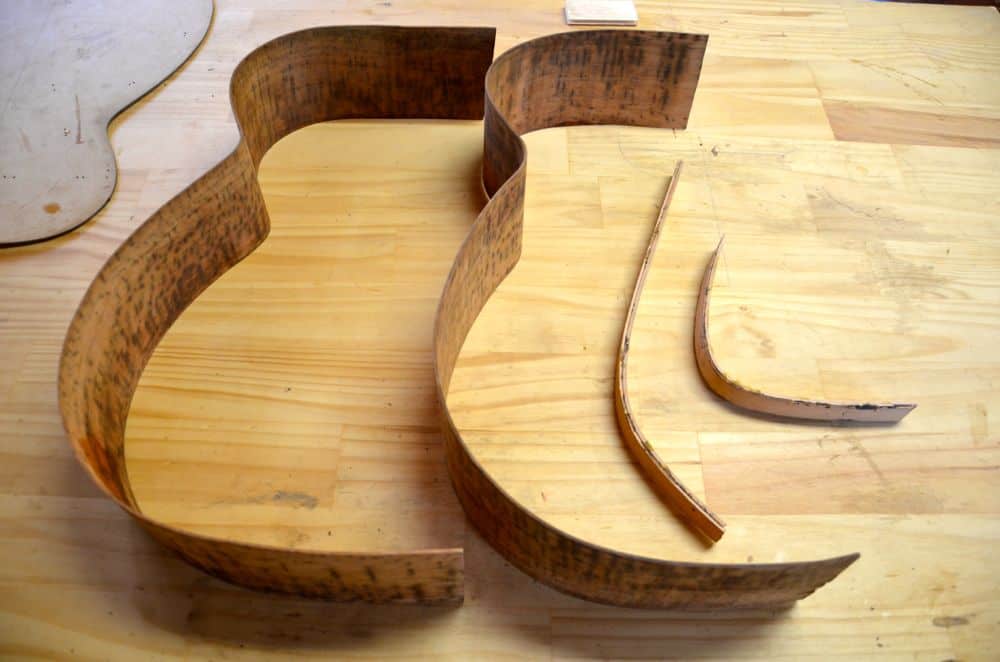
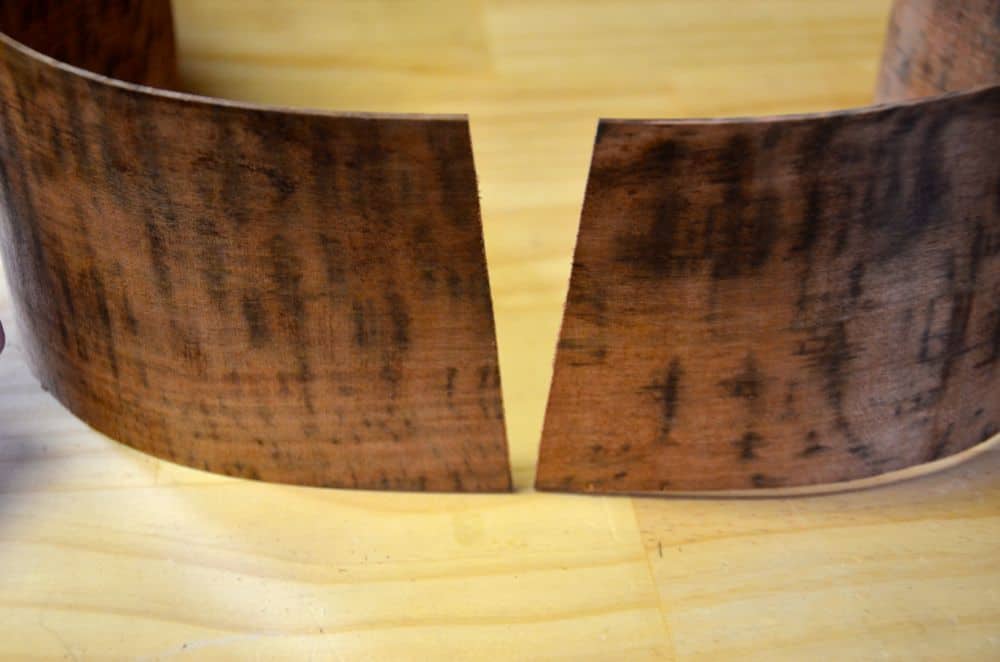
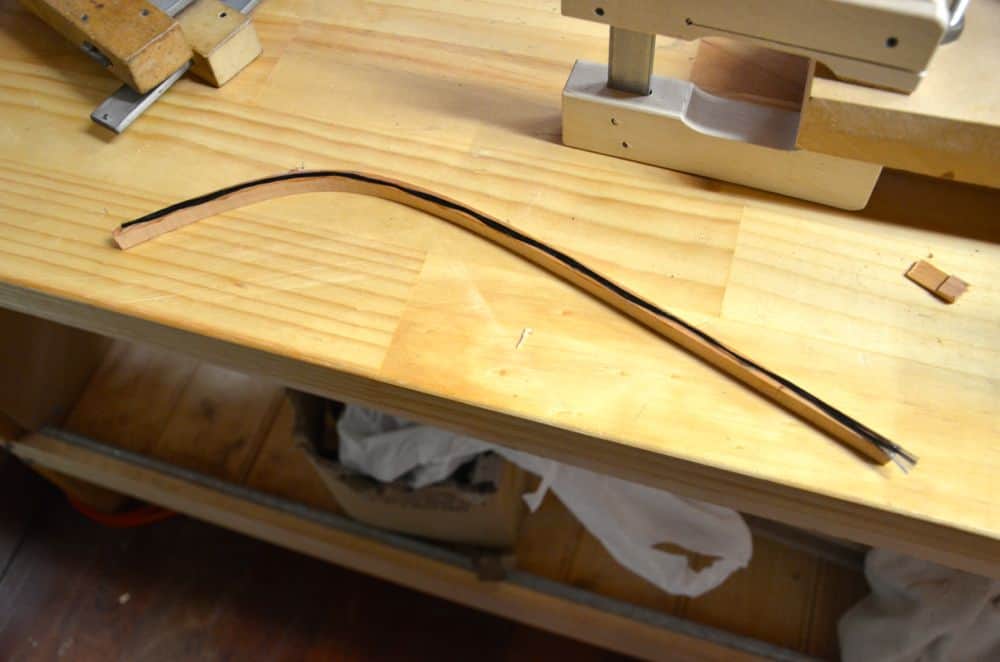
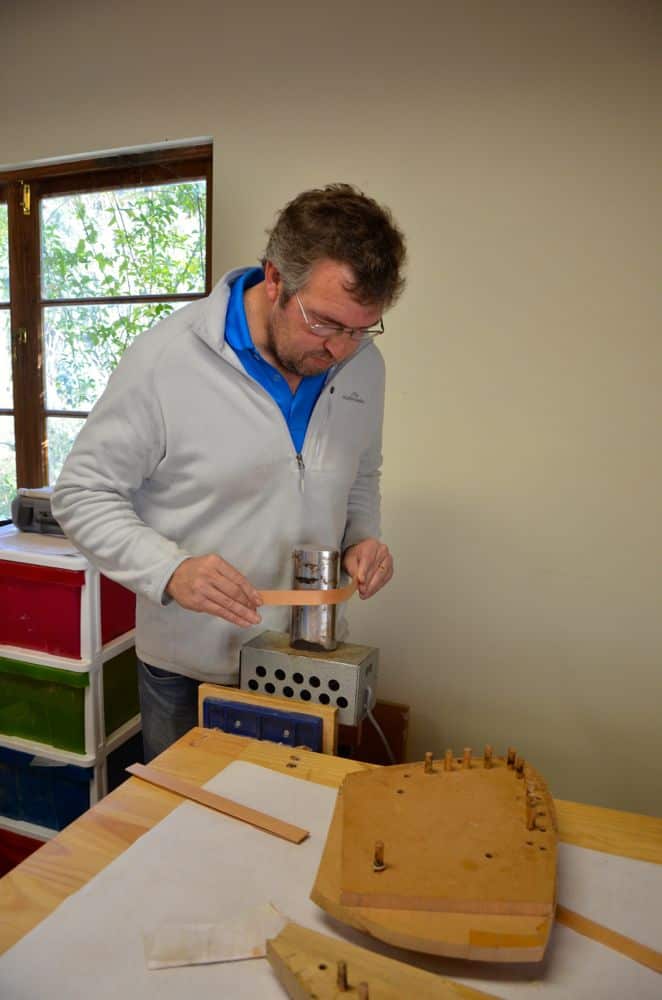
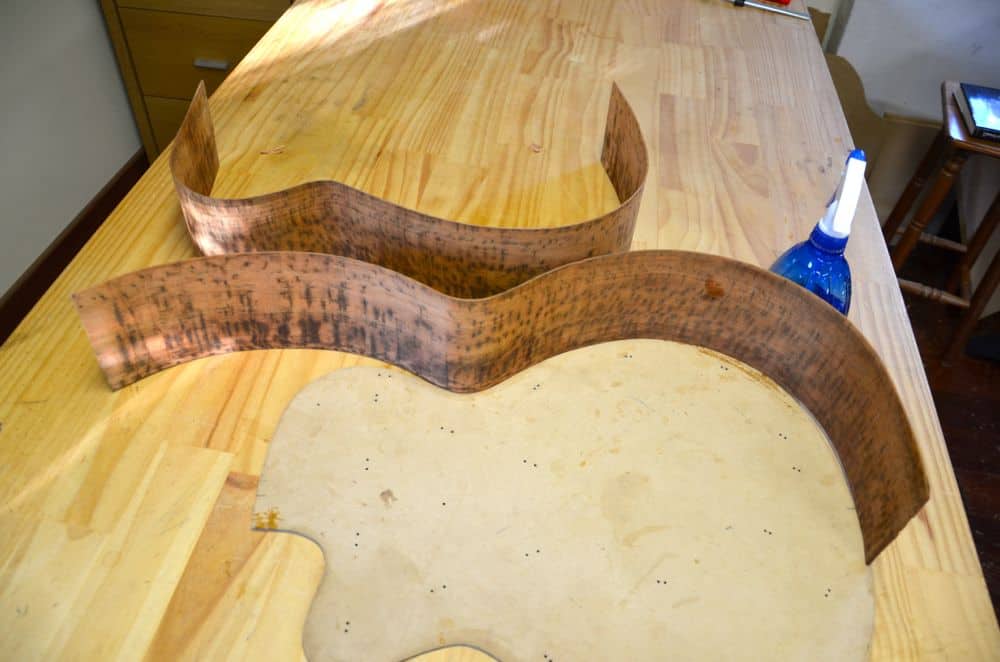
The next job involves applying the ‘binding’ to the edges. The binding is a thin strip of maple that will be glued to the top and bottom of each side of the guitar.
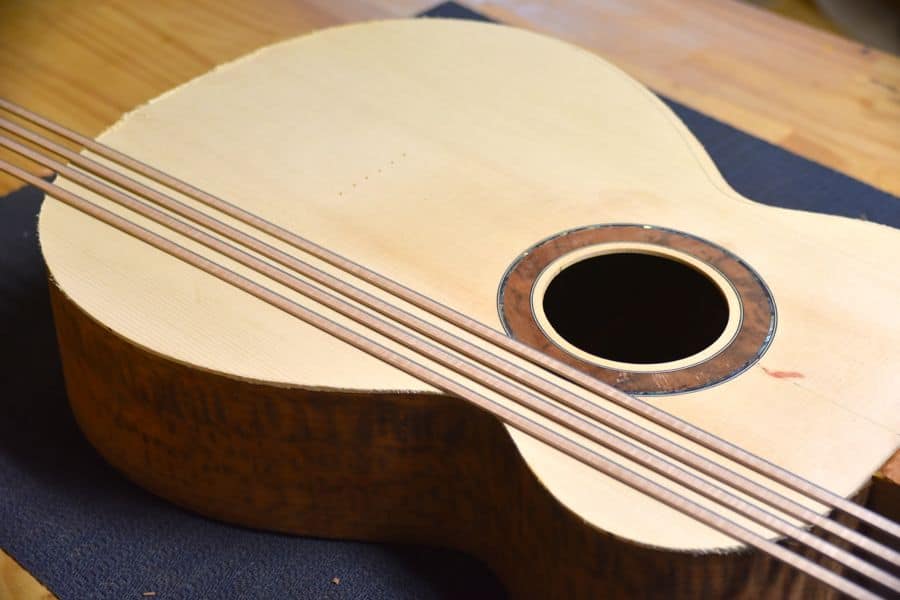
Before you can do that, though, the binding has to be heated and bent to the correct shape. As it’s so thin and small, it needs a delicate touch to avoid breakage (yes, I managed to break one!)

Next we had to use the router again to create a channel for the binding to sit in.

I didn’t get to glue the binding in on Saturday as we ran out of time.

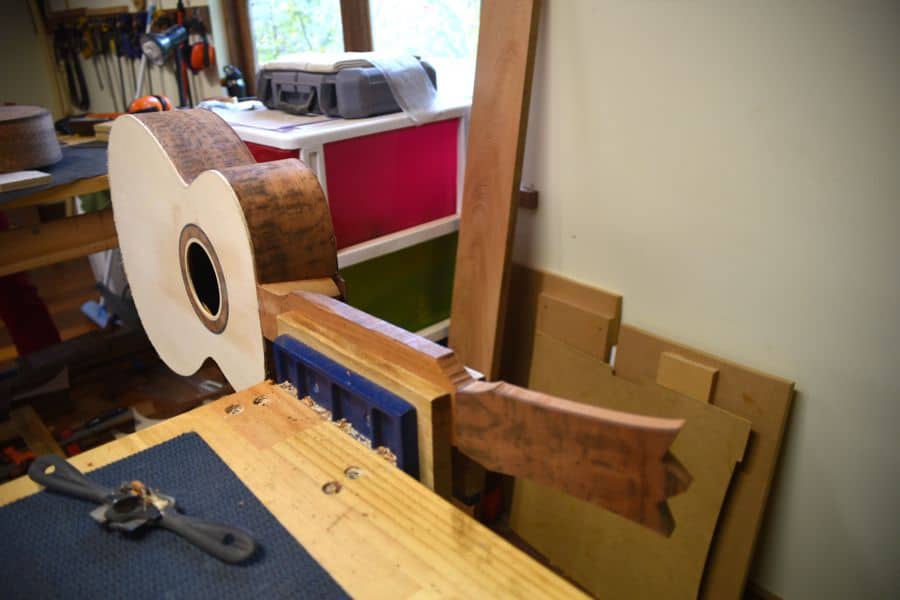
The other job left incomplete on Saturday was some planing and sanding of the head of the guitar, which is intended as another little tribute to Sweden.
——

We still have some big jobs to do, but the margin for error is getting slimmer as all the things we do now are on the outside of instrument. They’re visible, and they will affect the sound. With the finish line clearer, the work has to better, cleaner, and more accurate.

Thanks for reading!

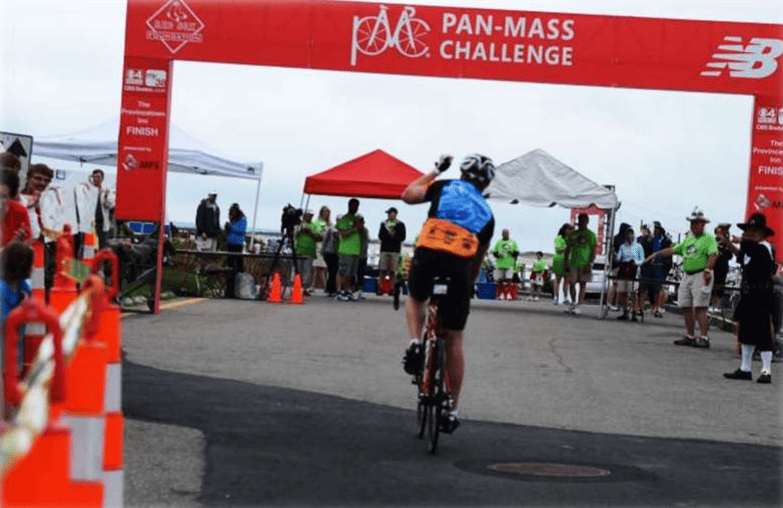
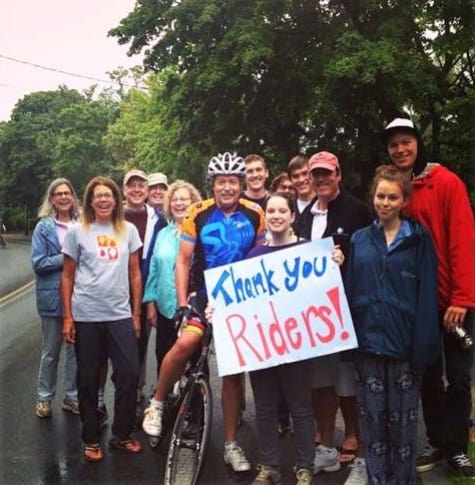
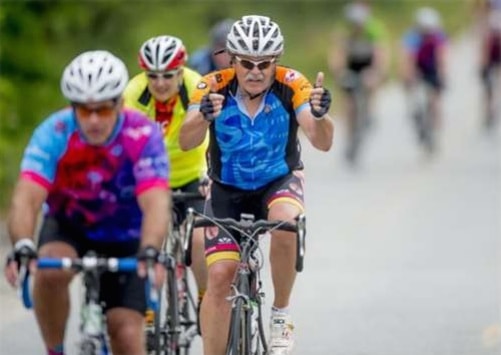
Result! Jim Coggs At The Pan Mass Challenge

Regular visitors to this website (and Saabs United in the old days) will probably know the name of Jim Coggeshall. Jim is a big Saab fan and a multiple Saab owner.

Jim is also a cancer survivor (several times over) and for the last few years I’ve been asking you to support Jim as he rides his bike in the Pan Mass Challenge to raise funds for the Dana-Farber Cancer Institute in Boston.

Well, I want to take my hat off both to Jim for doing the ride, and to you for helping him have his best fundraising year ever. I just received the following from Jim via email:

Dear Swade,

I’d like to take this opportunity to thank you for your overwhelming support in sponsoring my fourth Pan Mass Challenge bicycle ride across Massachusetts. Your generosity enabled me to contribute close to $12,000 to the lifesaving work being done at the Dana-Farber Cancer Institute in Boston. This is the highest total ever and brings my historical tally to over $35,500. In all likelihood the 5,600 cyclists will have been able to far surpass this years $40 million goal.

The Dana-Farber likely saved my life on two occasions. You have enabled them to give others the same lifesaving chance I was given. To that I express my deepest gratitude.

Coggs

I wanted to support Jim because cancer is a disease that touches all of us. It took my Dad’s life nearly 30 years ago and it recently took two great Saab friends – Nic Schellekens and Curvin O’Rielly.

I’m happy every year when Jim sends his Pan Mass Challenge email around because it gives us all an opportunity to think specifically about this terrible disease and the relentless task of not only treating the sick, but also finding a cure. And there’s no better way to think about this than through the prism of a friend who is a survivor, especially if you have friends or family who are not. Treatment IS possible and CAN work.

I’m especially happy this year to know that my friends and I have played some small part in helping another friend and cancer survivor raise funds for an institution playing a vital part in treating cancer patients.

Congratulations on another great ride, Jim. Every year and every ride is a bonus, mate!

And thanks to everyone who contributed in 2014. You really have made a difference.

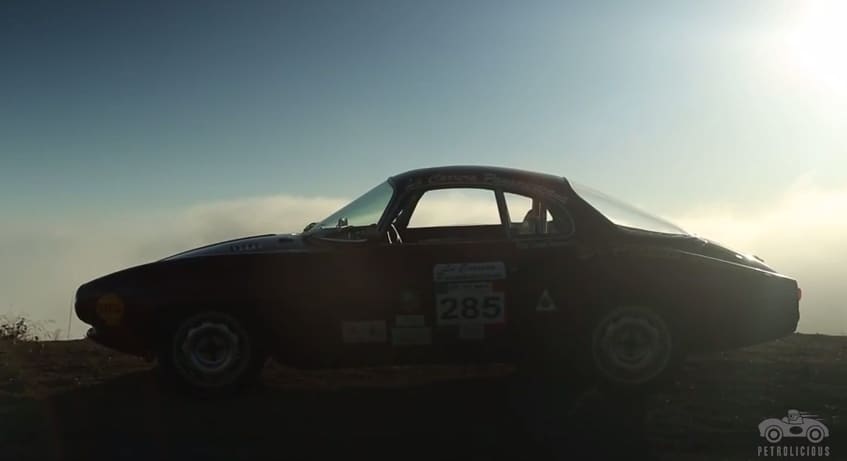
Video: Alfa Romeo Sprint Speciale Shows Everything Alfa Romeo Should Be

This might just be the best video Petrolicious has ever made.

The car is an Alfa Romeo Sprint Speciale from 1965 and it was built especially for the La Carrera Panamericana race through Mexico. There’s plenty of driving footage to see and it’s a wonder to behold. In fact, it’s so wonderful it makes you wish there was no owner’s story to tell. Just give me more driving!!

For me, this video sums up the soul of Alfa Romeo. I hope he calls in the stylists and the engineers and says “This is your brief. Do this for a modern Alfa Romeo”.

That’d be fine by me.

Put it on widescreen and turn the driving footage up loud!

Build Your Own Guitar – Day 9

This is the entry for Day 9 of a 3-week intensive guitar building course I’m taking through the Australian Guitar Making School.

Click here to view Day 8’s entry.

Click here to view Day 7’s entry.

Click here to view all of Week #1.

——

We’re Going To Be On The News!

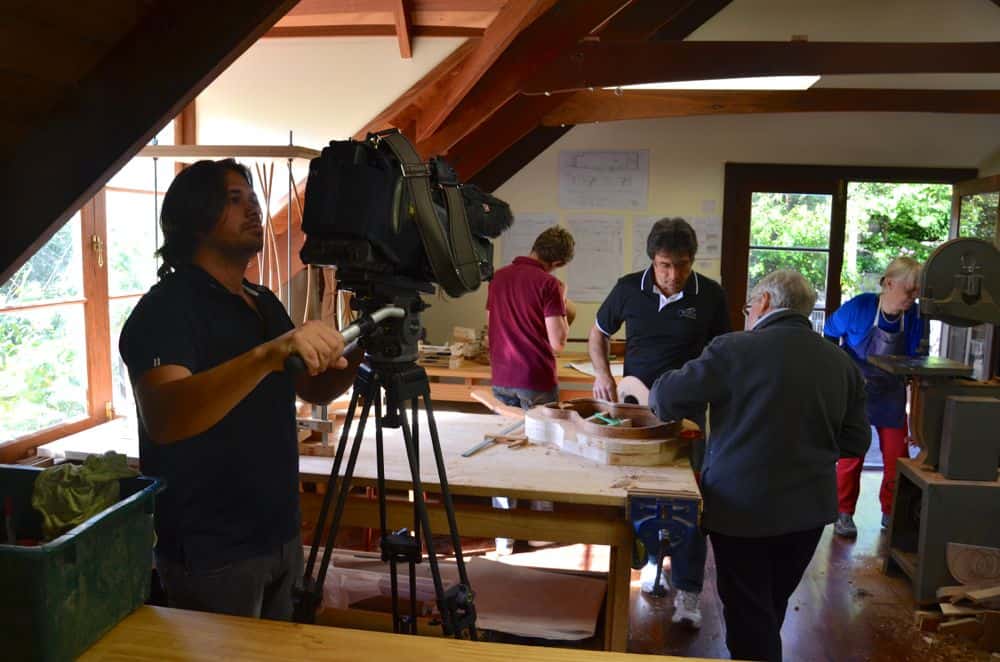
Today we were visited by a reporter and cameraman from WIN News here in Hobart. They are covering our guitar school as a ‘feel good’ feature story on Saturday night’s news bulletin.

Strato was interviewed, as were a few of the participants (no, not me, but maybe I’ll be seen working away in the background).

Our school is held in a workshop at the home of the Lewincamp family. Cary Lewincamp is a prominent professional guitarist living in Hobart. Click that link if you’d like to hear some outstanding seven-string guitar playing from an absolute master.

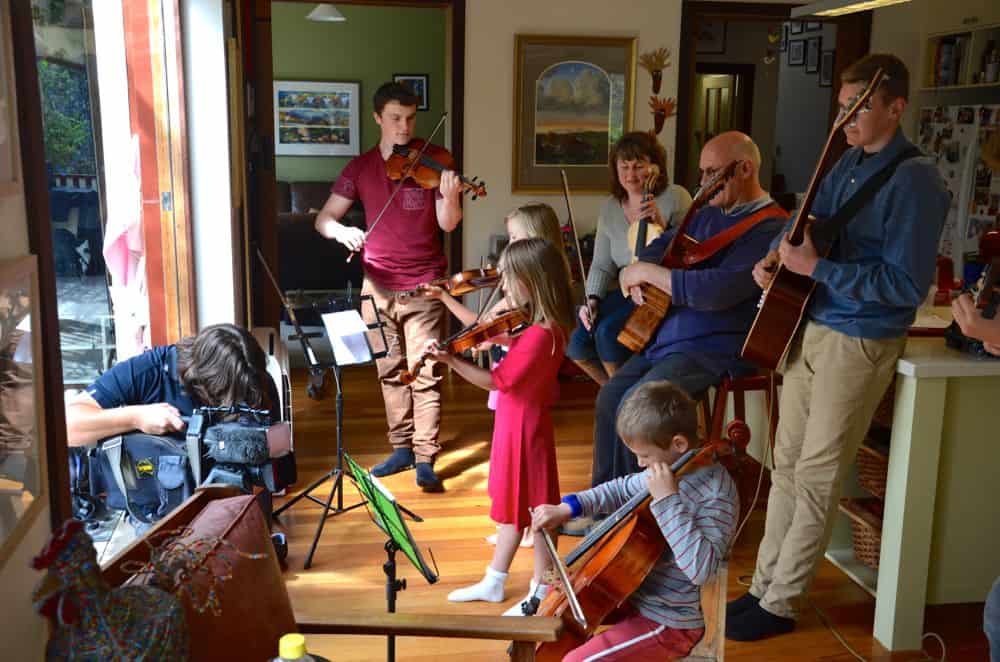
There are six Lewincamp kids still living at home and the whole family got out their instruments for a small performance for the news team, which will feature in the story. The family includes six-year-old triplets, by the way, who have just started to play. Yes, it was a cuteness overload, which was only heightened when Lewis (the family dog) walked through the performance 🙂

The welcoming atmosphere in this loving home is just amazing and we’re very, very lucky to be building our instruments in such a wonderful setting. It’s made the whole experience that much more special.

And speaking of building instruments…..

——

Back To Work!

I started today with “death by 430-odd cuts”.

That’s how many small cuts I had to make in four timber strips to make my own ‘kerfing’. This is a structural support that is glued in to the top and bottom of the sides of the instrument, where the top and back will meet the sides. The cuts are made in order to allow the timber strip to be heat-shaped to conform to the body.

Once the kerfing is shaped to fit the body, it’s glued in place and clamped to allow the glue to set. Once set, the kerfing is planed until it’s level with the sides of the guitar.

Falcate Bracing – continued…

The other job for today was (almost) finishing the falcate bracing system on the top face of the guitar. When I finished yesterday, the four basic braces were in place….

So today I started by tapering these four braces with a block plane. The difference is quite artistic, I think:

I also made/glued a few smaller braces for the top section:

The braces, which are on the ‘inside’ of the guitar, cross over where the bridge will be on the front of the top face. The bridge is where the playable section of the guitar string ends before the string passes inside the guitar. A lot of stress is placed on the holes that the string passes through, so I had to make some timber reinforcements that sit between the braces. These were made by making templates out of tracing paper and then tracing and cutting the pattern on some scraps of tiger myrtle.

It doesn’t look like much, but it took a while to get right.

The final bit of fun for the day was adding carbon fibre to the braces. We take strands of carbon fibre, soak them in epoxy resin and lay them out along the braces, fanning them at the ends.

——

Tomorrow I have to glue those string supports in place, make my final components of the falcate brace and then………. (cue dramatic music)………. glue the top to the sides.

This is a scary proposition. All the things we’ve done so far have a certain margin for error or a capacity for my rookie mistakes to be repaired. Big stuff like gluing the top feels like one of those “no turning back” moments, where you only get one chance to do it right.

Thankfully we have Strato there to guide us.

Thanks for visiting!!

Build Your Own Guitar – Day 8

This is the entry for Day 8 of a 3-week intensive guitar building course I’m taking through the Australian Guitar Making School.

Click here to view Day 7’s entry.

Click here to view all of Week #1.

——

Today was a day of little things and big things. We had a bunch of little things to finish off in preparation for a couple of big things. The end result – I now have something that actually resembles a musical instrument instead of an assortment of wooden pieces. Exciting!

I finished up yesterday with one of my sides properly bent and the other 75% of the way there. That got finished up early this morning:

So with the sides done, the neck and head in basic form and the top/bottom in basic form, it’s actually possible to see an instrument taking shape!

There were a few things to do before we could start putting things together, however.

The sides are clamped into this mould, which helps to keep their shape while you get around to a few other jobs.

It would help at this point to explain one of the end goals for the day – to attach the sides of the guitar to the neck of the guitar. Before that happens, a little work has to be done to both the sides and to the neck.

While the sides are clamped into the mould, above, I got to work on preparing the neck. The top face of the guitar will sit on a block at the end of the neck so the first job was to chisel a step in the block so that the top face of the guitar would sit flush with the mahogany of neck (which, you should note, is yet to get its Gidgee top). Taking a step out of the block enables the top face to sit level. First you chisel, then you plane. Eventually you’ll take out a section of timber equivalent in height to the thickness of the top face panel.

Next you have to taper the sides after removing them from the mould. A guitar body is generally fatter at one end than the other, so it requires a little bit of trimming – or ‘tapering’ – on the bandsaw.

This is a nerve-wracking process to say the least. When using a bandsaw, the optimum method involves the piece you’re cutting being placed flat on the base plate. With guitar sides, however, that’s not always possible and the potential for cracking when the wood has no direct support underneath (i.e. when cutting the waist) is real and ever-present.

Thankfully, no sides died in the making of this class’ guitars.

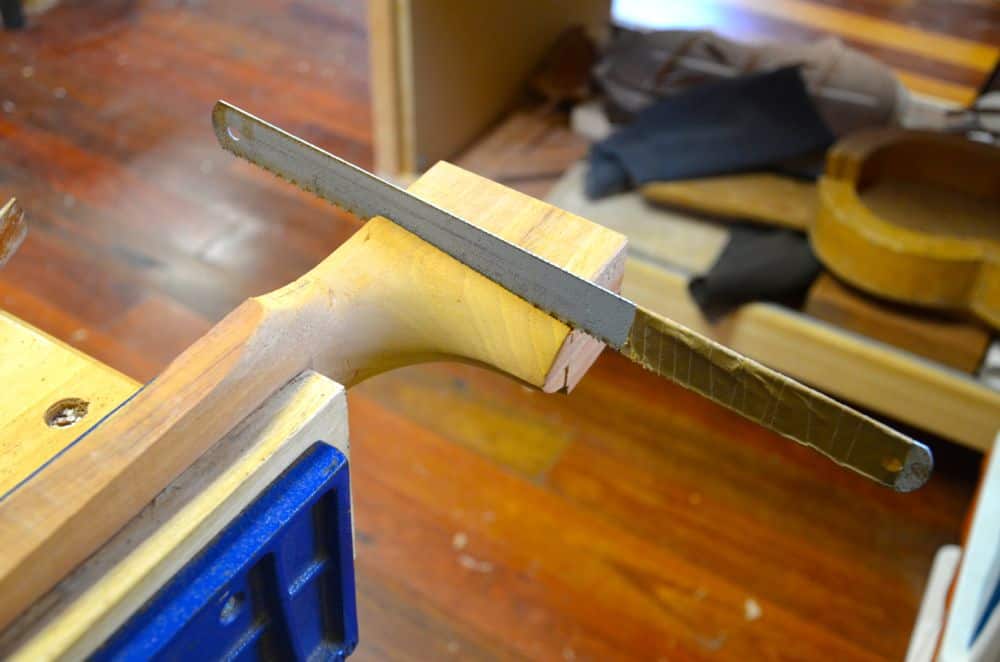
The sides fit into a slot at the base of the neck, just behind the block that I chiselled earlier. We made the first cuts for this slot last week but today those cuts had to be widened so that they would accept the sides, which are around 2mm thick. This is done with what can best be described as a fat hack saw blade with a masking tape handle. Simple, but effective 🙂

Those cuts are made on an angle so next you have to take some timber off the end of the sides to match the angle.

Next, a test fitting to make sure the sides slot in OK. This was actually a pretty thrilling moment because you’re joining two things you’ve been working on for days and things are beginning to take shape in a physical way.

After the test fitting, it’s time to do it for real. Glue is pressed into the grooves and the sides are pressed in, then clamped. I also made an end block that sits at the bottom of the instrument and this was glued in at the same time. The extra bits of wood and the plane are just providing some extra weight to keep everything flat against the table while the glue sets.

Yesterday I formed some braces to be used on the top face of the guitar. The other little/big job for today was to finish those braces then attach them to the panel with some glue and carbon fibre.

Here are the raw formed braces after removing them from the mould…..

We need four braces, however, so these are cut along their length with the bandsaw to provide extra braces of a matching shape. Edges are smoothed using a plane.

Those of you familiar with guitar bracing might find these to be of an odd shape. Traditional guitar bracing uses variations on what is called an X-pattern. At right is an example of this, as used by Martin guitars, for instance.

We are using a relatively new form of guitar bracing called the Falcate bracing system, which was developed by a couple of Australians a few years ago and is now favourably reviewed and accepted right around the world.

I’ll let the bloke who co-invented it describe the system:

I designed my Falcate bracing system to escape the limitations of more conventional bracing practices. The system is configured to withstand the high twisting forces exerted by the strings over the saddle onto the guitar’s top (tending to rotate the saddle downwards and towards the sound hole) whilst still allowing the top great scope for vibration. There are two major benefits: the stiffness distribution makes for a more even sound across all notes (i.e. there is no “designed in” bias towards a particular frequency response) and there is increased monopole mobility (responsiveness and volume) without compromising longevity, because the strength and stiffness (and consequentially the mass) is where is it needed and not elsewhere, making for an efficient design.

So that’s what we’re doing. Got it? Good.

With my falcate braces cut and planed, it’s time to glue them to the top face. First, here’s what the basic system will look like when it’s laid out. There are more braces to come after this, but these four curved braces are the basics of the Falcate system:

To glue them on, we used an epoxy resin with a length of carbon fibre applied to the resin before laying it on the rear side of the top face…..

When all four braces are glued to the timber, it’s time to apply a bit of pressure to ensure they stay in place. This is done with a rig using a combination of traditional clamps as well as these tensioned rods, which apply pressure to specific points.

And that was it for me, for today. It was a long day but a lot was achieved.

Tomorrow we’ll pull this rig apart and continue the job of putting all these parts together.

If you want to build your own guitar – take the plunge. It gets better and more rewarding every day.

Thanks for visiting!

Build Your Own Guitar – Day 7

Click here to read the review of Build Your Own Guitar – Week 1.

Given that we’re covering quite a lot each day, I’m going to try and update this diary on a daily basis. The information is fresher that way and it means less photo handling at the end of the week.

Monday was all about two things – bracing and shaping.

Bracing

We stuck some horizontal bracing along the back of the guitar last week. One of the little jobs completed on Monday was shaping the shoulders of these braces. Done with a chisel.

We also inserted some diagonal braces and shaped those, too. Here’s the back with me halfway through shaping the braces.

That’s the bracing on the back of the guitar. There’s bracing on the front of the guitar, too. Our guitars are using a relatively modern form of bracing, known as Falcate bracing system. I’ll talk more about that later.

On Monday we made the braces, which involved several thin lengths of timber and a shaping iron, which is used to bend the timber.

We made two of these braces and then glued them together and bound them to a pre-formed mould to ensure they set at the right angle. They’re bound using giant rubber bands.

These moulds will make two braces – one on a mild angle and another a lot tighter. When they set we’ll cut them in half and have four braces. See how they’re applied to the top of the guitar in another section below.

Shaping

You can see me using a shaping iron in one of the photos above. The shaping iron heats to 180 degrees and the heat, combined with sprayed-on water and a little pressure, helps to slowly bend the wood. It’s a wonderful, almost addictive process. The steam coming off the wood smells amazing!
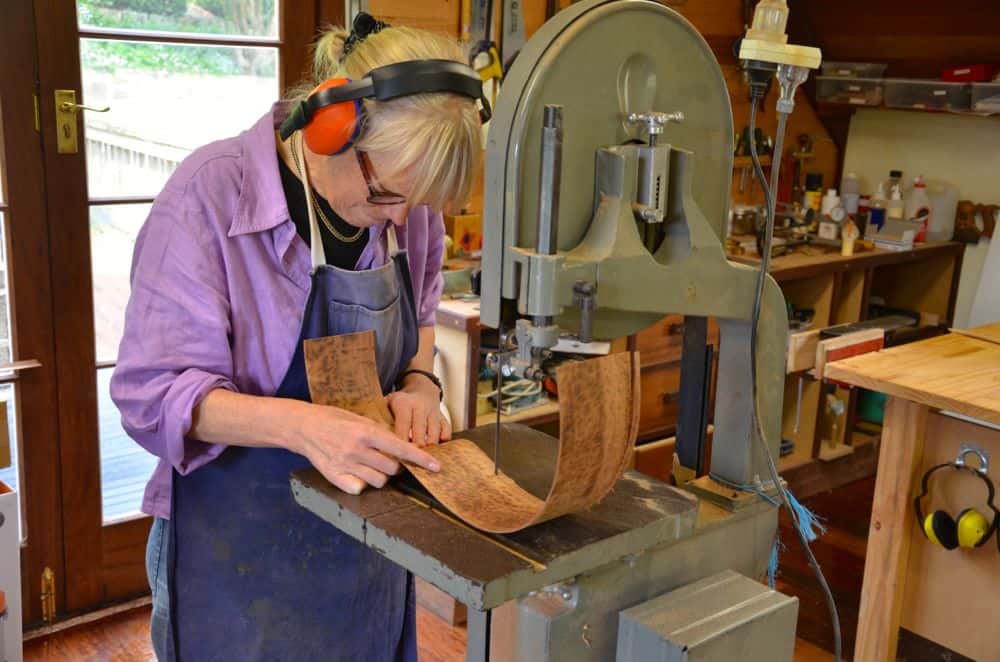
We shaped some of the internal bracing on Monday but the lion’s share of the day was spent shaping the sides of the guitar.

That kink in the waist of the guitar is a real tough one and it takes quite a bit of time to get all the angles right.

I ended the day with one side complete and the other 80% of the way there. That’s my first job for tomorrow morning.

Thanks for reading.

More to come tomorrow!
——

A footnote:

This course in Tasmania is a once-a-year affair and word’s getting around as to how good it is. Today we learned that next year’s course is already fully booked, a full year in advance. Sadly, I’m not able to do it again next year, much as I’d love to.

I’ve told Strato to save a place for me in 2016, though. 🙂

Jay Leno And The Lancia Fulvia Sport (Zagato)

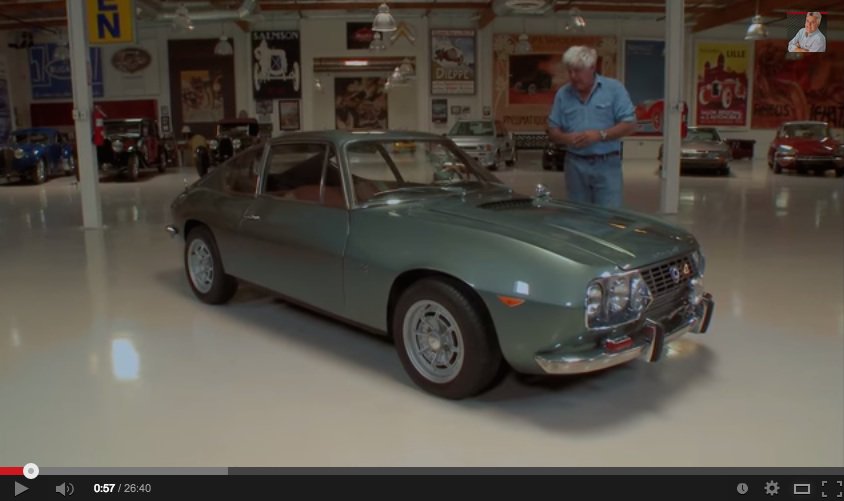
Jay Leno gets all sorts of cool stuff coming through his garage. Most of it he owns, but occasionally he brings in someone else’s car to show it off. Such is the case with this Lancia Fulvia Sport.

The video is around 25 minutes long and provides a great overview to the Fulvia, albeit with the alternate Zagato body.

For those unfamiliar, this is basically the same as my Fulvia, but Lancia had Zagato build some bodies for them until 1972. This is one of those cars. Mine is the regular coupe made by Lancia itself (they made a sedan called the Berlina, too, but that’s another story).

Anyway, the main difference is in the body styling. Underneath, it’s basically the same car.

Enjoy.

Lancia Fulvia – First Photos

Things have been busy with my guitar building course taking up so much time, so it’s been hard to find time to do anything with my new Lancia Fulvia.

Here are the first photos of the car. I haven’t cleaned up a single thing yet so you’re seeing it warts and all. It was good to finally take a close look at everything. There’s a LOT of work to do but having looked the car over pretty closely, I feel even more confident that it can all be done. It’s just a matter of time and money. I have plenty of the first. Hopefully I have enough of the second.

——

Exterior

The red paint is not original and will eventually be replaced. My current thinking is a dark-ish blue. The paint’s in poor condition and who-knows-how-much bog is underneath. The car was first described to me as having had more hits that Frank Sinatra and whilst it appears straight, I ear it’s true.

Here’s a telltale worrying sign – the crooked grin on the front. The left side seems to be slightly lower than the right.

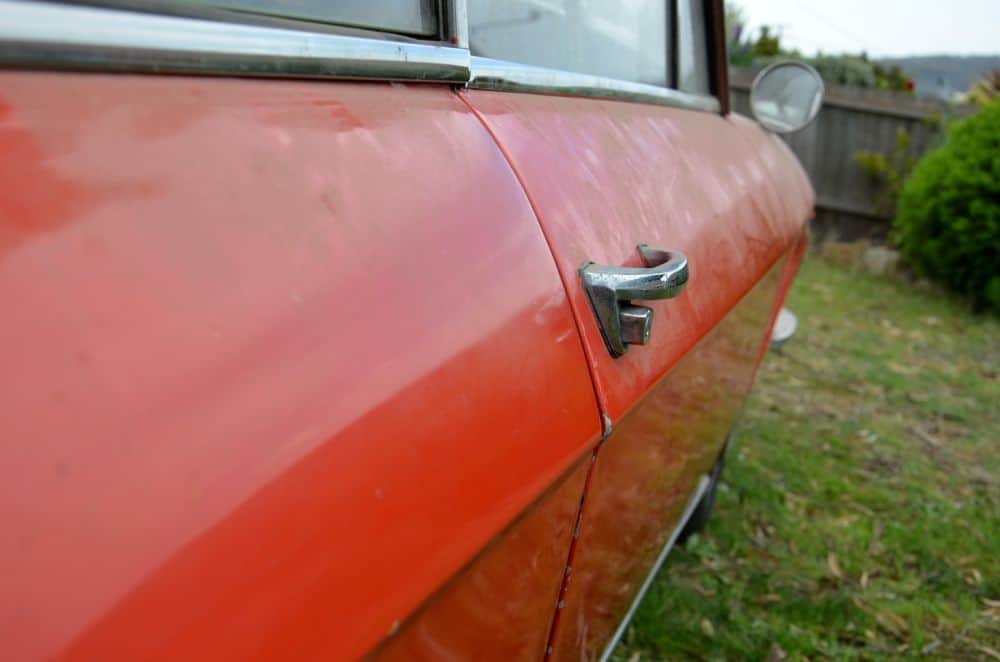
You can also see some misalignment with this view down the side of the car with the door not quite matching the rest of the car:

There are a few spots of rust apparent, mostly in the sills and likely in the floor. Both were expected and new replacement metal can be ordered easily enough. From what I can see, the all-important subframe appears to be intact.

Here are some more external photos:

At first I thought the windscreen was intact but then noticed a crack when I was sitting inside the car. I’m sure I can get one eventually but the price will be interesting!

Much of the brightwork is OK. The window trims, for instance, are quite good and can be retained. The stainless steel trim around the boot is pretty dented, however, and hard to replace. The dents in this headlamp trim (below) might be hard to see, but are significant.

Engine Bay

This little Lancia Fulvia played host to some rats for some period of time and they seemed to like using the privacy of the engine bay for their toileting. Rat poo abounds! I restored a little of the Fulvia’s dignity by sweeping what I could out by hand after taking these photos but I’ll need to haul a vacuum cleaner (and a very long extension lead) up to the front yard soon to clean out the rest.

The boot (trunk)

We’ve removed the boot lid and the inside’s not terminal, but not exactly pretty either.

I peeled away some of the material covering the fuel tank and noticed a tiny little hole peering back at me. I’m not sure if it can be repaired (I’d like to keep as much of the original fittings as possible) so that might be another replacement item.

The Interior

There’s plenty to do on the inside, too. The seats need reupholstering, the dash needs some new timber as well as re-covering or replacement of the top pad, and who-knows what state the wiring’s in? The roof lining appeared to be intact at first glance but soon revealed a 1cm hole above the passenger seat. The wooden steering wheel has a number of small cracks in the timber but I’ve been thinking of replacing that with a Sandro Munari two-spoke wheel anyway. All the brightwork is intact, which is a bonus.

Dismantling the interior will be the first job I do in a couple of weekends from now.

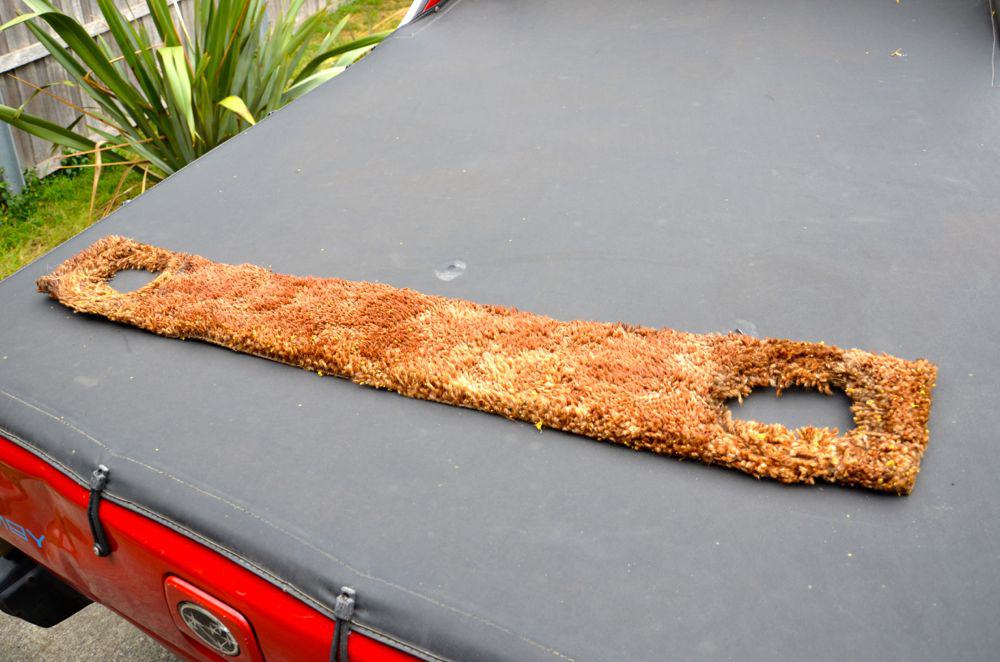
The shagpile rear parcel shelf came out quickly and is now in the bin 🙂

——

When we first got the car home we set to work finding out why the boot lid was stuck up in the air. We managed to squeeze our arms inside and undo the hinge bolts to remove the lid and found that the hinges were stuck fast. We got one moving a little with some Penetrene but the other still won’t budge. Dismantling comes next.

I’ve also started applying some Penetrene to the cylinders to help un-stick the engine. This will be a long process, so I’m putting a little more in every few days to let it soak. The engine will have to come out anyway for dismantling but at least it feels like I’m doing something to contribute to the process in these early stages.

That’s your introductory look for now, a warts-and-all view of the Lancia Fulvia I’ve just bought. There’s not much I can do myself in terms of proper repair but dismantling, some preparation work and then reassembly should be within my meagre abilities.

Thanks for looking!

Build Your Own Guitar – Week 1

The Background

I decided to get back into music earlier this year (long story, not worth the telling). When I saw an ad for the Australian Guitar Making School I figured there would be no better incentive to start playing again than to build my own instrument.

AGMS is based in New South Wales but it’s run by a former Tasmanian – Strato Anagnostis – and he runs an intensive guitar build once a year back in his home state. That’s the course I’m doing at the moment – six days a week for three weeks.

Strato’s been building things out of wood for the last 30+ years but he began his training building musical instruments and he’s trained under some of the world’s best luthiers both in Australia and overseas. Strato started the Australian Guitar Making School in 2007 and it now has outlets in New South Wales, Queensland and Tasmania.

This week was our first week at the course and it’s been an absolute blast. Strato prides himself on being able to guide anyone through the process – male, female, young, not-so-young, skilled or unskilled. And it’s true. Our course has six participants, three of whom are retired, two of whom are retired ladies and four of whom have never built a guitar before. And let’s face it, if you can teach a guy with two left hands like me, you really can teach anyone.

The Build

Below is a brief description of what we’ve done this week. It doesn’t seem like much but believe me, there’s a lot of hours tied up here.

First, this is where the magic happens. It’s a private workshop just 5 minutes south of central Hobart, in a suburb called Dynnyrne. It’s a wonderful setting and we’re lucky to have access to it.

I don’t know how other guitar building courses run. I suspect some of them give you a kit with a shaped body, neck, etc, and show you how to put it together. Nothing wrong with that.

When you build your own guitar at AGMS, however, you start with half a dozen bits of raw timber:

The back and sides will be made from tiger myrtle. The front is a species of spruce that I can’t remember right now. The neck is made from Honduran mahogany grown in Indonesia and the fretboard is an Australian timber called gidgee.

The first job is to join the two pieces that make up both the front and rear panels (i.e. two pieces each for the front and the back).

The secret to this is something they call bookmatching – getting the grain and the patterns in the timber to match and complement one another. The edges are planed using a special technique to ensure the edges are straight and vertical, and then glued and clamped to form one large panel from which the shaped section will eventually be cut.

Click to enlarge.

The same technique is employed for the tiger myrtle panels that will make up the back of the guitar, which is also cut to a rough shape on a bandsaw.

We also started crafting the neck using a piece of mahogany with another block glued at one end that will be carved to form the ‘heel’ that joins to the body. The neck building starts with a 17 degree cut to form a scarf joint that will become the head of the guitar.

A leftover piece of tiger myrtle is then glued to the head piece as a more attractive veneer. The whole head will be shaped later on in the process.

We cut a curve out of the heel block and then begin to shape it, first with the chisel and then finishing it with sandpaper.

While some of the photos show Strato demonstrating techniques, I can assure that we’ve all been planing, chiselling and sanding our butts off. This is 100% hands-on course.

Next, the rosette. The shape of most acoustic guitars is a basic choice with few variations. You choose either standard shape or cutaway. There are a few areas, however, where you can customise things and make it more personal. The shape of the head, the choice of hardware, the selection of timbers, and of course, the rosette, which is the decoration around the sound hole. I’m using a ring of tiger myrtle with some black-white-black purfling and a ring of abalone shell to set it off.

We used a Dremel attached to a special luthiers jig to do this job. The first task (after locating the centre-point of the sound hole) is to route out the channel for the rosette. Next you glue the purfling to the tiger myrtle ring and glue the rosette in place in the channel. Then you plane and sand this down to match the soundboard. Finally, you create another channel for the abalone and glue that in. A whole bunch of scraping and sanding later and you’ve got a rosette. I don’t have a photo of the finished product here but it looks amazing!

Today we did the bracing on the back of the guitar.

The first step is what they call the ‘marraige strip’, which is glued down the centre of the back panel. It’s glued along the join we did on the first day and the grain of the timber strip goes cross-ways to the grain on the panel. We cut three grooves in this strip and then glue-in some shaped braces that we made earlier in the day, which give a slight curve to the panel. All this goes into a jig and is secured by the forest of clamps you see in the last photo.

Other work completed….

Today I also did the first cuts on the head of the guitar, which still has to be scraped and sanded. No photos of that, however, as it’s something I’ve designed specially for the guitar and I’ll save revealing that for later 🙂

We’ve got a LOT of work left to do but so far, the experience has been superb. It’s great to see the instrument taking shape and extremely satisfying to be doing it with my own two hands (with some amazing tuition and help along the way).

This course isn’t exactly cheap but then the quality of the finished instrument is amazing. It’s above par with anything you’ll buy in a shop because of the quality of the timber and the quality of construction. We had a few of last year’s participants call in through the week with their instruments and the finish – and most importantly, the sound quality – was just stunning.

If you’ve ever wanted to build your own guitar then I say jump in. Go for it. Find a good teacher, pay your money and enjoy one of the great experiences of your life.

I’ll post another update next week.

Thanks for reading.

Link (again) – Australian Guitar Making School

Goodbye Porsche 968CS – Hello Lancia Fulvia

When I advertised my Porsche 968CS for sale a month or so ago, I did it expecting that I’d still have another good 6 months or so with the car. Having watched 968’s and other Porsches online for so long, I knew that most of them hang around for a very long time. There’s a 968 on carsales right now that was advertised before I bought mine, more than a year ago!

I thought I’d have more time with the car, but it was not to be. This morning, I sold the 968 to a wonderful bloke from New South Wales who has 40 years racing experience in various classes. The 968 won’t have a hard life in Mike’s care, but I’m sure he’s going to enjoy it to the fullest.

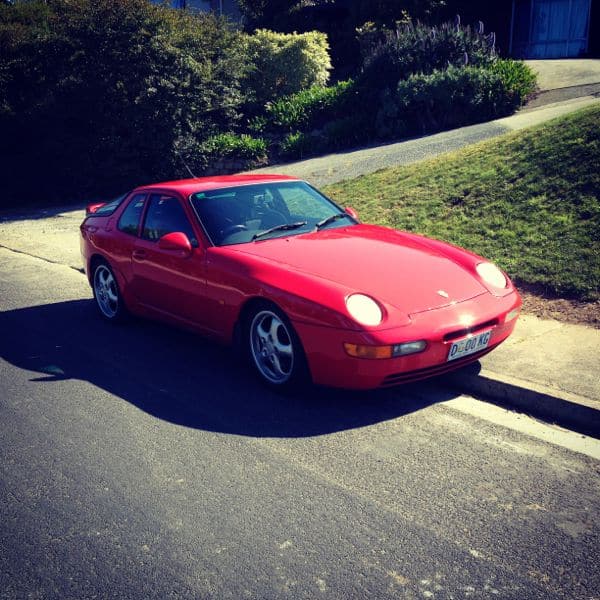
This is my final photo, taken minutes before Mike began the long drive home.

Why sell the 968?

I got a few questions from friends about selling this car. Why would I do it? There are a few reasons.

First – and it’s one of life’s big ironies – is that we’re planning to build a big garage at the front of our house. Selling the 968 to add some funds to the kitty is my way of showing Mrs Swade (and myself) that I’m serious about the project. So yes, I sold the 968 in order to build a house for cars like the 968 that will come in the future!

Second, some of the funds will go towards of the restoration of the car that I brought home today….

My Lancia Fulvia.

It was pure serendipity that I managed to sell my ‘old’ car on the same day that I planned to bring the ‘new’ one home. It’s pure stupidity that my old one is much newer than my new one. And the old one runs. The old one has a boot lid that closes. The old one doesn’t have any rust. And the old one has keys (yes, I bought a Lancia that doesn’t have any keys).

Today was a busy day. I had a couple of hours with Mike, showing him the 968 and taking care of the paperwork this morning, before picking up a car trailer with my stepson Geoff and heading off to pick up our ‘new’ cars.

After a bit of messing about – and a big dollop of help from some friends who have done this sort of thing before – Geoff and I managed to get our new vehicles home.

The Fulvia has inched its way into my heart already. I absolutely love it, even if all I can do is sit in it. In fact, in the event it’s deemed to be a totally (maniacally) unviable proposition, it may well hang around as some sort of super-sculture in our garden. It really is that pretty.

I’ll start tooling around with it tomorrow afternoon. My first job is to try to get the boot lid closed as the hinges seem to be frozen with the lid raised around 5 inches.

Geoff’s Fiat X1/9

My Fulvia and Geoff’s Fiat were purchased from a deceased estate. They are, in essence, a pair of real-life barn finds, covered in dust and even some hay (seriously!). The deceased was a wealthy man who bought all sorts of fun cars that took his fancy. They were often left sitting when they fell out of favour. Given that he had so many interesting cars, the vast majority of them have very low mileage. You can only drive them one at a time, right?

Where my Lancia is quite derelict and in need of a complete restoration, the Fiat X1/9 that Geoff bought is in superb, original condition and shouldn’t need too much work to re-commission. It’s an early model with small bumpers and the 1300 engine and it’s done only 45,000kms – and yes, we have some records to support this 🙂

My apologies for the dark, garage shots, but have a look…..

Getting the car into our garage at home was quite a challenge. It hasn’t been run for around 10 years and we weren’t going to fire it up today, so we had to roll it down my drive using my Subaru Brumby as a top-side anchor to stop it crashing through the back of the garage. The car was hampered by stuck brakes, too, so while we had to stop it from rolling down the hill with the Brumby, we also had friends pushing it down the hill to actually get it to move. It was quite a production!

In fact, the Brumby turned out to be quite a star today. We didn’t use it to tow the car trailer but we did use it as an agile little tow vehicle once we got the cars home and it did a wonderful job. Again.

Conclusion

24 hours ago my automotive world was completely different to how it is today. It’s amazing what a difference a day can make.

I’m really sad to have sold the Porsche so early in its sale campaign. I really came to love that car and my respect for the Porsche brand and their pursuit of excellence is through the roof. I plan to add a 928 to the family in due course, sooner rather than later.

But…. to balance that sadness is a fair bit of excitement.

I’m really, really excited about Geoff’s Fiat. I think he got an absolute ripper of a car and it’s going to be fun messing around with him in the garage on that one.

I’m also really excited to have my very own Fulvia and some money to get the restoration underway. There’s SO much to be done with this car but as long as it proves to be a viable candidate for restoration, it’s going to be a barrel of fun. I can’t wait to get it started.

If your day was even half as good as mine was today then you must have a smile from ear to ear 🙂

Exit mobile version