I just wanted to pass on the good news that my Lancia Fulvia was sold within a week.
I’m really, really pleased with this sale not just because it’s happened – and happened so quickly – but also because the car is going to the perfect buyer. The Fulvia will be Ralph’s fourth Lancia restoration, so he’s obviously a massive enthusiast for the brand and already has the skills and the contacts in place to bring this car back to life again – something I hope to replicate myself some day.
I’ve had a couple of false starts over the years but got a little closer with each one. It’ll take time but it will happen. I’ve had a major education with this car, even in the short time that I’ve owned it. I’ve learned a lot about the Fulvia itself, including its wonderful, yet simple, engineering and construction. I’ve learned about the difficulty in repairing such vehicles when the body needs a lot of work. And I’ve learned that there are certain cars for which there’ll always be a keen interest. Quality always creates curiosity.
A few people have already told me that I’ll be kicking myself in 10 years from now at having sold this car. That may be true. I do desperately want a Fulvia some day but with so many competing priorities right now and the restoration on this one requiring more than I’m capable of doing (or financing), my time with a Fulvia will have to wait.
The Fulvia will most likely be picked up in late February. That’ll clear one car from the front garden and I can then start preparations for selling the Brumby.
My Lancia Fulvia 1.3 Rallye is up for sale. With Mrs Swade and I wanting to move house and the initial estimates on the restoration work being higher than anticipated, I have to offer it up for someone else to take on.
It’ll be very sad to see this beautiful lady move on, but hopefully someone else can do the work that I can’t.
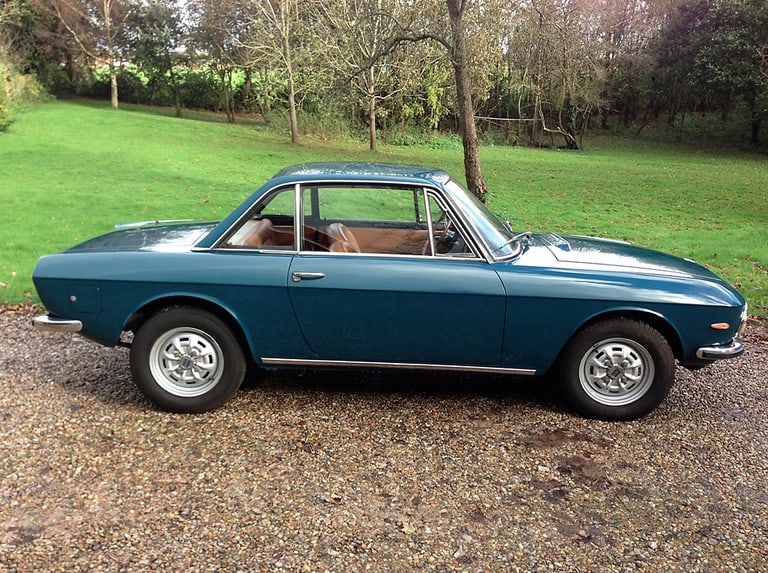
When I first saw a Lancia Fulvia colour chart the idea of a grey Fulvia didn’t excite me too much. I still wouldn’t want a grey one, myself, but seeing this car today has caused a massive mindshift over the basic idea of a grey Lancia Fulvia.
It’a also the best looking Fulvia-with-bumpers I’ve ever seen. I think it might be the wheels and the low stance. Whatever it is, this Fulvia looks the business.
This car is for sale in Holland for 16,000 EUR …. and just quietly, what is it with the Mad Dutchies and outstanding cars?! They seem to have heaps of them!
I drove a few interesting cars on the weekend. Both experiences were unplanned. One car I drove with a view to buy and the other was purely for fun.
Peugeot 205 GTI
The first car was a Peugeot 205GTI. I stumbled across this one when I ran into a co-worker at Salamanca Market on Saturday morning. The Pug belongs to his son and Mal let me know that it was now up for sale.
Given that the 205GTI is a bit of a cult car, I had to check it out. Click the image to the right to enlarge.
Mal’s son is a young fella and being a young fella, he’d made a few young fella modifications. There’s a Whiteline strut brace across the top of the engine bay and a big fart-can exhaust. The strut brace made the top edge of the hood sit up a few centimetres. The fart-can was just way too loud.
The 205’s party piece is its handling and yes, this car shone in that department. I only took it for a short drive but it was plenty enough to see why the little Pug hot hatch is so loved.
I’ve got my eye out all the time for an inexpensive fun car and this one definitely fit the bill. I didn’t buy it, though, as there is just a little too much still to be done. I’ve got enough work to do with the Lancia and the X1/9 right now. I don’t need another fixer-upper, even if it’s already running and registered.
If you’re interested, the car is on Gumtree and Hew’s a wonderful young bloke. The interior’s a bit tatty but the mechanicals are all sorted after an engine rebuild done around 4 years ago. The clutch might need a pedal adjustment (at least) but the car goes like a cut cat and feels like it would be big bags of fun.
—
Alfa Romeo 145
My second drive for the weekend was an Alfa Romeo 145.
I featured this car a few months ago after it made its debut at Classics By The Beach. The owner is a mate of mine named Norman and he called in to our place on Sunday.
Of course, as soon as I saw he’d parked the Alfa out front I suggested he might like to take me for a ride 🙂 . He went a step further and handed me the key! Woohaa!
The 145 was never officially sold in Australia so Sunday was a very rare opportunity. The 145 came with a variety of petrol engines over its lifetime and interestingly, they were in two very different configurations. The early cars had Alfa’s wonderful boxer engine, the one I’m quite familiar with from my Alfa 33’s. Later cars had Alfa’s Twin Spark inline 4 cylinder engine.
Norman’s 145 has the 1.6 litre 8-valve boxer. It’s got a little less grunt than my old 16V Alfas but the Fiat chassis that underpins the 145 is a lot more solid than the 33. The end result is the most refined Alfa Boxer experience you’ll ever feel.
When you say “refined”, people often think you mean boring. Far from it. The sound is still fantastic and the little 145 loves a good corner. There’s nothing quite like a small car revving to 6,000 and sticking like a limpet.
Outstanding!
—
Fiat X1/9
I’d normally be doing a Lancia Fulvia update around now but I spent the last two weekends gardening! Regardless, there isn’t a whole lot left for me to do with it parked out in the front yard. I’m at the stage where I really need to get the Lancia into the garage so I can clean it up and start stripping the paint. I can’t get the Lancia into garage, though, until we get Geoff’s Fiat X1/9 out of the garage.
Our young bloke, Geoff, bought the little Fiat from the same deceased estate that I bought the Fulvia from. It’s got 45,000 genuine kilometres on it and is in great cosmetic condition.
Sadly, it’s not running yet.
The first job we did on it was to change the timing belt. I say “we”, by which I mean Geoff did it and I handed him the occasional tool. It was actually an easier job than I thought it might be. The hardest part was getting the yellow cover back on.
Then the fuel was freshened, the oil, filters and plugs were changed and a new battery was connected. After that, it was time to try and start the car. Thankfully, the engine isn’t seized like the engine in my Fulvia. Sadly, though, it wouldn’t start.
Fuel, Air, Spark.
We have air, of course. And we have fuel. Spark is the problem.
We did a few tests and found there was no spark making its way to the plugs at all. A call to our local generic parts store got us a new coil, but it still wouldn’t start.
A local mate with considerable Fiat experience (G’day Ant!) came over to lend a hand. On closer examination, it seems we installed the new coil incorrectly (there were some extra, confusing wires in place). We corrected, but it still wouldn’t start.
Ant re-gapped the points. Geoff cleaned out the distributor cap. Still, it wouldn’t start.
I made some enquiries about getting a new distributor cap and was surprised to find that you can’t get one for a 1.3 Fiat X1/9 anymore. They were particular to that car and they fail so infrequently that the manufacturer hasn’t made them in a long, long time.
The guy I spoke to did give me some recommendations, however, so we have some new HT leads and a new condenser on the way. We’ll try it again when the new bits arrive.
—
The big jobs that remain on the little Fiat are the clutch and brake master cylinders, which are going to be a complete pain in the posterior (for Geoff) to replace.
While the engine’s in the mid position, the master cylinders are located at the front but you have to go under the dashboard to get to them. That means removing the seat and quite likely the steering column as well (we’re still researching that one).
You’d think removing a seat would be a pretty simple affair but not this one. Normally you just undo the bolts at the front and rear of the seat rails. With the earlier Fiat X1/9’s, though, there aren’t any bolts. You have to undo a spring underneath the seat, then you hold the seat adjustment lever and slide it forward until it slides right off the rail. It would’ve been nice and easy but the seat was stuck fast on the rail until a liberal dose of WD-40 finally got it moving.
So that’s where we’re at right now. We’re waiting on parts to try and get the engine started and the cabin is now ready for Geoff to hang upside down and get under the dash to replace the master cylinders.
Hopefully that’s all the little Fiat needs before we clean it up and get it registered. I can’t wait to see Geoff’s face the first time he takes a bend in this little mid-engined Italian.
——
Final note……
If Bertone can design the tiny Fiat X1/9 to have a full-size spare – it goes in this hidey-hole behind the front seat – how come modern cars can’t get one so easily?
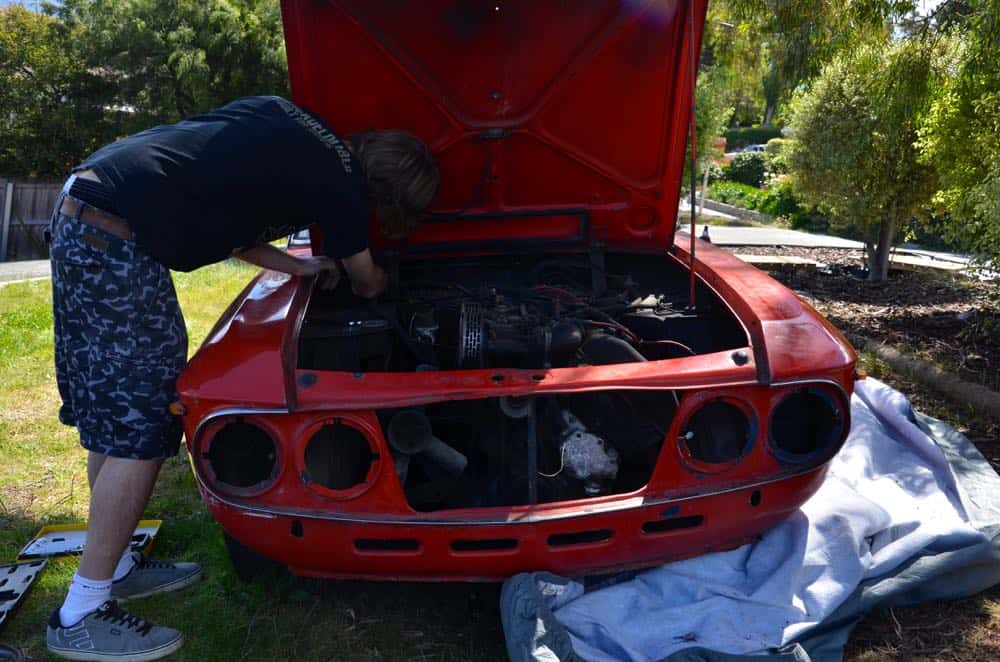
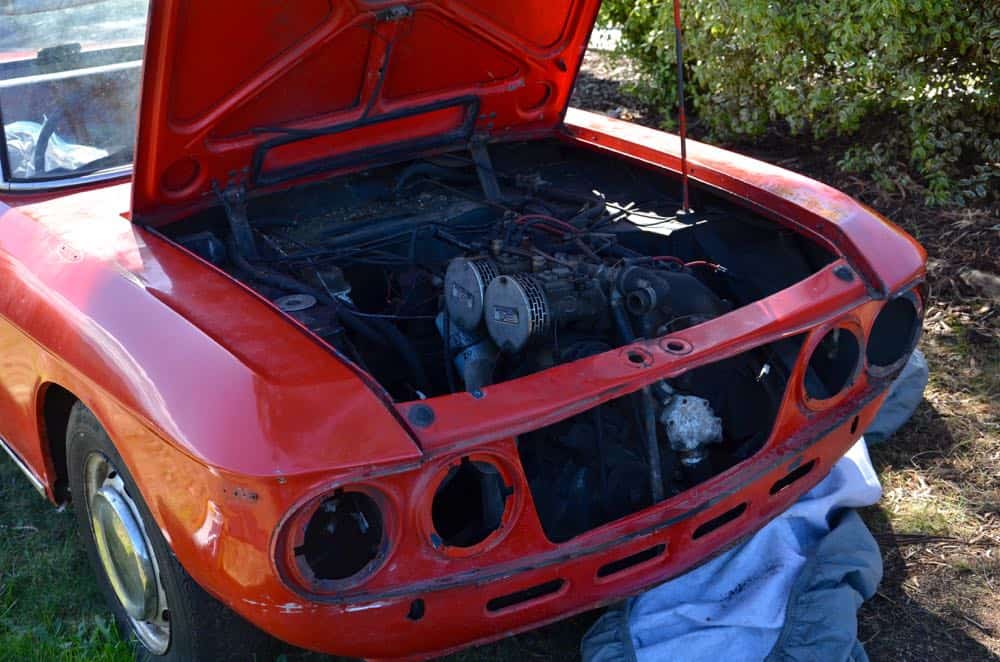
At the last Lancia Fulvia Update, I’d started removing some exterior trim. The job continued today and true to form, I got over some previous frustrations and discovered some brand new ones!
Last week’s frustration was the headlamp surrounds and a fresh air intake for the heating system. Let’s tackle those first….
I managed to get one headlamp surround off but the bolts holding the other three in were round where they used to be hexaganol, and rusty where they should be smoothly threaded.
One off, three on….
And this week, all of them removed and then the headlamps out, too.
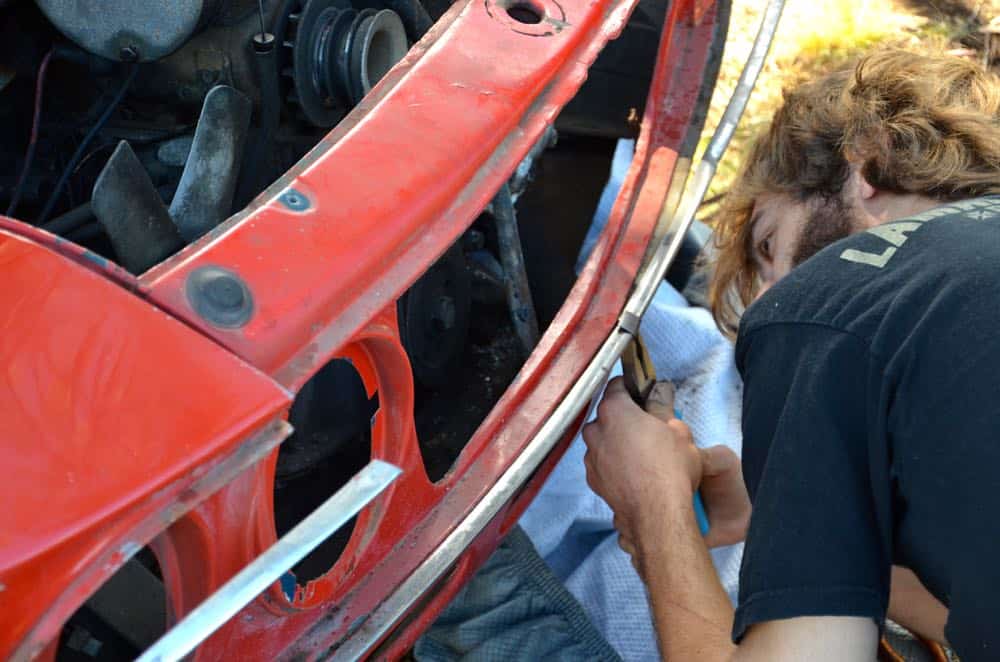
That’s Geoff working on something or other inside the engine bay. Geoff managed to wrangle the headlamp surrounds out thanks to a liberal dose of penetrating fluid and some mighty big pliers from his van. It’s handy having an electrician around, sometimes 🙂
—
It’s worth remembering that the end goal for everything that’s happening right now is to get all the little bits and pieces off the body of the car so that I can rub the paint off before sending it away for rust repair and new paint.
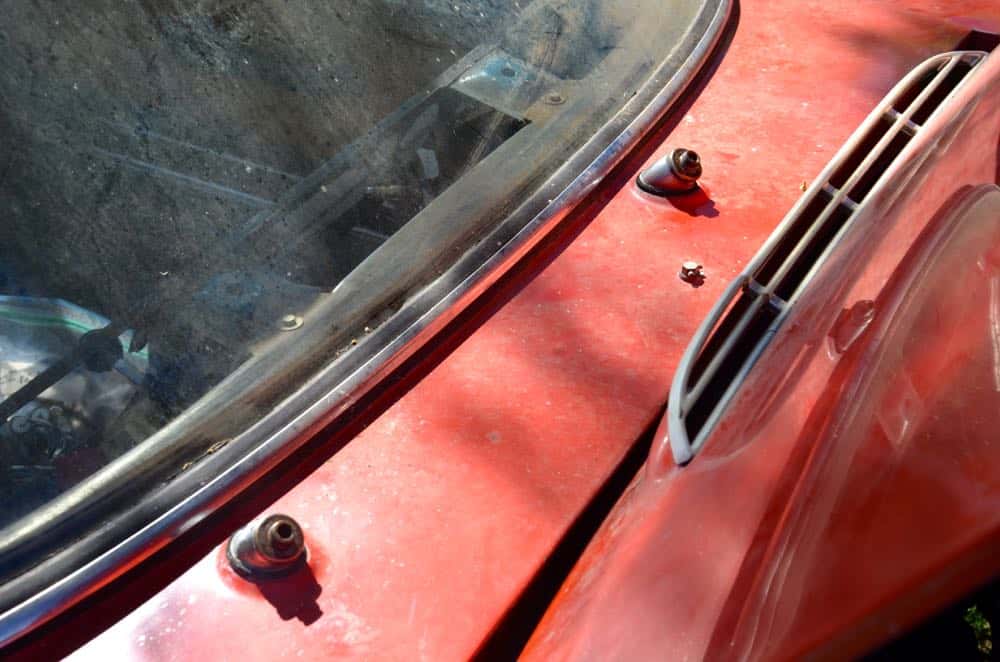
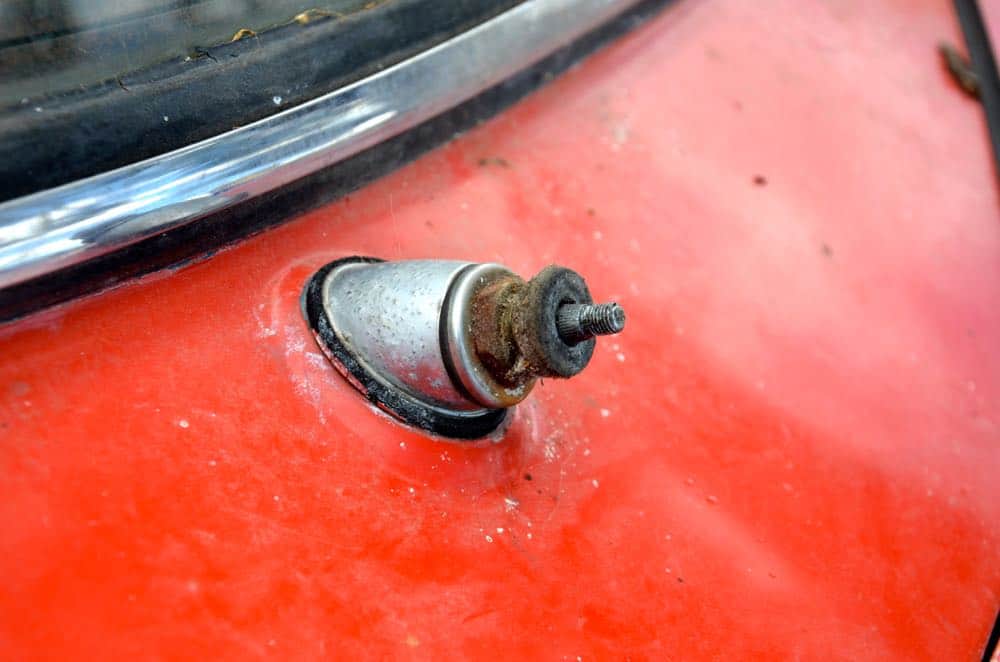
A few weeks ago I started removing the windscreen wipers but the little pokey-uppy bits that the wipers attach to won’t go until I get all the mechanicals out from underneath.
Here are the pokey-uppy bits (it’s a technical term).
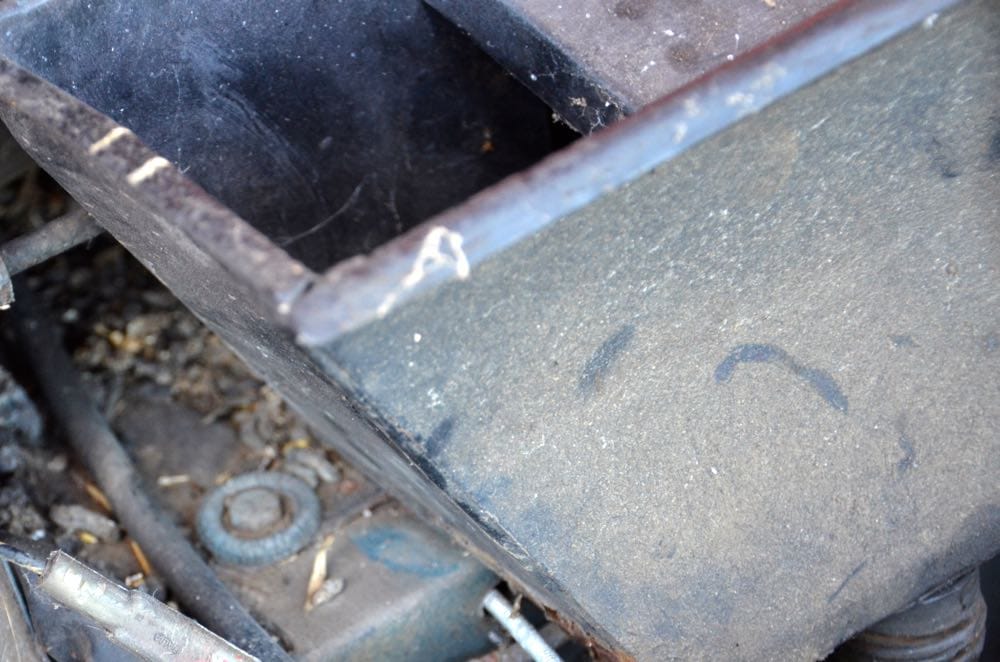
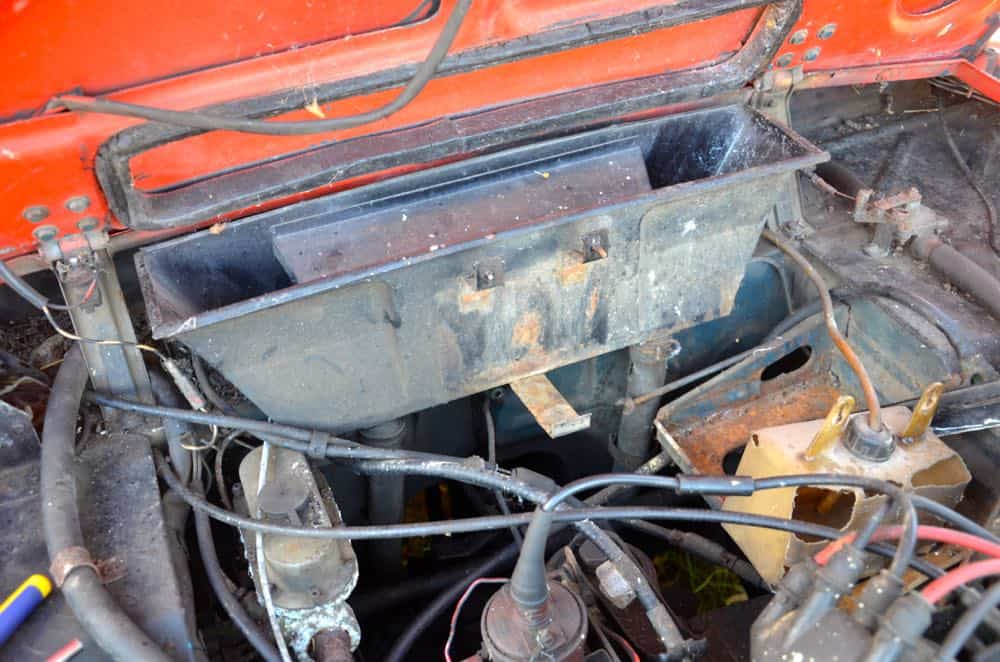
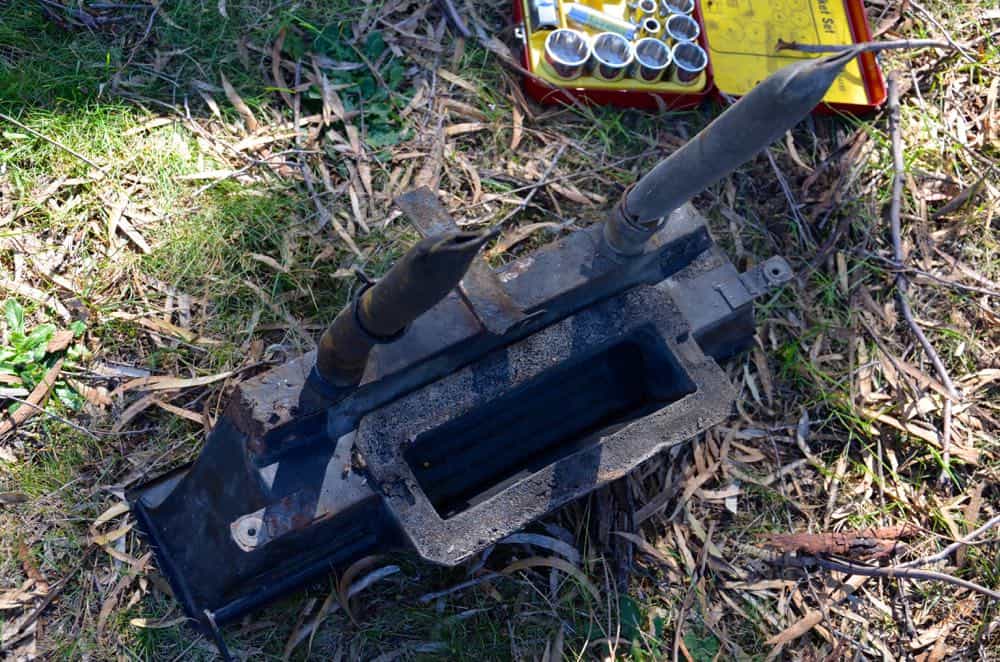
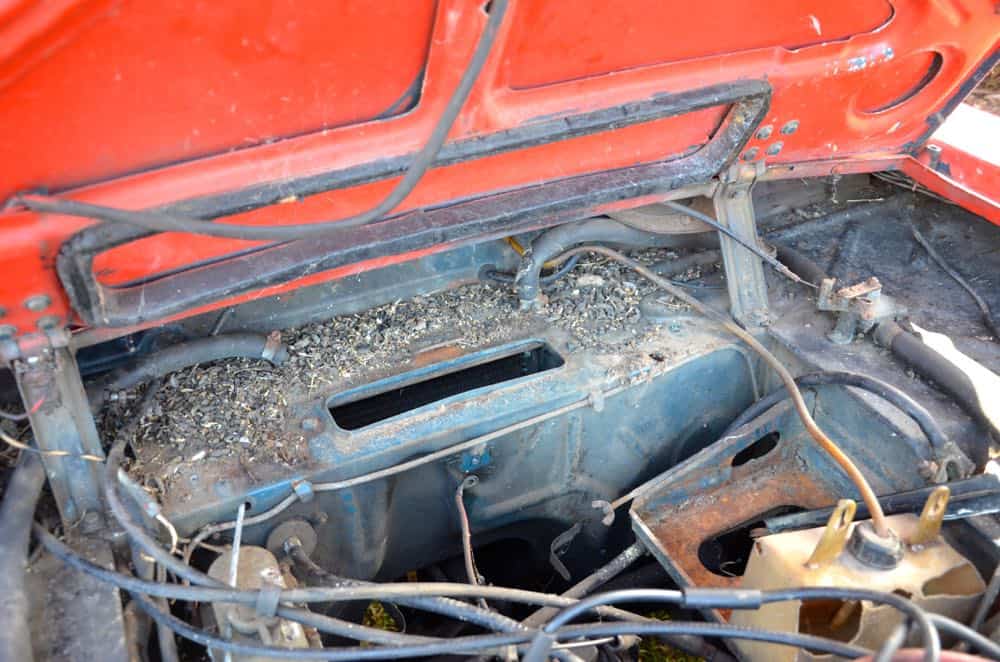
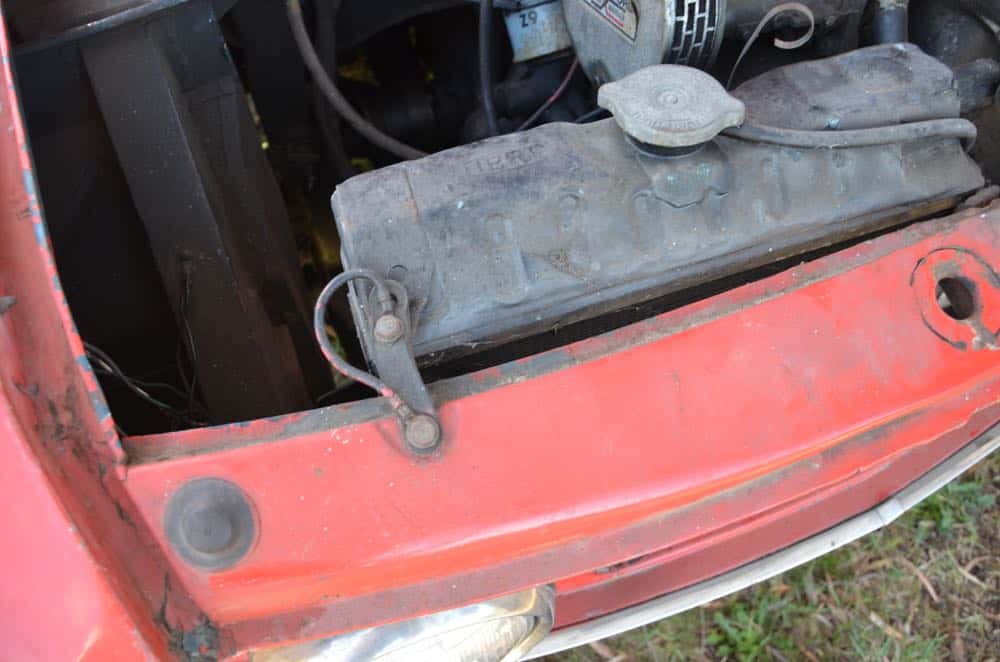
The mechanical bits underneath are hiding behind the fresh air intake for the heating system, which is the long black box you can see at the back of the engine bay in the photo below.
I’d removed one fixing last week but couldn’t find the others, which I assumed were on the inside of the car. A helpful gent in comments pointed out that there were two more fixings in the engine bay, one either side of the intake box. I hadn’t seen these due to the abundance of rat poo covering them!
One, and then the other.
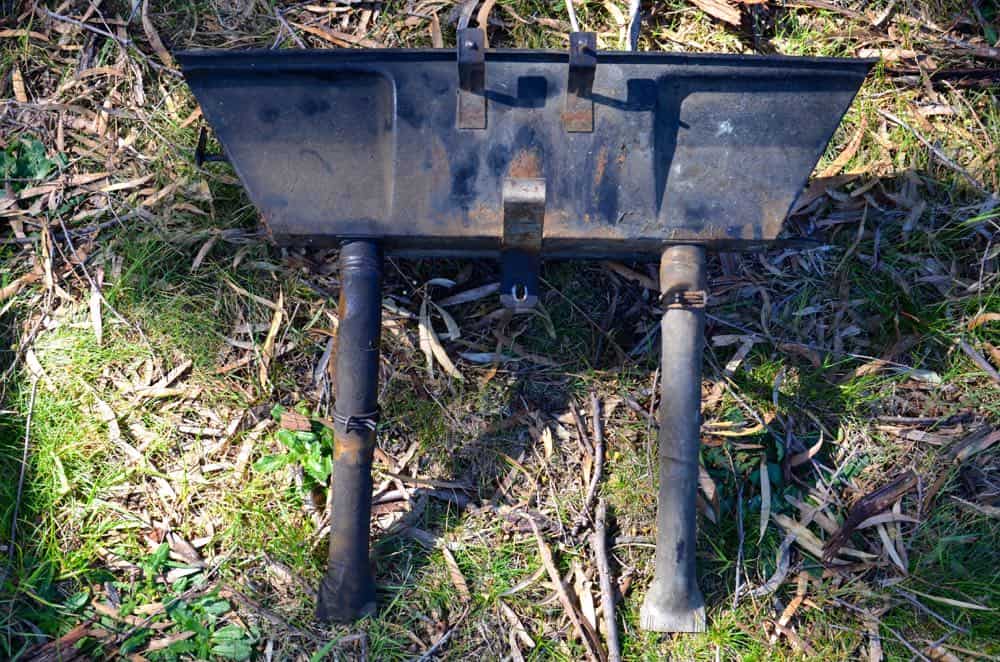
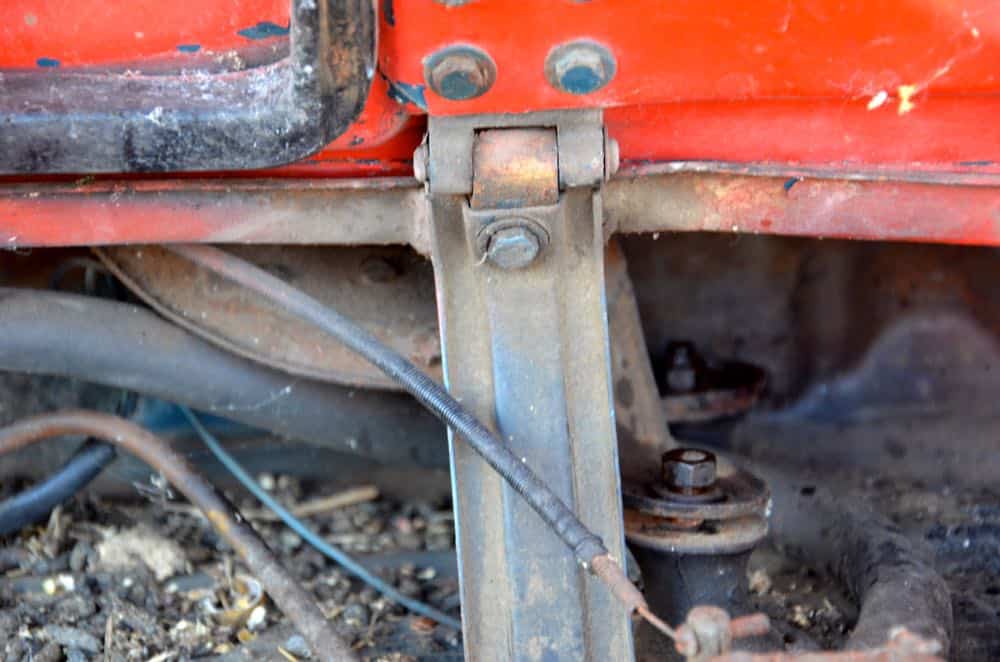
These came off fairly easily but the box was still stuck in place. There are a pair of hoses coming off the bottom so I un-clamped those (more on those in a minute) and it was then that I noticed one more fixture – a pivot mechanism that opens and closes the vent, attached to the interior by a cable.
It was tricky to get to as access was limited, but a couple of 11mm spanners saw it off.
And with that, the air intake box was free. The strange thing is the two pipes coming off the bottom, which seem to have flattened ends and go nowhere i.e. they’re just there, without being attached to anything else.
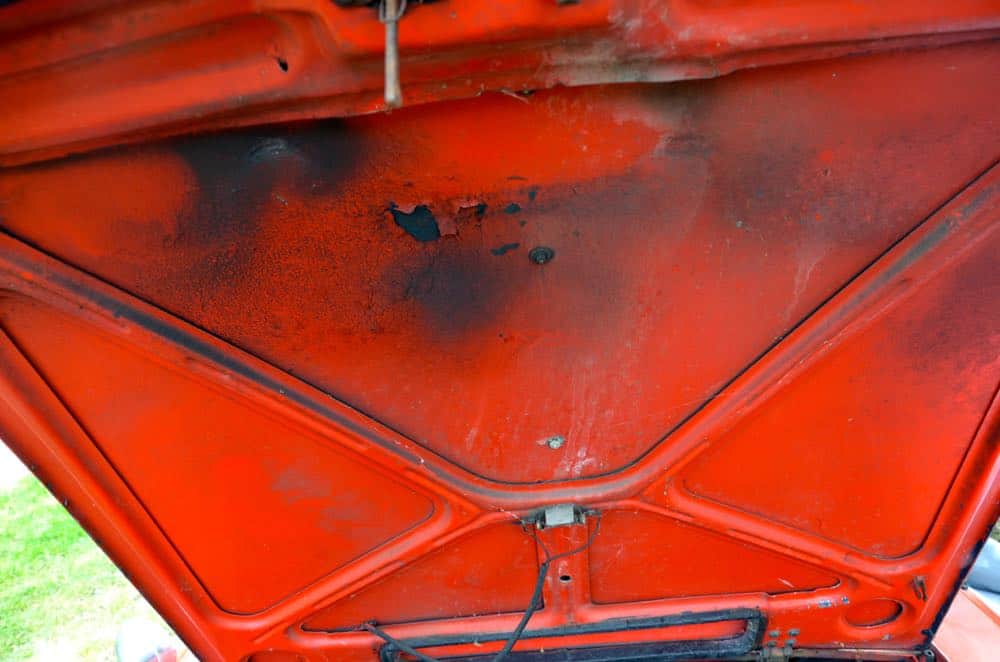
Removal of the box gave me a full view of the extent of the rat poo. They certainly had a good old time in there….
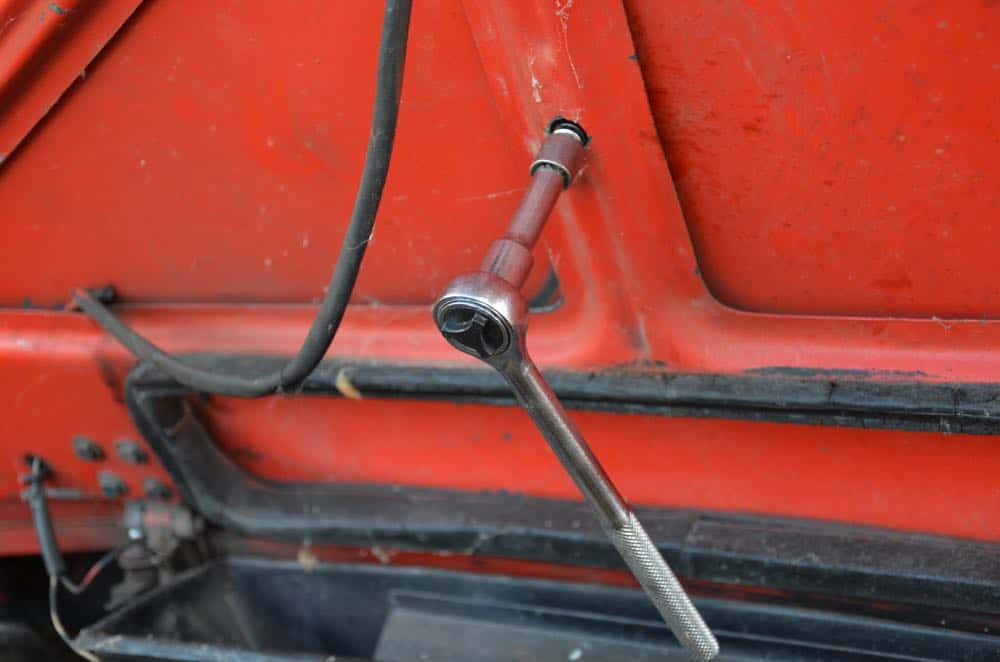
Removing that air intake finally allowed me access to the windscreen wiper mechanism, located under the cowl and attached by a couple of nuts on the passenger side of the car and a couple of wires.
Most things have been removed from the car with only a little bit of fuss. These two nuts proved to much more difficult, however. The bolts they attached two are housed in a rubber bushing and they don’t appear to be attached at the other end. That means whenever the slightest bit of rust caused the nut to stick, the whole rubber bushing would twist with the bolt. What kind of system is this? I managed to get the first one off OK, but the second was doing nothing-but-sticking so I’ve given it another bath in Penetrene and we’ll see how things go later in the week.
Indicators came off from the front, with one lens as a casualty.
—
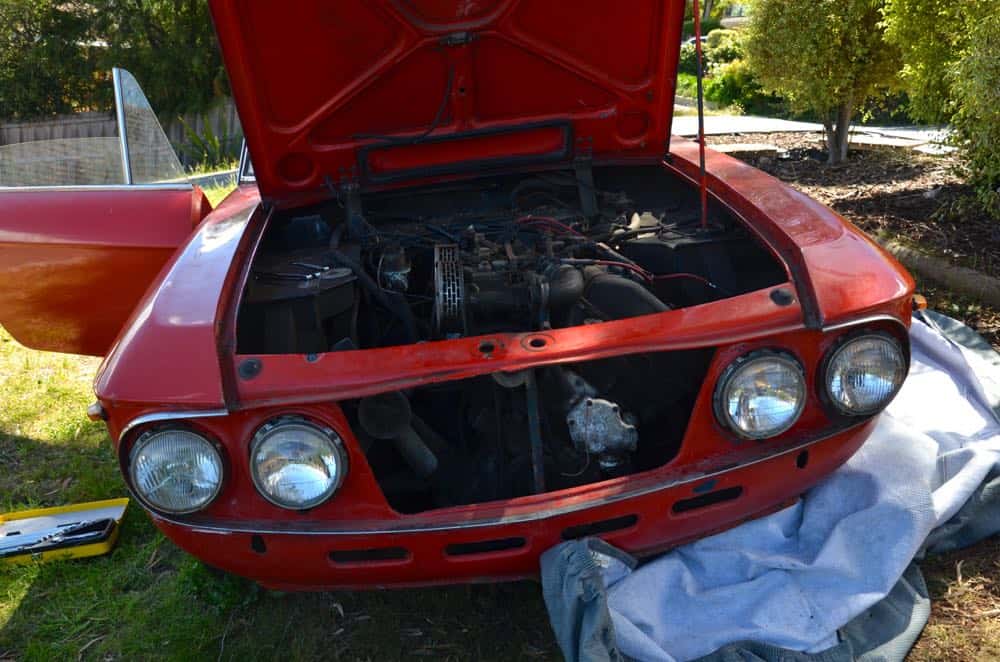
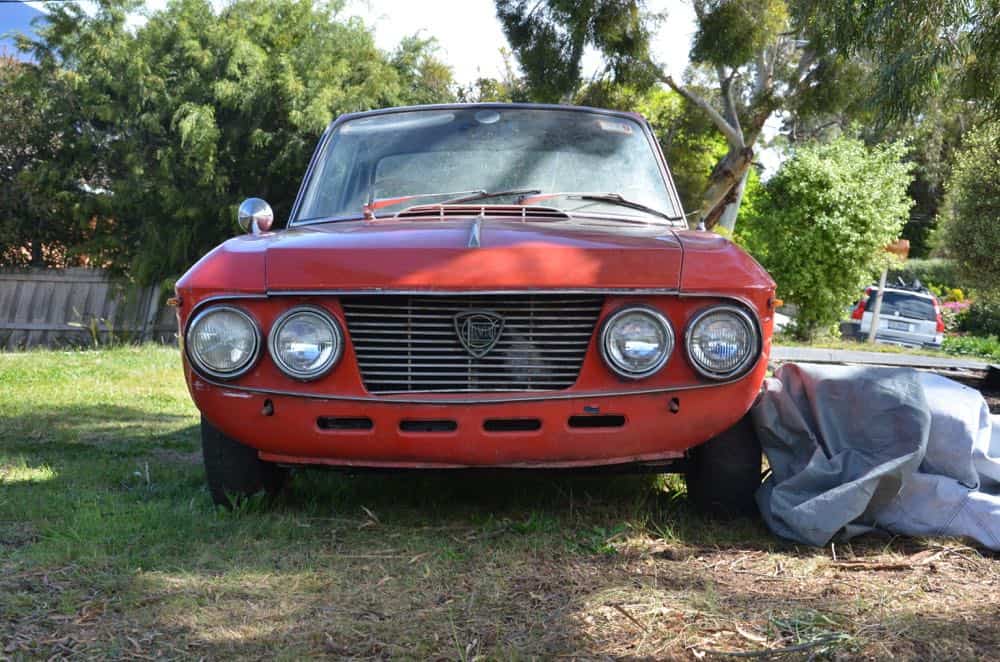
And out last job for the day was removing the stainless steel trim from around the front face of the car. This was secured by three small screws, one at each end above the headlamps and one in the middle-lower section.
It came off quite easily but I’m not sure it’s re-useable. Maybe one side is, but the passenger side has quite a few bumps where the car obviously had a bit of a front-ender at some point. The outer headlamp surround is suffering in the same way.
The end result?
The front end of my Lancia Fulvia is looking rather bare now. We’re on our way, for sure!
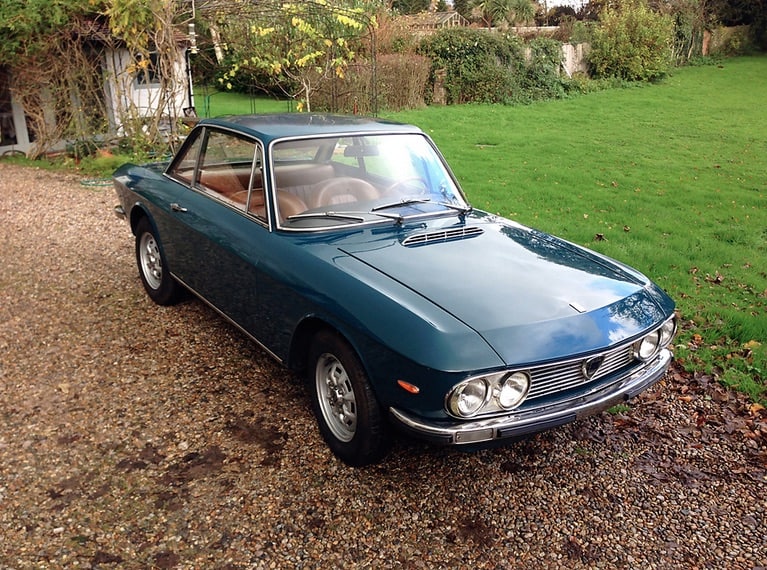
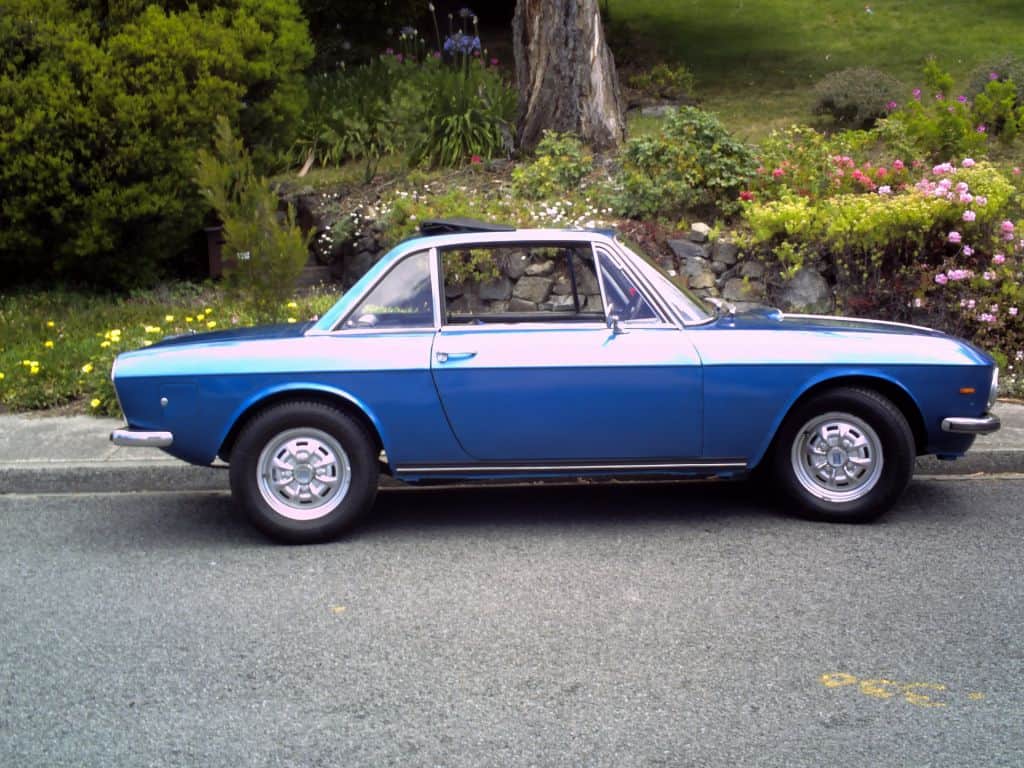
My Lancia Fulvia is red. But before the previous owner painted it red, it was Mendoza Blue. I’m still trying to decide what colour to paint mine and it’s very helpful to see some good photos of a Fulvia in my original colour.
The car shown below is currently for sale in the United Kingdom. It’s Mendoza Blue. This is a series 2 car as opposed to my series 1, so there are a few minor differences. Both have a tan interior, though.
So effectively what you see here is what my car would have looked like from the factory, save for the slightly different front end.
Nice.
Click to enlarge.
——
Now, all I need is someone with photoshop skills to take the bumpers off and add some Cromodora wheels to this shot…..
——
As a final note…..
This seller has four Fulvias for sale at the moment and it’s an interesting study in the market value of the various series cars.
The a-typical price there is the Series 3 car, which you’d normally expect to get for less than a Series 2. This Series 3 car has exceptionally low mileage, which might account for the higher price.
As mentioned before, mine is a Series 1 car and the higher values seem to apply quite consistently, which is encouraging.
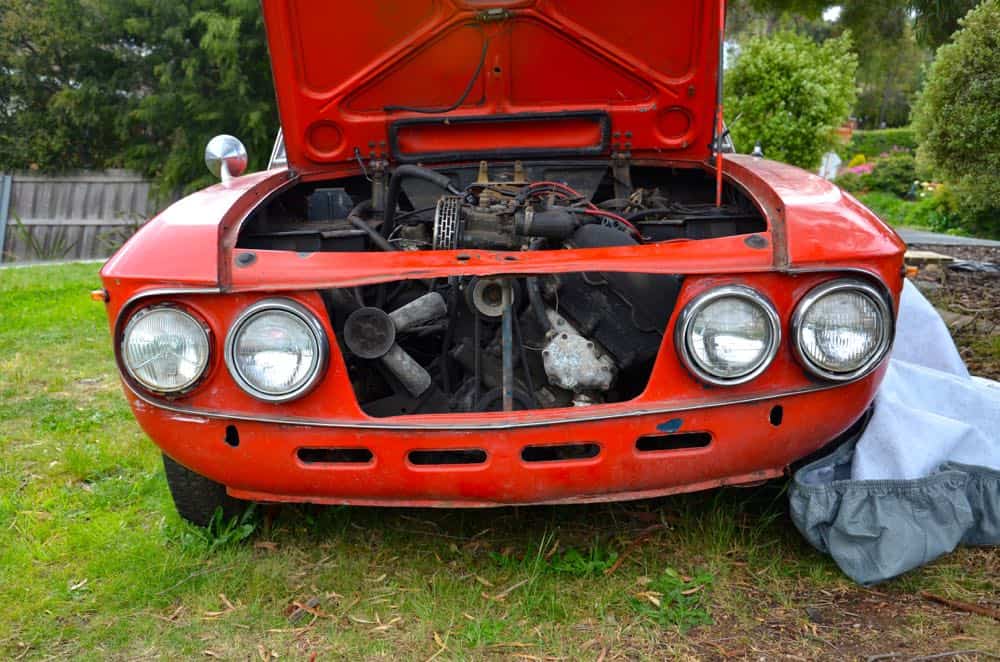
I’d been frustrated by the radiator and some headlamp surrounds…..
Well, the radiator is gone, but the headlamp surrounds remain….. for now.
As you can see, the grille isn’t in great shape. A few of the horizontal bars are no longer connected to their vertical companions and one of the corners was secured to the body by a twisted piece of wire. If it was complete then I’m pretty sure I could repair it but with that section missing along the top, I might be looking for a replacement.
The radiator probably needs a good clean but first impressions are that it might just be OK. It looks to be in remarkably better shape that nearly everything else under the hood.
My aim at the moment isn’t to disassemble the entire car. It’s to take off as much stuff as I need to in order to speed up the bodywork/painting process when I finally hand it over to the professionals. To that end, I’m picking off some of the low-hanging fruit at the moment. I guess it helps me feel like I’m making faster progress.
So I started working on a few bits of exterior trim. Small stuff, but fun stuff.
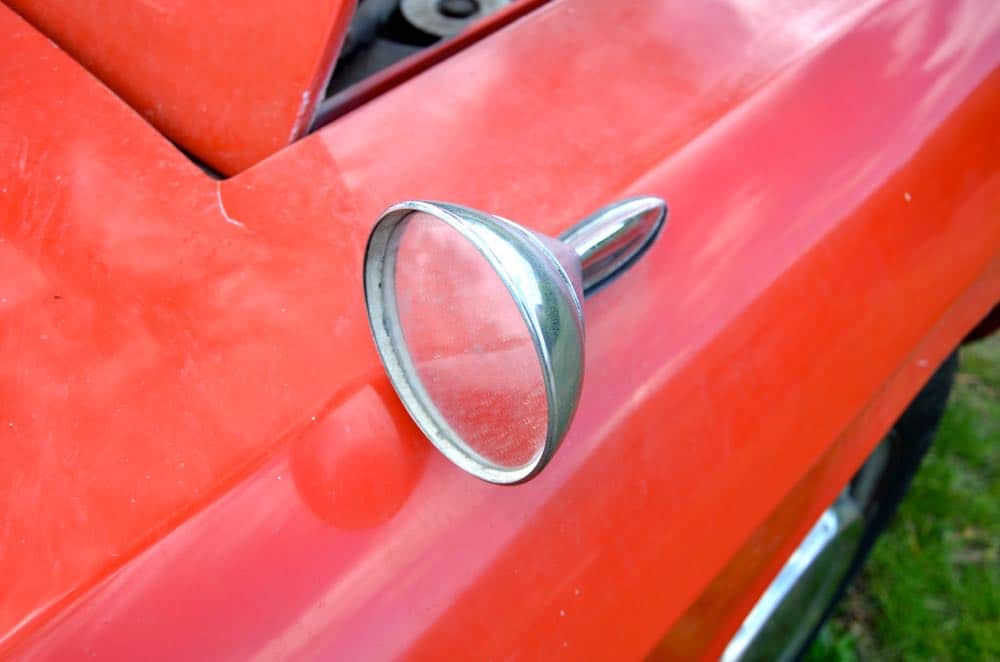
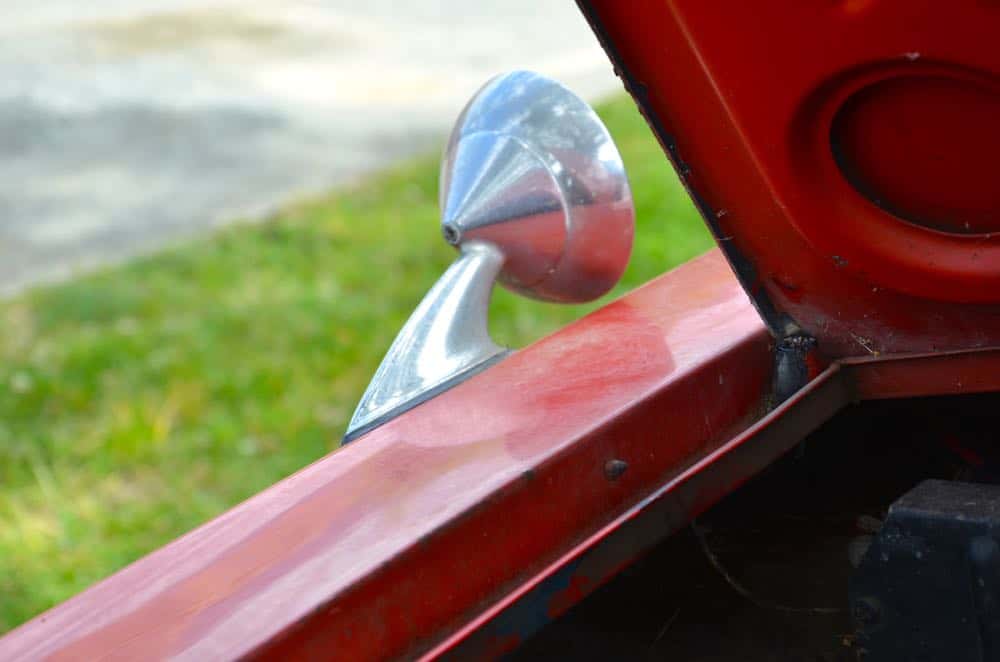
The mirror came off easy, secured by two screws hidden inside the front guard/fender. The mirror needs some of the aluminium foil treatment to remove pitting from the chrome.
Back to the radiator removal….
One of the reasons I had to take the radiator out was because I wanted to take the grille out. I wanted to take the grille out to get an idea of how skewed the front end is without the grille influencing the picture. It’s still out, of course, but doesn’t feel like it’s out by quite so much. Here’s the photo again, compared to an earlier one with the grill still in.
Actually, it still looks just as skew-iff. There’ll definitely be some straightening work for somebody in the coming months.
It’s interesting how the Lancia shield isn’t centered on the grille. I wonder why. I’m pretty sure it should be.
——
I have a mate in Sweden named Mats. He’s doing a bare-metal restoration of a Porsche 914 at the moment and he’s really, really good at this stuff. Mats sent me an email last week and he advised that I take my time when undoing old screws, etc. His advice was to hit the fixture with plenty of penetrating fluid (WD-40 in my case) and to do it a few days ahead of when you want to attack.
It was wise advice and I listened. I promise I did.
The problem was that I didn’t exactly act on it and I paid the price with two sheared (very thin) bolts.
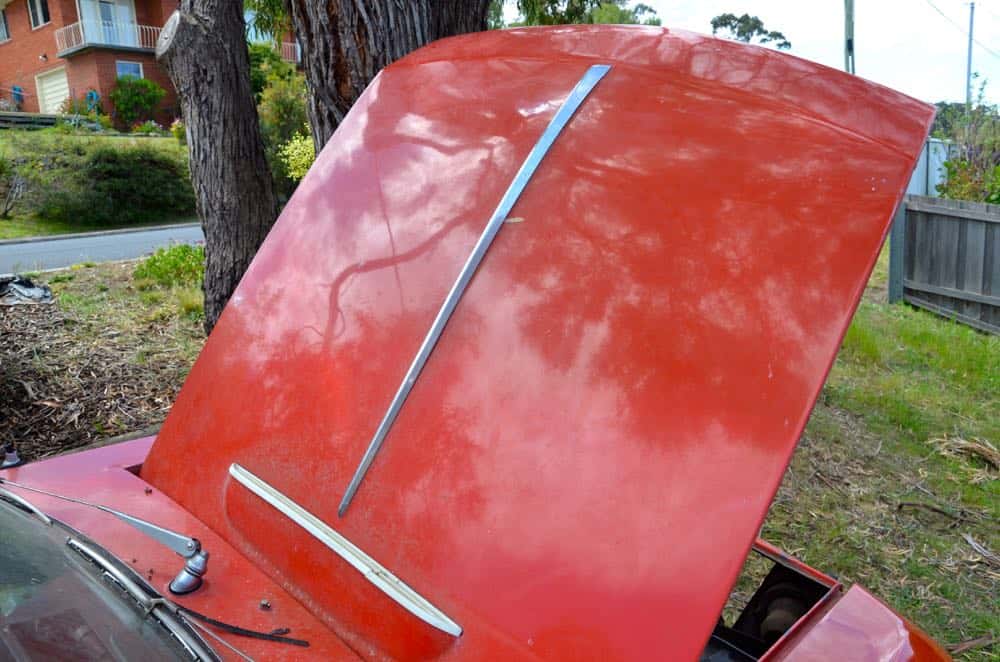
The first of them came when I was taking off the stainless steel strip that runs down the middle of the bonnet/hood.
It was the second bolt from the top that sheared off. Luckily that piece is held in by four fixings so I don’t think it’ll be much of a loss.
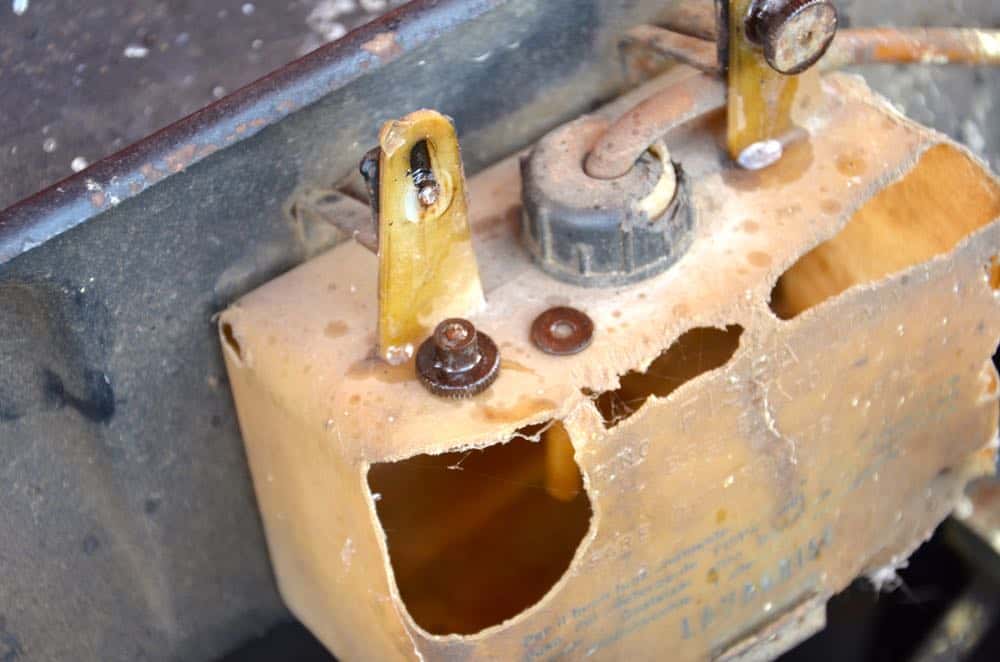
The second bolt that sheared off was one of two securing the rat-eaten washer bottle. I only gave this one about 2 minutes on the penetrating fluid. I waited another 15 minutes on the second one and it came away with no trouble at all 🙁
——
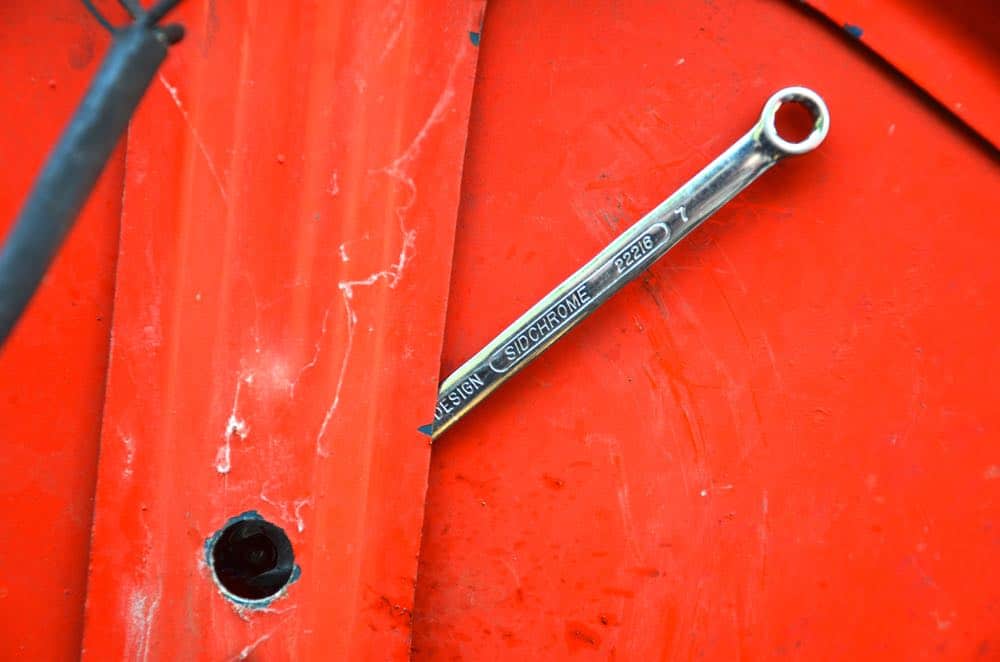
Actually, I had a win with the stainless still bonnet strip, too. The last nut I had to get off was the one nearest the windscreen, which is actually behind a piece of metal that makes up the frame of the bonnet. There is a gap between this piece of metal and the bonnet itself so my first idea was to slide in my thin 7mm spanner and turn it from there.
This worked, but it was going to be a very time consuming and laborious process. It was hard to locate the spanner head on the tiny bolt and even when I did, I could only do a quarter-turn at a time before I had to take the spanner off and locate it again.
My fancy (read: expensive) Sidchrome socket set doesn’t have an 8mm socket, so that was out.
Fortunately, I still have the first el-cheapo socket set I ever bought. And fortunately, it does have smaller sockets, including a 7mm. It was a perfect fit into the little access hole, too.
It’s amazing how quickly things can happen when you have the right tool.
——
I took the wiper arms off the car, but getting the rest of the mechanism out is proving to be difficult.
The two wipers are controlled by a mechanism that spans between them but it’s located behind this fresh-air intake box that feeds the ventilation system.
I tried to get the box out but I think it’s secured from inside and getting to the fixings might involve removing the whole ventilation system. I was hoping I wouldn’t have to do that as it’s very delicate and will be very complex to reinstall later on. I might have to seek some advice.
——
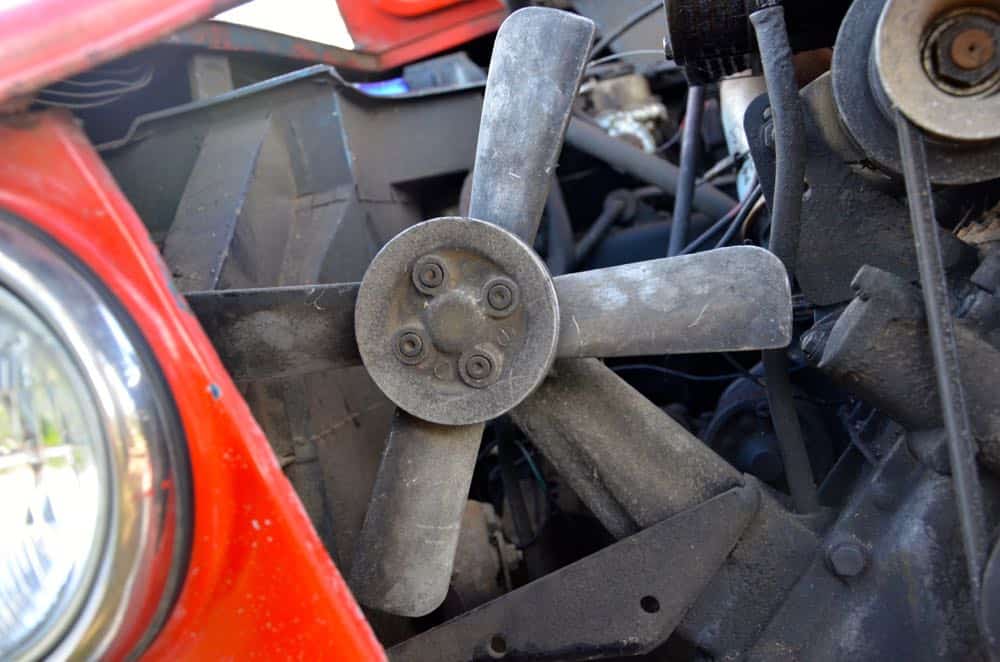
Some happier notes to finish on…..
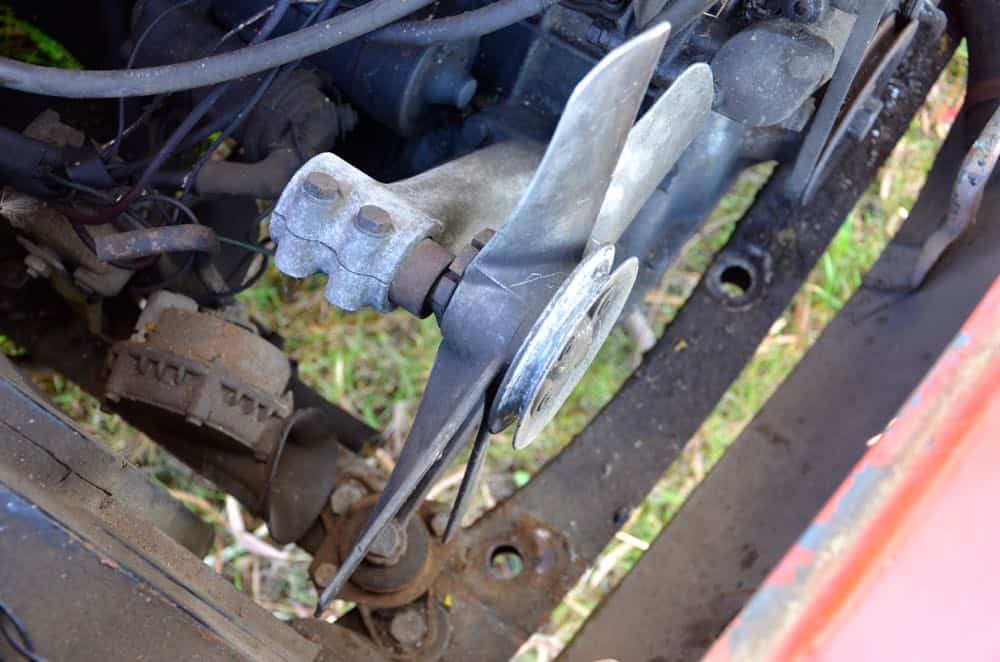
I’m not sure it’s the most efficient solution and I know it’s weird to say this, but I really love my radiator fan.
It’s not an electric fan attached to the radiator itself. It’s a belt drive metal fan that is bolted on to the front corner of the engine. It looks like a beautiful little sculpture sitting there.
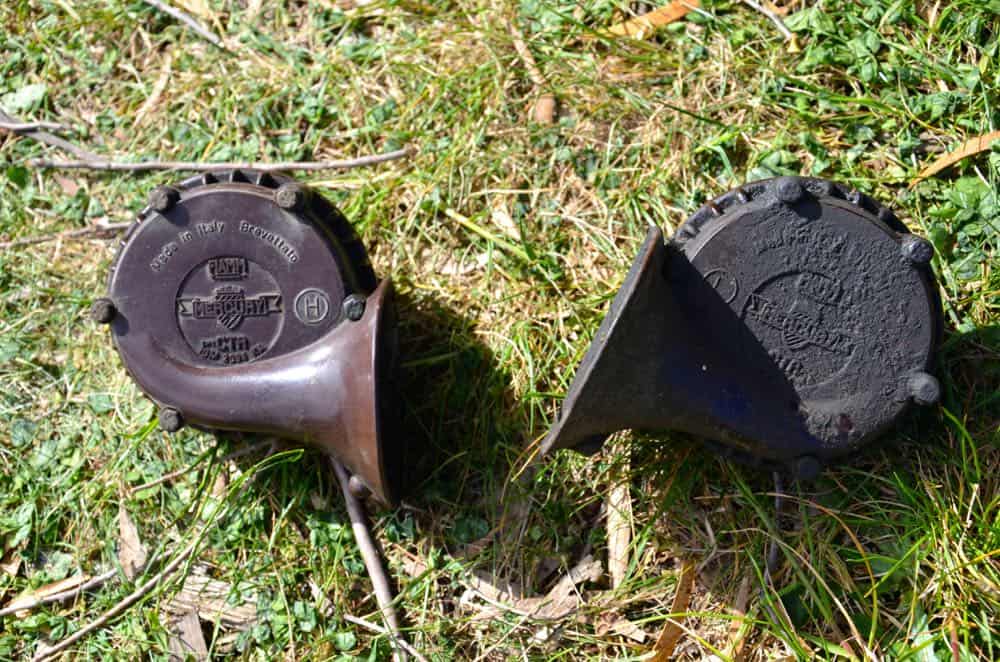
And check out my dual horns!!
They both looked like the one on the right when I first pulled them out of the car. I gave one a quick blast with the remnants of a can of degreaser and it showed definite potential. In fact, it looked quite stunning. I’m not sure, but it looks and feels as if it’s made from bakelite.
——
So that was my few hours of tinkering on Sunday.
I spent another good portion of the afternoon helping Geoff tinker with the X1/9. We got the point where Geoff went and bought a battery and we tried to start the little bugger. Sadly, it didn’t want to start, which may or may not be down to the empty fuel tank.
We’ll try again soon. Fuel, air and spark.
There will be video when it finally happens.
The little Fiat still needs the brake and clutch master cylinders to be changed, but we’ll get to that eventually.
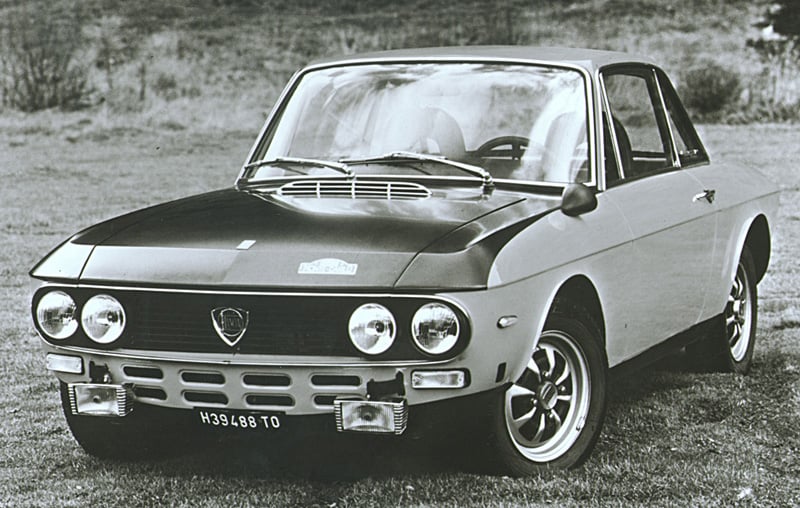
Welcome to the Friday Fulvia – a new (old) Lancia Fulvia photo every week!
This week it’s a series 2 car, not badged as an HF but dressed up in rally colours nonetheless.
My favourite bits on this car – the little mirrors (replicas available) and the blacked-out wheels. The blue Series 2 that lives here in Hobart has the same wheels in plain silver, which I’ve posted below for comparison.