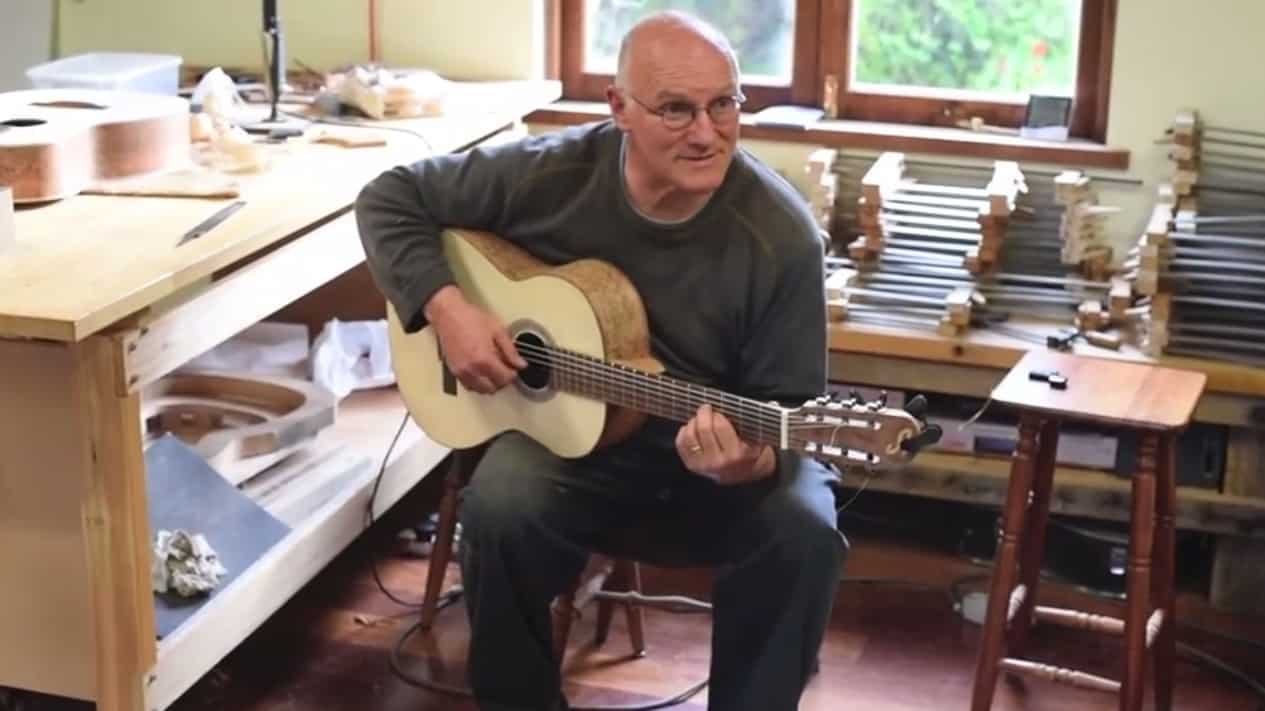
This video spends an hour looking at the Saab effort at Pikes Peak early this century, with Per Eklund at the wheel.
It’s in Swedish but has English subtitles.
Enjoy.

This video spends an hour looking at the Saab effort at Pikes Peak early this century, with Per Eklund at the wheel.
It’s in Swedish but has English subtitles.
Enjoy.
Myself and a few mates like to talk crap via email. The subjects include list making, music, cycling, gadgetry, buildings, cars, man maths and other things. Occasionally the subject ends up making sense in an interesting way that’s worth circulating.
All entries from The Guild can be found at that link.
Introducing Turbin.
——
I’m a big railway fan from way back.
One of my favourites is what was called the “Sharknose” diesels from a company called Baldwin.
They were once the biggest loco manufacturer in the world with a capacity of 3000 steam locomotives a year.
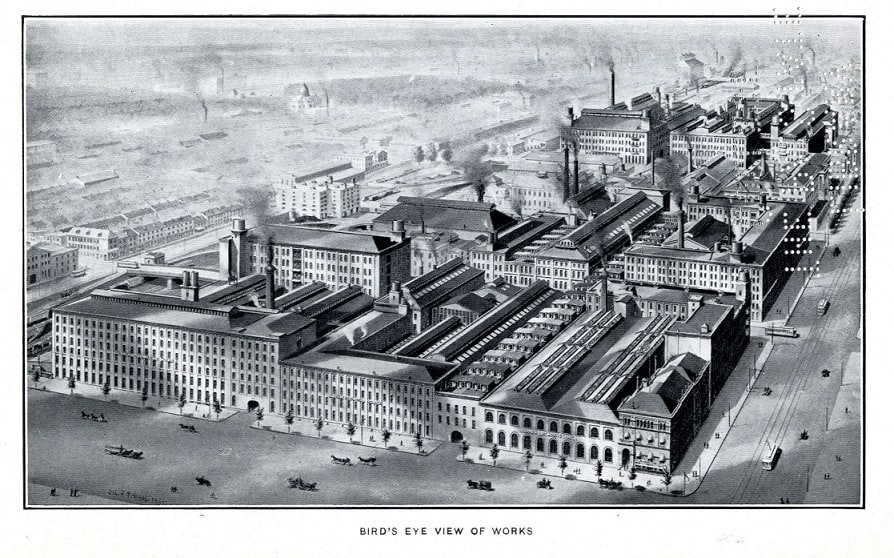
Baldwin Trains were also some of the biggest and baddest machines ever.

They started developing diesels early in the piece but were interrupted during WWII. The War Production Board would not let them develop mainstream diesels through the war period.
The only company allowed…. yep, GM’s EMD division.
So post war GM comes out strong with a lead and a standardised product that took the US (and Australia, as pictured below) by storm.

Baldwin battled along for a couple of decades making some big, beautiful and brutal machines.
In an effort to differentiate themselves from the GM product they enlisted Ramond Loewy, a designer famed for his “out there” work with Studebaker as well as some truly incredible hardware for the Pennsylvania Railroad.

Loewy developed the “Sharknose” theme for the Baldwin diesels which sold in very modest amounts but had a big visual impact.
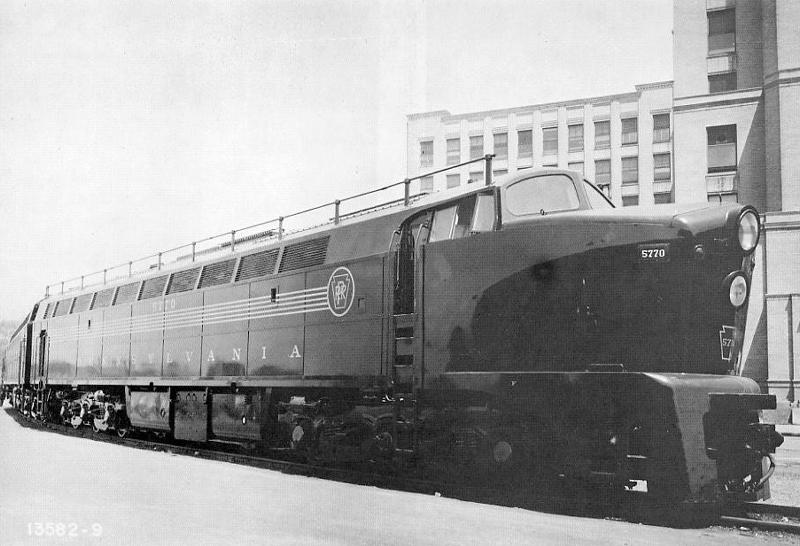
Many of these locos started serving on mainline “name” trains pulling luxury coaches and the like, but before long were relegated to pulling general freight. Most lasted only a decade or so before being pulled out of service and cut up for scrap…
Except for 2.
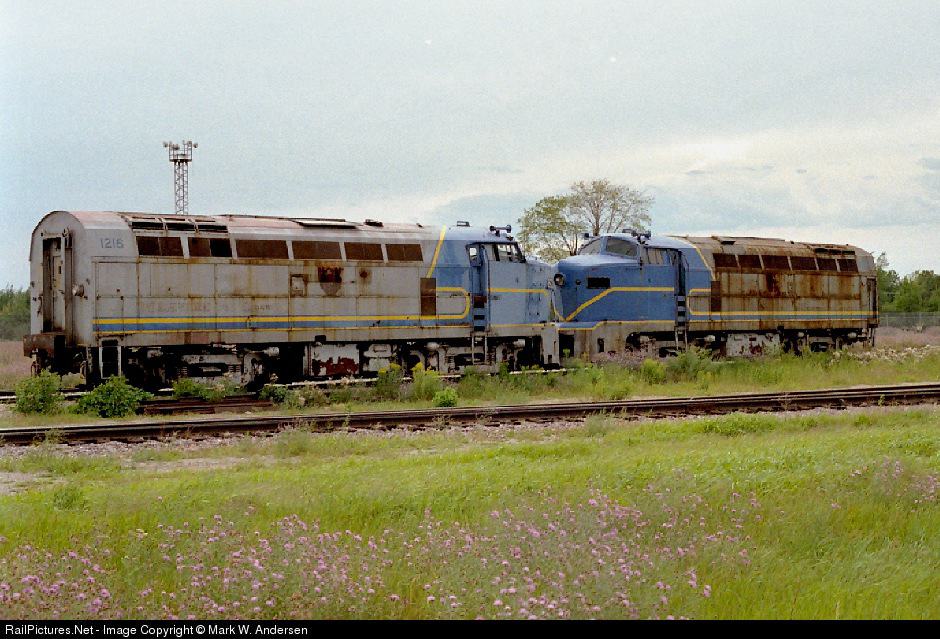
These two were bounced around from railroad to railroad until finally both their engines failed. They were left out in the open for some time but in the early 80’s were put undercover, never to see the light of day again and very heavily shielded from a railfan public who had reputedly stolen bits off the locomotives while they were sitting outside.
I’ve had a book about Baldwin diesels since I was a teen and it is in immaculate condition. I pull it out every now and then for a bit of a browse.
On my latest read I again relearned about these last two units of a once great company which prompted me to do a bit of googling.
Lo and behold, just a few weeks ago somebody anonymously posted the only photos anybody has publicly shared for over 30 years.


These are pics from inside the shed of a privately held railroad. Apparently the owner has been offered m for them and refuses to sell.
Whoever, whenever, restores these has got one hell of a job ahead of them (it’s all relative, Swade) . At least they are covered and not likely to be deteriorating at as greater rate as they were outside.
Why is this important??
It just is.
sharknose turbin
Imagine it’s 11:58 on your personal doomsday clock. You’ve got a heart condition and you’re due for surgery. Tomorrow.
Being a strong spirited type and knowing that your time might be limited, you decide to dress up and head out for a night at your favourite jazz club. Jazz is what you love most in all the world and if you’re going to check out, then you’ll go on your own terms.

After the first set, the band steps down for some dinner. You wait a respectful 20 minutes or so but you have to get home at a reasonable hour, so you head on over to the band’s table to congratulate Dr Davis on the best set of jazz you’ve heard in your life.
As you arrive, the good doctor is thumping his fists on the table because his $5,000 glasses just fell off his nose and into his fillet steak. The whole table’s laughing but your doctor is mad as hell before he sees the funny side for himself. As you look down to examine this odd occurrence, you notice that this tender fillet of beef hasn’t been delicately cut and consumed. You might have expected that from a surgeon, but no. In fact, there are shreds of beef all over his plate. Maybe he got a blunt knife? Who knows? But for whatever reason, the steak looks like it’s been set upon and torn up by a couple of hungry dogs.
The whole situation is a little bit slapstick. “Imagine those glasses just falling off his nose and into that messed up meat”, you think. “What a laugh!”
You go home and sleep soundly on what might be the last night of your life. Why? Because despite the fact that your heart surgeon might be a bit clumsy with both his utensils and his food, he sure can play a mean horn!
——
NEVS/Saab survived their creditors meeting earlier this month and earned a stay of execution to continue their business reorganisation plans. During that creditors meeting they outlined what they called “Plan B” – a totally new element to their business plan involving the potential to offer technical services to other OEMs as well as adapting the Trollhattan factory to build cars for other OEMs. It’s not written in stone. It’s something they say that they can do without, if necessary. But it’s there.
Saab’s business plan has been quite fluid since NEVS took over. In the beginning, they were gung-ho on going fully electric. Then NEVS took on a 22% shareholder who – they have recently claimed – insisted that Saab produce petrol-driven vehicles for immediate use. Consequently, NEVS swung its resources into resurrecting the Saab 9-3 only to have the 22% investor fail to honour their contract while new 9-3’s sat in the factory car park with very-close-to-zero interest from buyers.
Now the business plan has a new, slightly desperate element. Well, it’s new for NEVS but not totally new for Trollhattan.
Spending time on the viability of Plan B is a bit like our heart patient at the top of this article. It misses the point. It’s fundamentally irrelevant. The court knows it. The suppliers/creditors know it and NEVS knows it, too. Plan B is merely complimentary information included for the sake of saying “we’re trying everything” while they continue to talk with their two Asian [potential] investors. It purchases time and nothing else.
The real issue here – the one that creditors are hoping NEVS can solve – is the issue of ownership and management. I think it’s only by changing the ownership and management structure of NEVS that the creditors can hope to see their debts collected.
Kai Johan Jiang was let down by his Chinese investor and he’s been burning cash trying to keep things afloat. NEVS spent bundles of money on a car it can’t sell while slowing development on its key technologies – the Phoenix platform and vehicle electrification. Qingbo might have let NEVS down but the bottom line still tells you a few things:
That NEVS was able to build a 9-3 that motoring journalists in Sweden described as being quite capable is intellectually interesting but ultimately, irrelevant.
The only thing that NEVS had to do, the only thing that NEVS had to prove, was that it could live up to its promise of building a premium electric vehicle. Anything aside from that was, and still is, a distraction from the core reason the company was established.
As always with car companies, it all comes down to the product. You can position a company any way you want in the public eye but if you haven’t got a good product that people want to buy, you’re toast.
Building that product is a tough gig. I’ve said a million times that there are no fingersnap solutions in the car business (and by the way, “Plan B” is no fingersnap solution, either. The logistics involved are mammoth, which is one of the reasons I count it as a mere smokescreen to buy more negotiating time). Designing a car and its component parts takes time and LOTS of money. Right or wrong, NEVS got distracted from that tough gig. Whether the company would have succeeded anyway is a matter for debate but only as another intellectual exercise.
What matters now depends on your point of view.
If you’re KJJ, you want to keep your shirt on.
If you’re a supplier, you want to get the money that’s owed to you.
If you’re a Saab fan, you want to see meaningful vehicles being developed and built in Trollhattan in the future.
If you’re a potential investor, you want……… something that we don’t really know right now.
From here, though, the best way for most of these things to happen is a change of ownership to someone with the management skills and the resources to make something meaningful out of this mess. The upper level of NEVS management has neither the skill set or the resources to have meaningful success with the Saab facility at Trollhattan.
The decision to extend NEVS’s time in reorganisation had nothing whatsoever to do with Plan B or anything else to do with product plans, etc. If you believe it did then IMHO you’re missing the point. The decision to extend, again IMHO, was to allow time for an outcome that gives people what they need the most – a change in ownership and management.
During September and October 2014 I attended a three-week intensive course to build my own acoustic guitar. As people will quite possibly be directed to this website to gain an understanding of the process, I thought I’d cap the experience off with this overview.
Click here to go to the Guitar section of this website, which starts with this overview and then goes on the show each section of the build.
The course was run by the Australian Guitar Making School (AGMS). AGMS was founded in New South Wales and runs schools in several locations that operate on what I’ll call a casual basis. Attendees turn up once (or perhaps more) per week and pay for a session where a luthier helps them to progress their build. Building a guitar this way typically takes eight or nine months.
The course I attended was a three-week intensive course, where you complete your guitar from start to finish within those three weeks. Attendance was six days a week for the first two weeks and the course finished on Friday of the third week.
This intensive course is run once a year in Tasmania and there are plans afoot for other AGMS schools in Australia to run similar intensive courses. The thoughts written below are specific to the intensive course. I have no experience with the ‘casual’ long term build.
——
Let me say straight up that I have received no financial or other incentive. I paid full price for my course and intend to pay full price should I do the course again (which I plan to do in 2016). I documented the build simply as a record. I knew it’d be fun for me to look back on it and figured it might be useful for others, too.
——
The following are some objective facts and subjective thoughts on the course that might be useful for anyone contemplating doing it:
My three week intensive course cost $2,800 plus $350 for the timber that I used and $140 for the Schaller tuners. There were less expensive options in terms of timber, but I wanted to use tiger myrtle because I understood it would have good sonic qualities, because it’s now in limited supply and because I liked the look of the timber. 3 out of the 4 other participants doing the course with me also chose tiger myrtle. I chose the Schaller tuners from a wide variety of options available at StewMac (luthier supplier based in the US).
This cost is not insignificant and I think your perception of value will depend on a number of factors:
Note: As mentioned above, the basic cost of my course was $2800. The 2015 course has already had its price raised to $3,700 but this includes all materials, including a case!
—
The sound quality of your instrument will primarily depend on two things – the grade and species of timber you use and your construction method.
I’d be happy to compare my guitar with anything you can buy from a music store, right up to your ,000-and-above Martins, etc. All the timbers used were top grade and the construction methods could not be more contemporary, fundamentally sound or stringent.
What’s more, you’ll know exactly what’s gone into crafting every element of your instrument because you did it yourself.

—
Do you want to learn how to make a musical instrument? Do you want to learn quality woodworking by learning to use the most basic and fundamental hand tools?
If you do, this course will give you that. I’ve made a couple of timber pieces for our home but they are very, very basic in construction and I used power tools at every opportunity. We used power tools during this build, too – a router, drill press, band saw, dremel and cordless drill. BUT, I would estimate that in three weeks we spent maybe 3 hours in total using power tools and 60% of that would have been the band saw.
We also used an electric heating iron for bending timber but I’m inclined to count that more as a learned skill than a convenience.
The rest of the course involved the extensive use of various chisels and planes as we took what were essentially six pieces of wood and transformed them into a beautiful musical instrument.
As mentioned earlier, I’ve only made a few basic items from wood up until now. I’m going to use the skills that I learned during this course on an ongoing basis. I found this kind of ‘work’ to be extremely satisfying. It gave me a totally new appreciation for craftsmanship and what can be achieved with a little skill and a lot of patience.
If you value an education like that, then this course is for you.

—
You get a great instrument. You get an eye-opening education.
You also get the satisfaction of creating your own musical instrument in a very positive environment with great people around you. Of course, there are no guarantees you’ll always have great people doing it, but the type of person who chooses to do something like this is likely going to have more in common with you than not.
The other wonderful benefit of this experience is the confidence you’ll gain in your own ability. You really can complete this course successfully with NO previous experience. You’ll be amazed at what you’ll learn about yourself. You’ll be amazed at what you can do with the right instruction.
For my money, $3K plus change is a very fair price for all of that.

——
Easy answer – building a guitar. Right?
Longer answer – you’ll be building a guitar from scratch using mostly hand tools and expert tuition along the way. This is what we started with….

What you see in that photo is the top (spruce), back and sides (tiger myrtle) as well as the neck (mahogany) and fingerboard of the guitar. Plus the tuners in the box. We also used a few strips of King Billy Pine used for the bracing, and some leatherwood used for kerfing. The parts that you can’t see there are the bridge, bridge pins, nut, saddle and fretwire. All of those are supplied.
During the course you take the raw materials shown in the photo above and you cut, plane, chisel, bend, glue, clamp and sand them until you end up with something beautiful, like this:

You’ll learn how to use a bunch of tools you’re probably unfamiliar with and you’ll be amazed at what you can do with those tools when you have the right instruction and a little bit of patience.
——
I’ve mentioned the initial cost, but be prepared to spend more. I’ve recently had to buy a case for my guitar ($280) and a groovy little clip-on tuner ($35). I’m also going to pay a specialist to complete the setup of my guitar, which I’m expecting to cost at least another $150.
I didn’t do it, but a couple of the guys in our course bought pickups for their guitars. And if you’re going to do that, you might want to buy an amplifier, which also adds up to the cost.
Take all such costs into account before building your own guitar. Make sure your estimated price is in line with that of other guitars on the market. In cases where the difference is significant, you can purchase a guitar of your favorite brand from a local store. Searching the internet for terms like “Gretch guitars omaha” can help you locate nearby stores.
The escalation of costs and the addition of new gadgetry is something every musician will understand 🙂
I’d encourage you work as diligently as you can in the first few weeks because I can guarantee that you’ll find plenty of details to touch up at the end. Best allow plenty of time at the end by working hard at the beginning.
Yes, you CAN build a guitar from scratch in three weeks. It’ll cost you more than money, though. Be prepared to be thoroughly focused the whole time and completely exhausted by the end of the course.
I don’t know if it would be practical or financially viable, but it’d be helpful if there was more duplication of some tools in the workshop. The workshop we used generally had two of each important tool for use. Sometimes three, but generally two.
When there are five (and sometimes seven) of you working on building instruments, you need access to tools. Most of the time we were all at slightly different stages and access to the right tool was OK. But if there were three working on a similar stage of the build, it sometimes meant waiting around for a tool you could use to do the job.
The other side of The Waiting is the fact that there will be times when you’ll not really know what you’re doing. Or better put, you won’t know if you’re doing it right and you’ll be worried about doing it wrong. At those times, you’ll probably have to wait a little bit for assistance. Even with an excellent teacher-student ratio of 1:5, there’s some waiting that has to be done.
—
This is a unique experience. Our teacher, Strato, was superb. I asked him to sign the inside of my instrument and he questioned this, saying “but you’re the one who made it”. My response – “I might be the one who made it, but you’re the one who made it good”.
I can’t recommend this course or this experience highly enough. If it’s something that you’ve been contemplating then my advice is to pull the trigger and go for it. You’ll be so glad you did. The satisfaction of building something so beautiful and so functional is immense.
Perhaps the best recommendation is that the 2015 3-week intensive Tasmanian class – which is only held once a year – is already sold out. Most of the places for 2016 are taken, too.

This is the final entry about a three week intensive guitar building course I did through the Australian Guitar Making School.
Click here to read all entries in this series.
——
At the end of the previous entry, I’d just started shaping the neck of the guitar using a tool called a spoke shave.
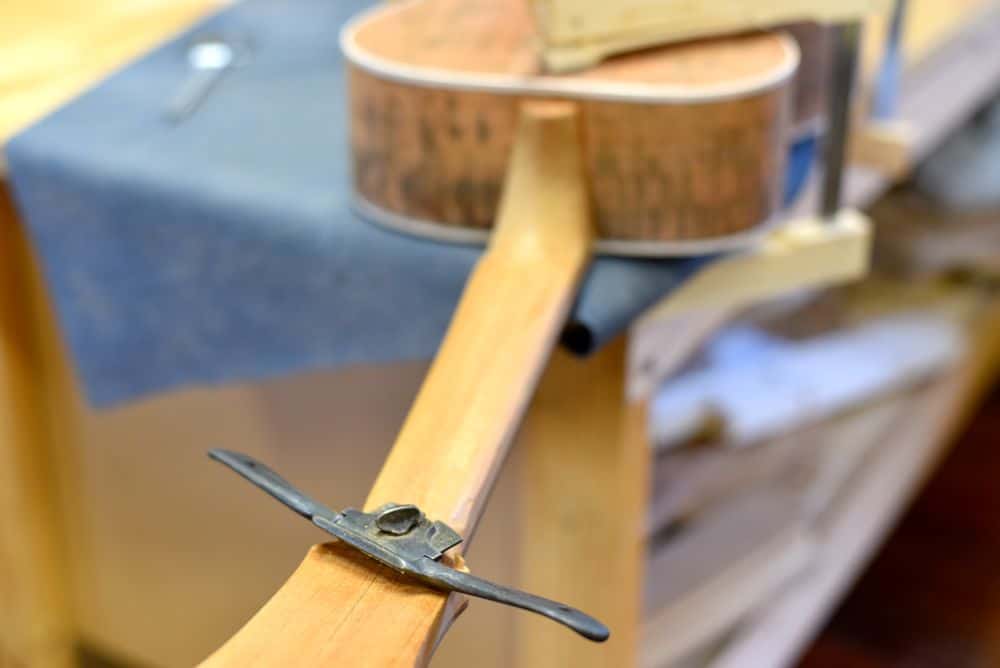
The final days were all about getting the last few big items out of the way so that we could concentrate on the finer details of finishing the guitar and making it ready to play.
The process started with finishing work on the neck. When work with the spoke shave was complete, it was time for sanding.
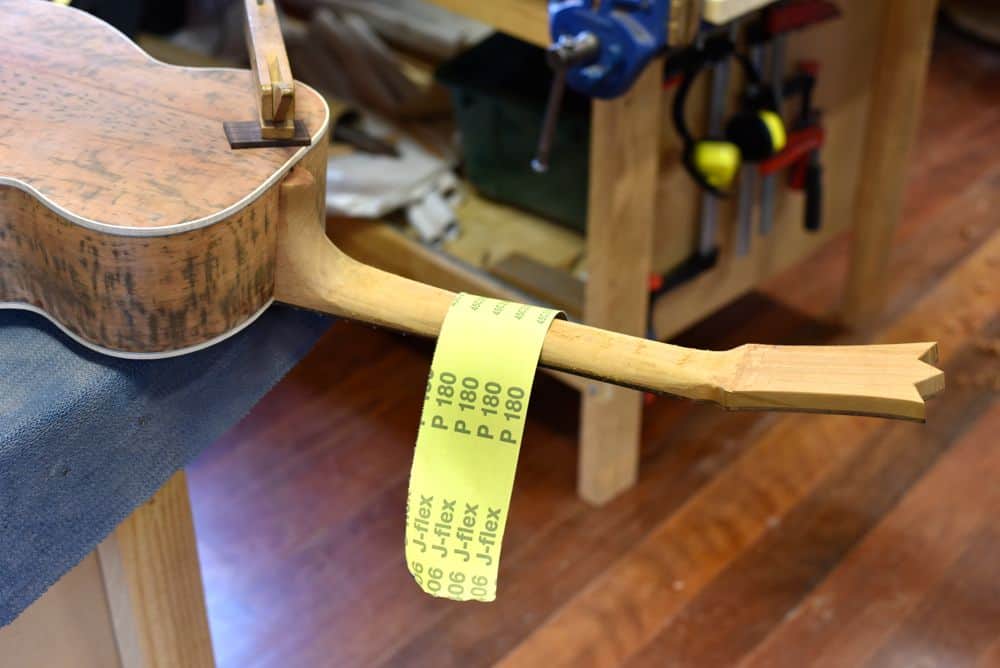
I also had to build a heel step to finish off the heel, at the body end of the neck. I made this from a leftover piece of gidgee, which was the timber used on my fretboard. I even left the fret groove showing and was tempted to insert a piece of fretwire in it, but didn’t. I might go back and do that yet.
The gidgee was cut to shape, glued and taped down. When the glue had set, it was shaped with a chisel to flow seamlessly with the heel (which is a very scary and painstaking process).


The next task called for measuring and drilling to install the tuners on the head of the guitar. I chose gold and black tuners made by Schaller, from Germany.
We measured 10mm in from the edge of the head and then marked points at 40mm gaps where the holes were drilled. The tuners are very easy to install from there. The string provides enough tension to hold them in place with just one small screw to secure them in the back of the guitar head.


The nut and saddle are the pieces that form the beginning and the end of the active string area. The nut is a small rectangular piece at the head-end of the neck. The saddle is a thin piece at the other end of the string, a part of what’s called the bridge.
Both the nut and the saddle are made from bone and have to be shaped before fitting to the guitar.
The saddle begins life as a long, thin piece of bone with sharp corners. This piece has to be shaped using a flat file so that it has a slight curve to match the radius of the guitar neck. The top edge of the saddle has to be rounded, too.
Sadly, I don’t seem to have photos of any of this 🙁 I must have been slacking off with the photos as things got busy towards the end of the build!
The nut is also made of bone, starting life as a shorter, stubbier piece.


We drilled string holes into the top of the guitar very early in the build…..
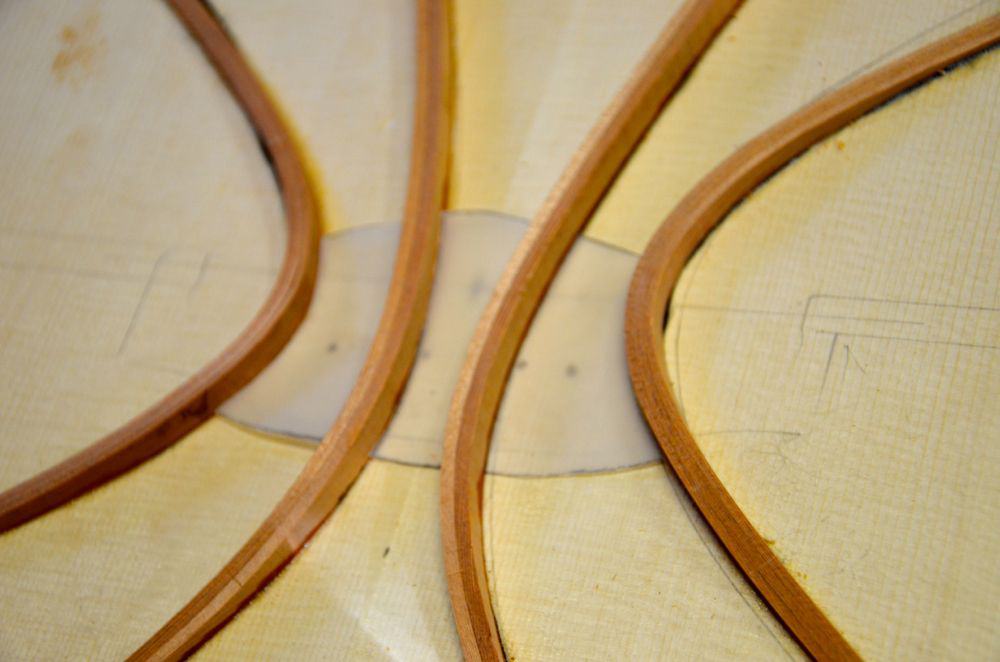
Now, with the bridge having been glued in place earlier in the week, it was time to widen these string holes. A reaming tool was used to do this. Care has to be taken as the pins that hold the strings in place rely on the hole being just the right width to hold the peg in place.


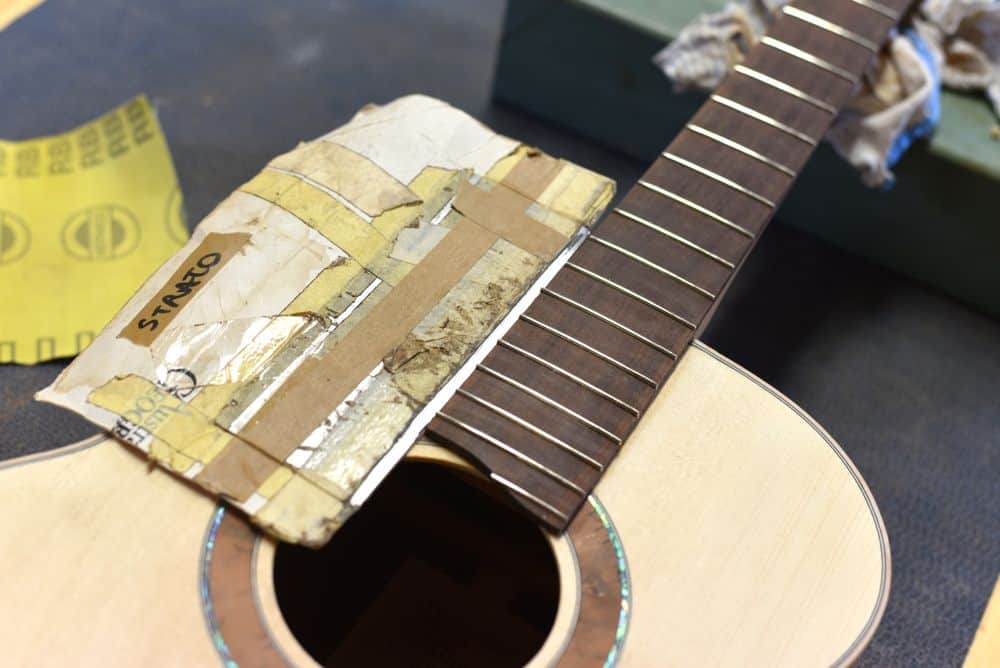
Most of the fret edges were filed earlier in the week when the frets were installed. The final few frets hadn’t been filed, however. These are the frets positioned on the section of the neck that has the body underneath so a special guard with a metal edge was used to protect the spruce.
With all of these little finishing jobs done, the guitar was ready to be strung and tested out!! A little group photo was in order, too.
Cary Lewincamp was kind enough to give my guitar a try. As you’ll hear, it’s not quite ready for the big time yet, but the fundamentals are there. It has a good sound and tone. But it needs a little setting up to get the ‘action’ right. That’s the gap between the strings and the frets.

As mentioned at the end of the video, the action will be adjusted to lower the string height. The grooves where the strings pass through the nut need to be lowered and the saddle can be lowered a little as well.
There are resources online that show you how to lower the action, however I’m going to send the instrument out to a local specialist and have him set it up. I’ve invested a lot of money and time into this instrument. May as well finish it off right.
Speaking of which….
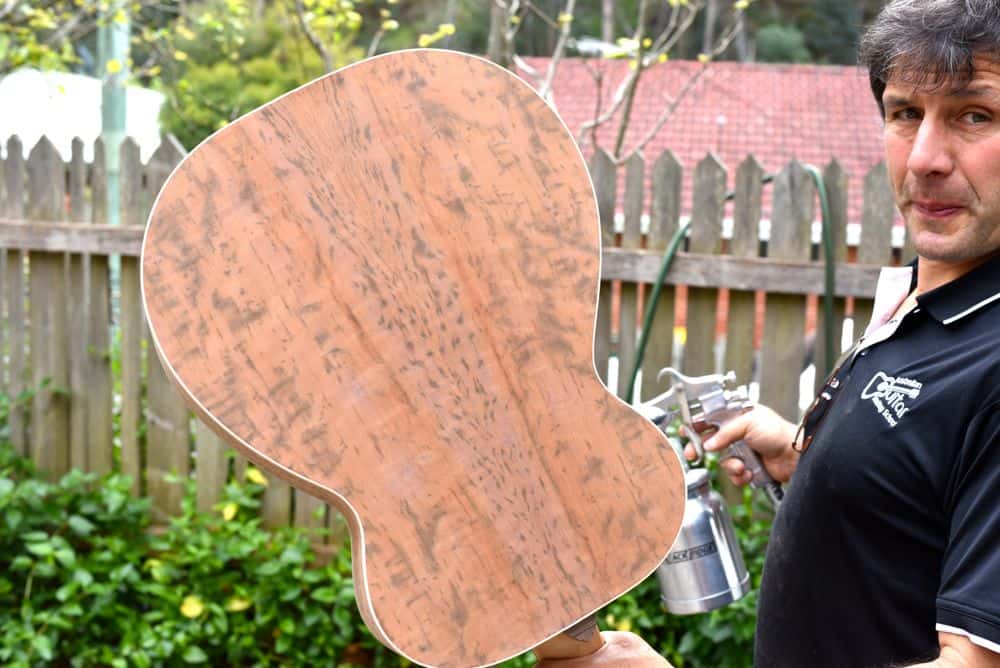
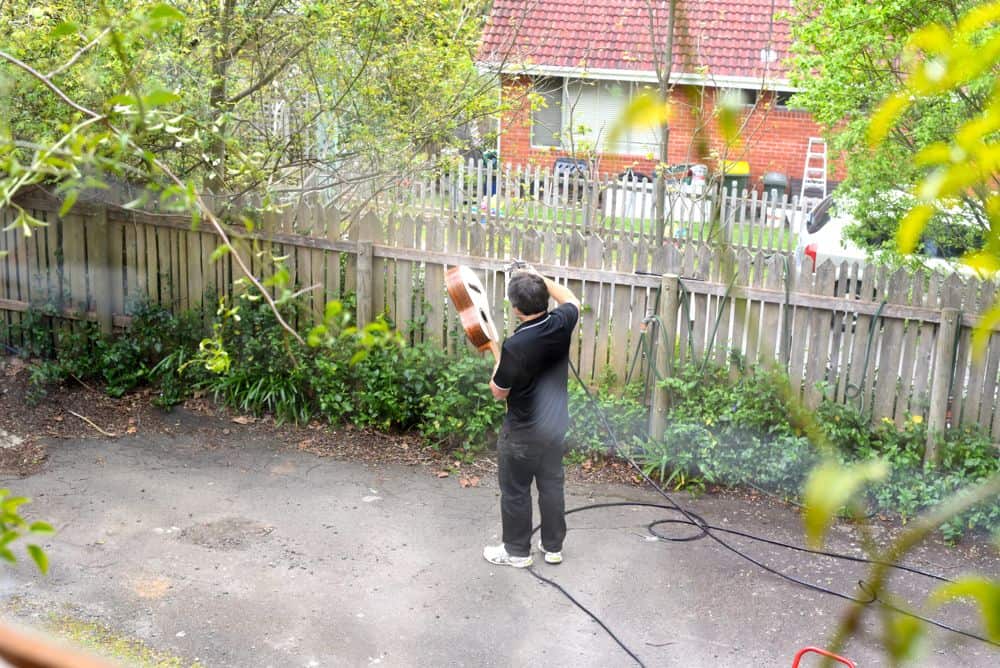
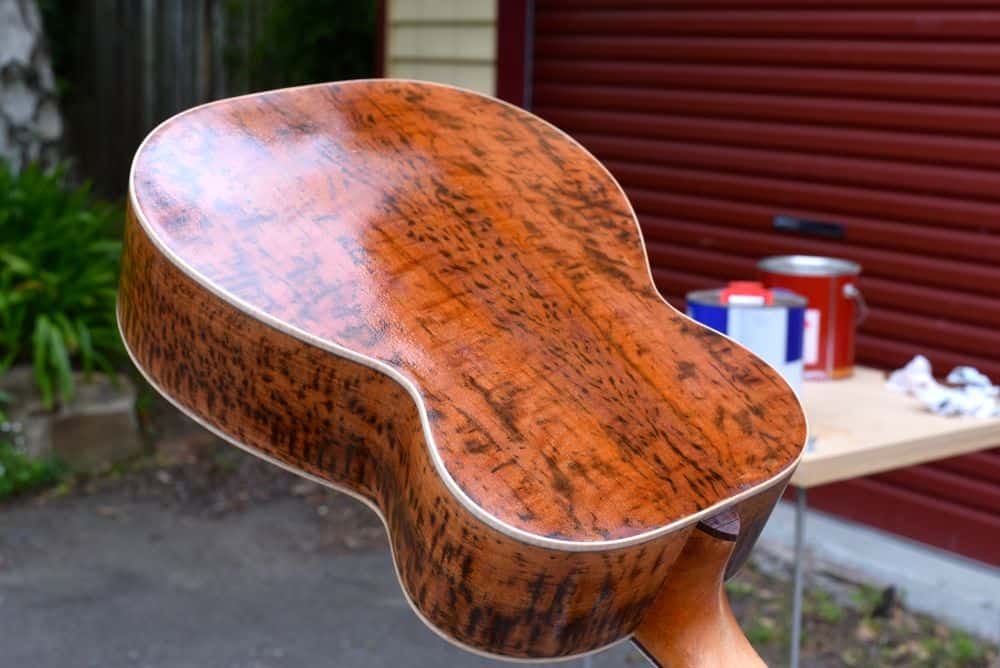
A coat of sealer was applied to the guitar. This was a light coat only as there are elements of the timber that can do with a more complete sanding. A fuller coat will be applied early in the new year.
The before shot…..
Spraying outside…..
The after shots…..
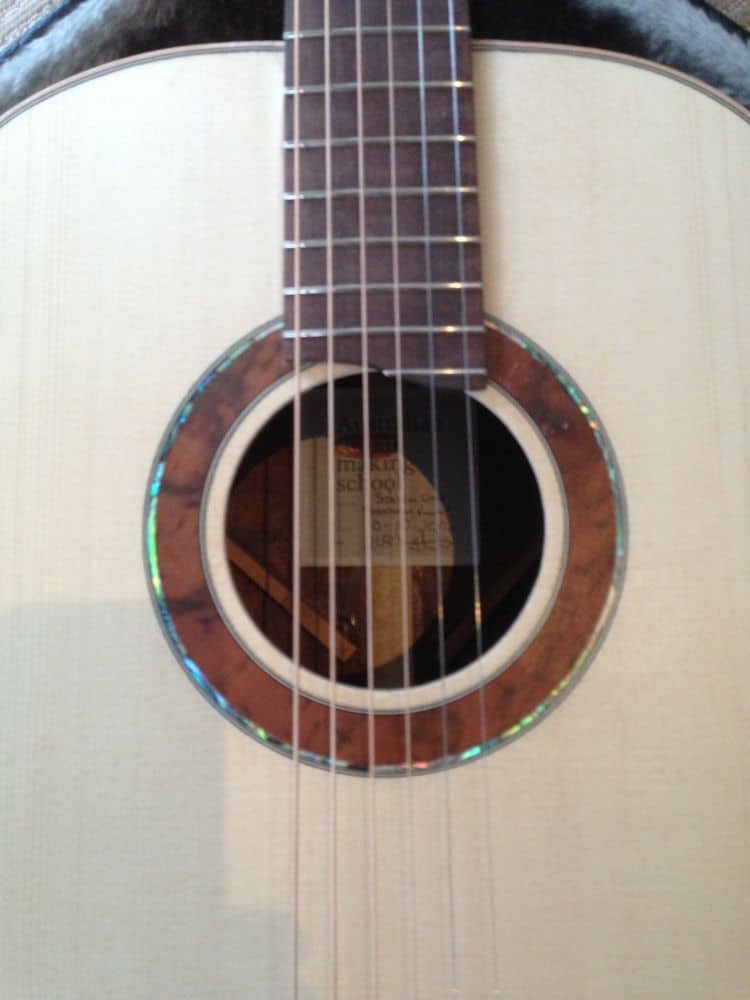
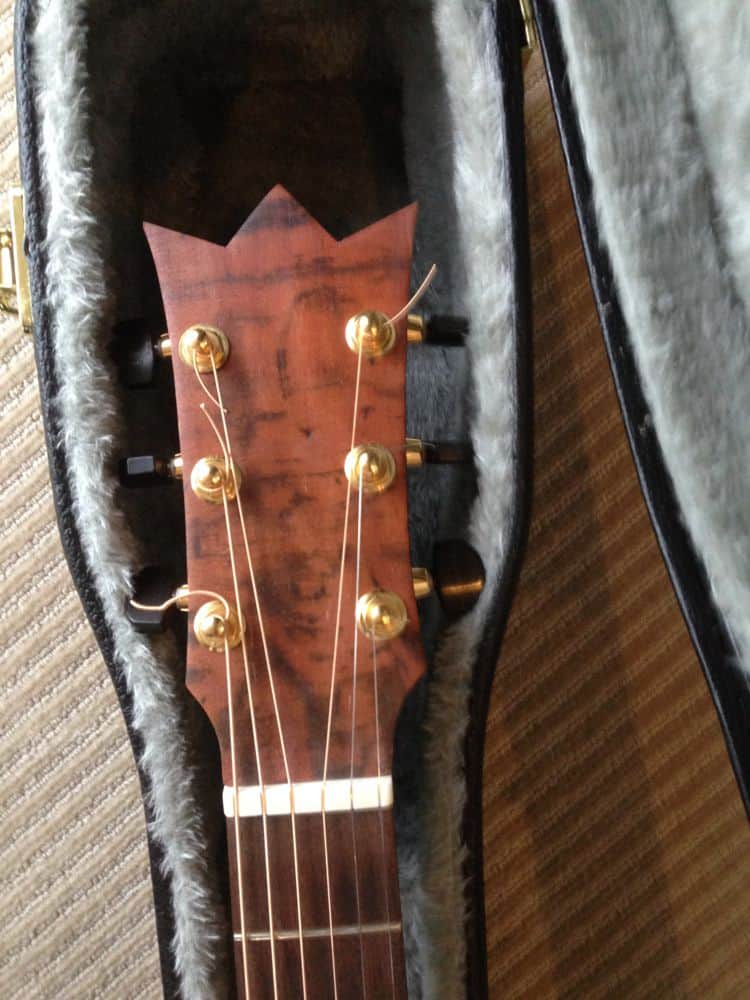
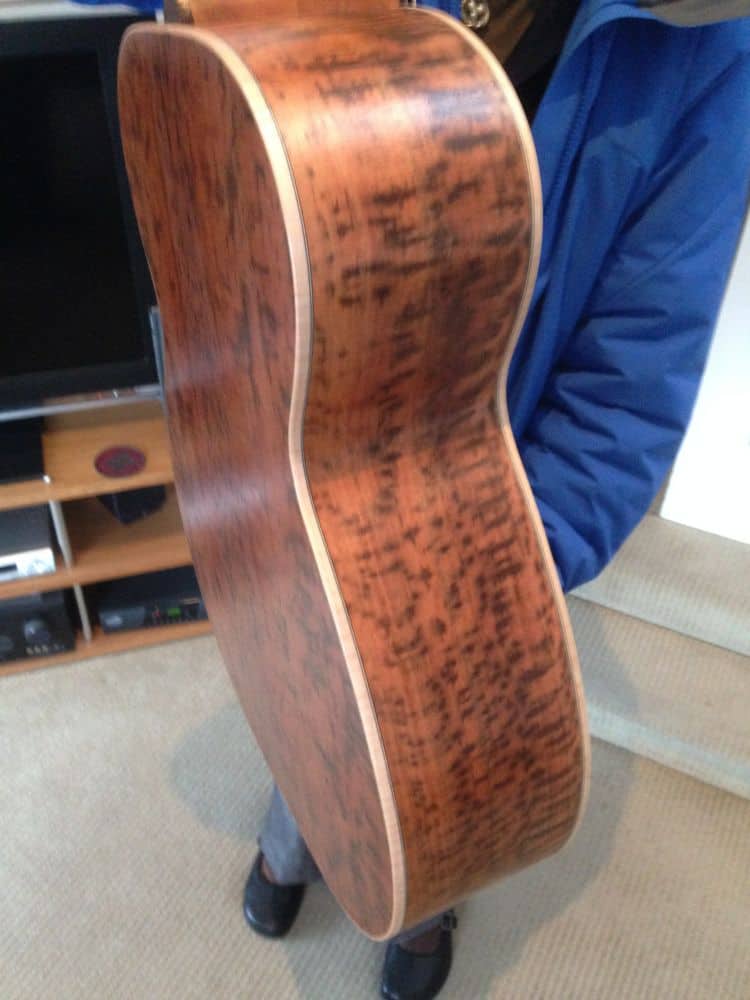
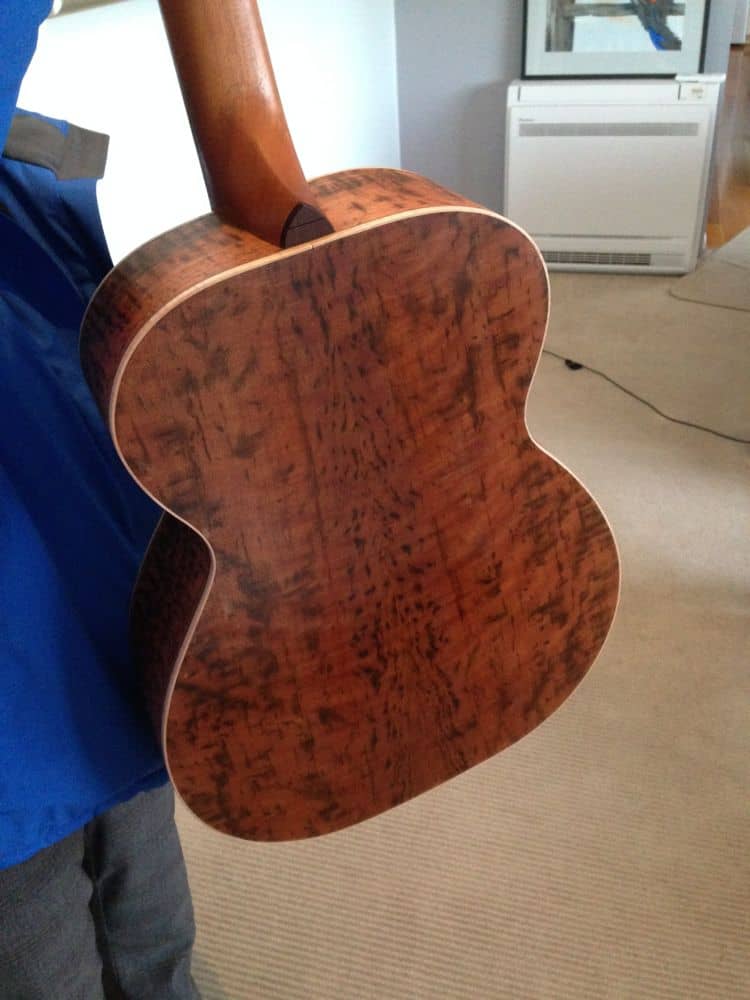
——
I still have one more thing to finish off: the tailpiece.
I had a little inspiration from the past 🙂
The first version worked well in terms of geometry but I’m going to do a second version soon. I cut this one a little too small. A revised version is on its way.
The gap to be filled:
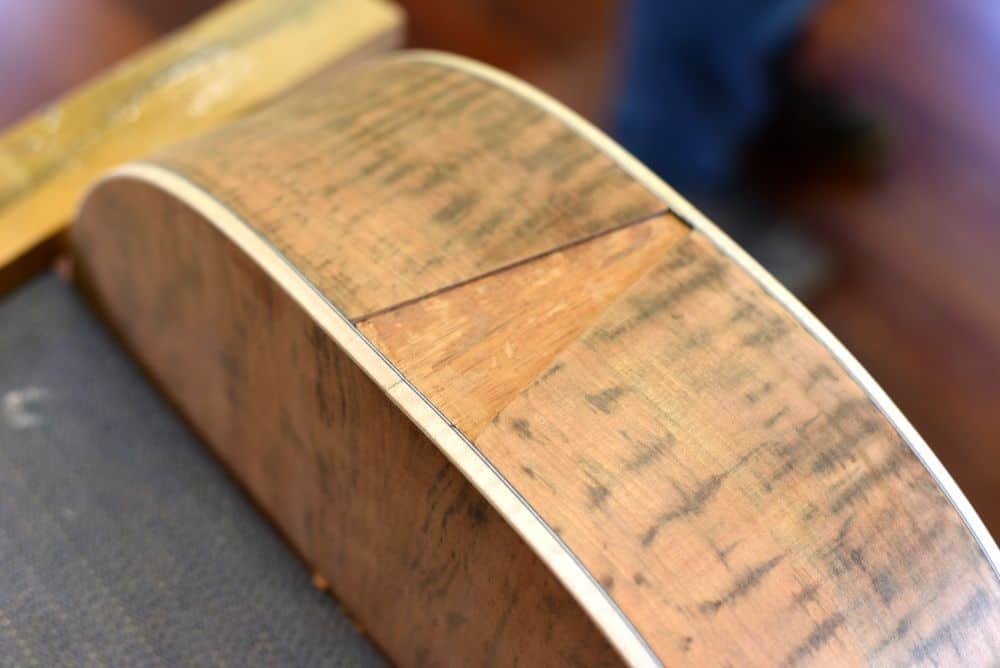
What I intend to fill it with:
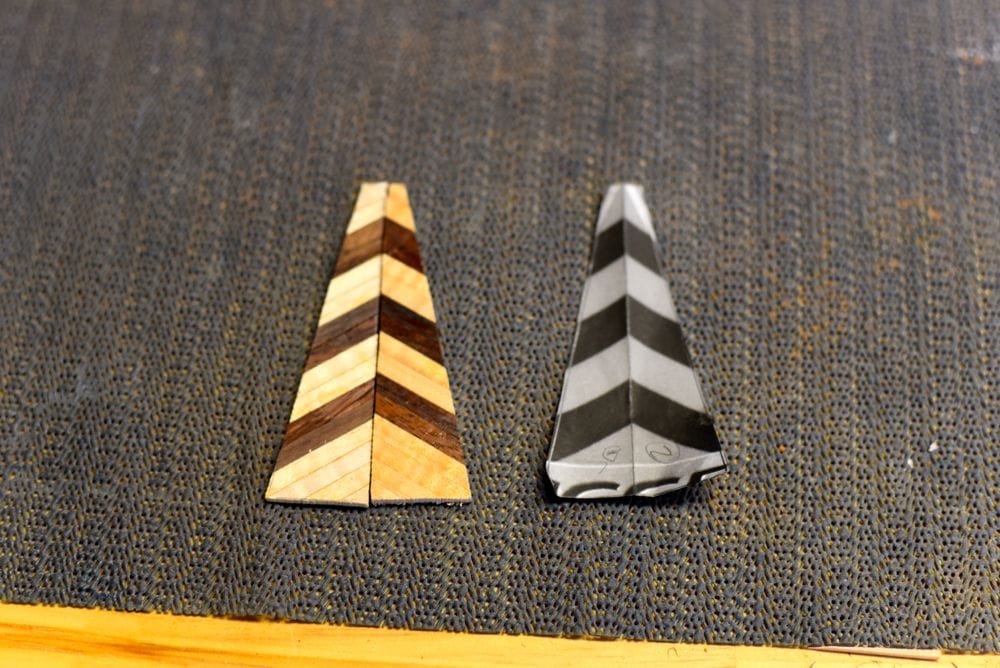
——
We had a celebration dinner on Friday night to mark the completion of our three-week build. All the guitars were there and all five of them were played. It was a great night.
I’m going to do an overview post in the next few days. This has been a long series and there are a few summary thoughts I’d like to put together for the benefit of anyone who might be thinking of taking on a similar project.
Suffice to say it’s been an amazing experience and a very rewarding one. Now I just have to learn to play again!

Yesterday we had a very exciting moment at our guitar building class. One of our fellow students, Christiane, had finished her guitar and it was strung and played for the first time.
Christiane doesn’t play guitar. She built the guitar for her son. I hope he realises the beauty of the instrument he’ll soon have in his hands.
The guitar is being played by Cary Lewincamp in the video below. Cary is a local professional musician and we are building our instruments in his workshop.
Put simply, the guitar sounds absolutely amazing. Cary is an amazing musician but the quality of the instrument that Christiane’s built cannot be denied.
This is the entry for Day 15 of a three week intensive guitar building course I’m doing through the Australian Guitar Making School.
Click here to read all entries in this series.
——
Today was (almost) all about the neck of the guitar.
When we first started building the guitar – and right up until today, actually – the neck was simply a solid flat piece of mahogany. Here it is yesterday with the truss rod installed.
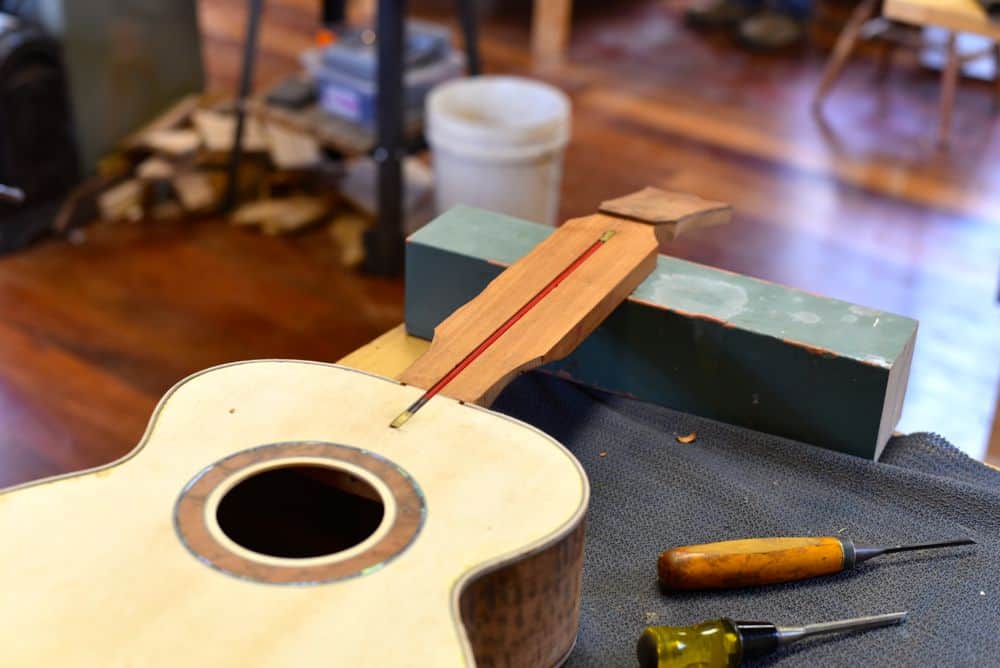
The first big job today was cutting down the excess timber to the size of the fingerboard. I used a block plane first and then got myself acquainted with a tool called a spoke shave. It’s the one that looks like an airplane propeller. It was difficult to use until I got accustomed to it, after which it powered through the job. Very nice. When the mahogany got down to a millimetre or so from the fingerboard, we got out a 25mm chisel to do the fine work.


The neck after its first trim…..
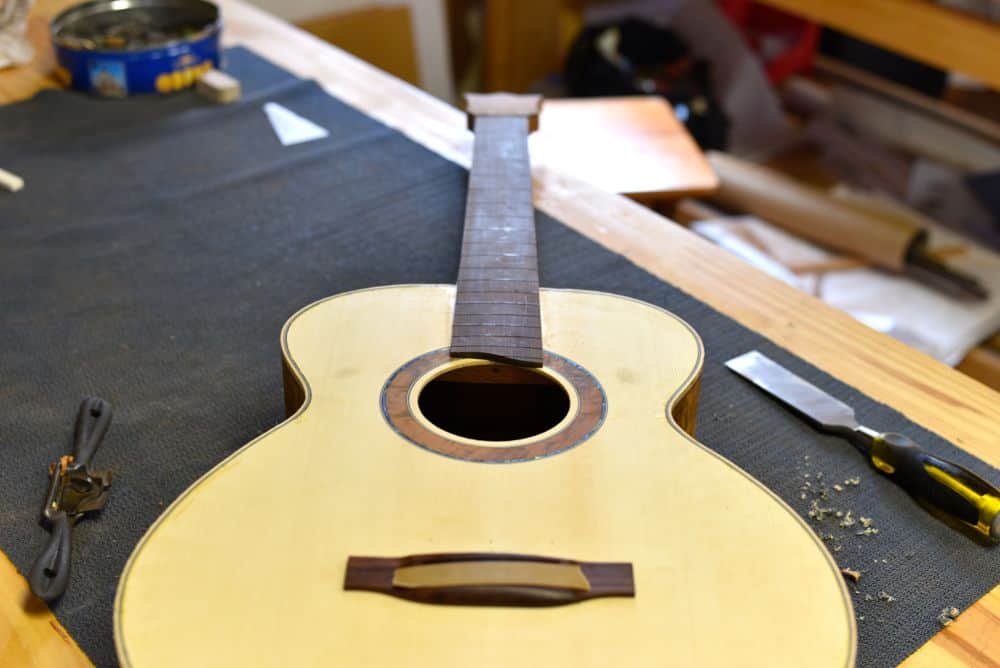
In between big jobs, I did some more scraping and sanding.
The scraping today focussed mainly on the sides of the guitar. Before we bent the sides last week, we had to soak the timber in water for an hour or so. This made the timber go a little bit dull and grey. Scraping it bought back quite a lot of colour, which will only be enhanced when it’s sanded and coated.
I also did some preliminary sanding of the spruce top to get some of the glue off. There’s plenty more sanding to go.


There are a lot of watershed moments along the way when you do something like this. Some jobs are fine detail work that go mainly towards the presentation of the instrument. Others are fundamental to its function and today’s big-ticket job was one of those.
Today we installed the frets into the slots we cut into the fingerboard yesterday. The first job is to do a final sanding of the fingerboard using a big sanding block with a curved profile.
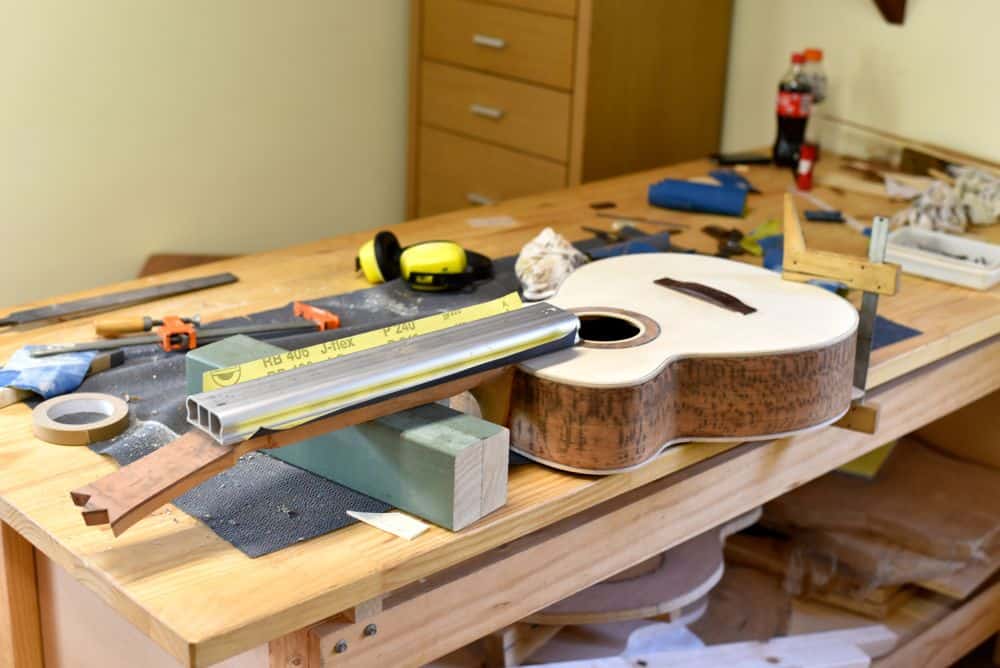
You don’t get given a bunch of frets in a bag. It arrives as a big coil of fretwire and each guitar will use around a meter or so. You get your meter length and then cut each fret as you need it.
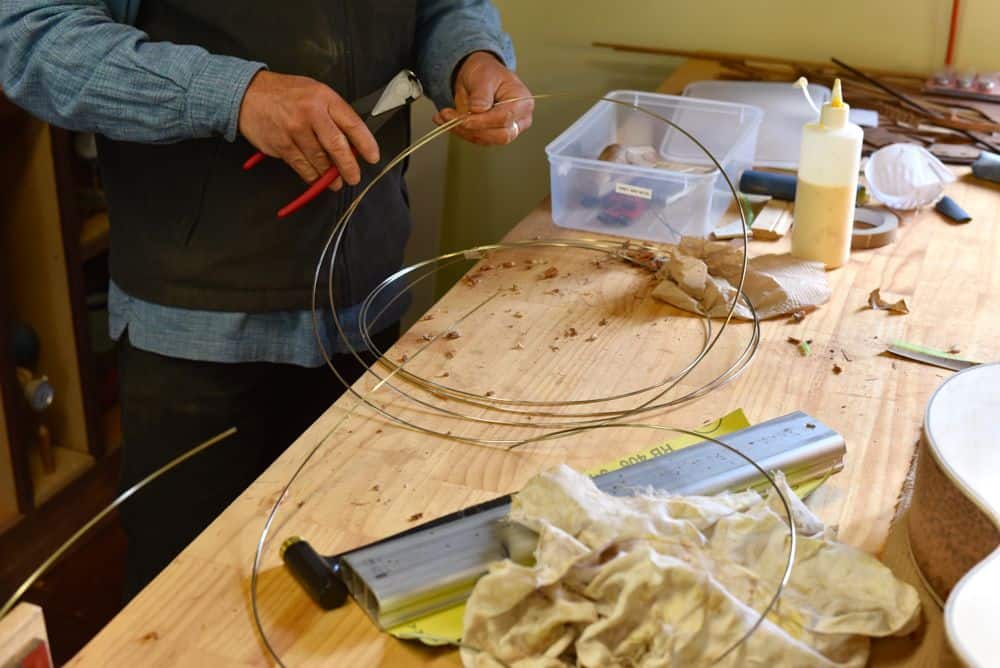
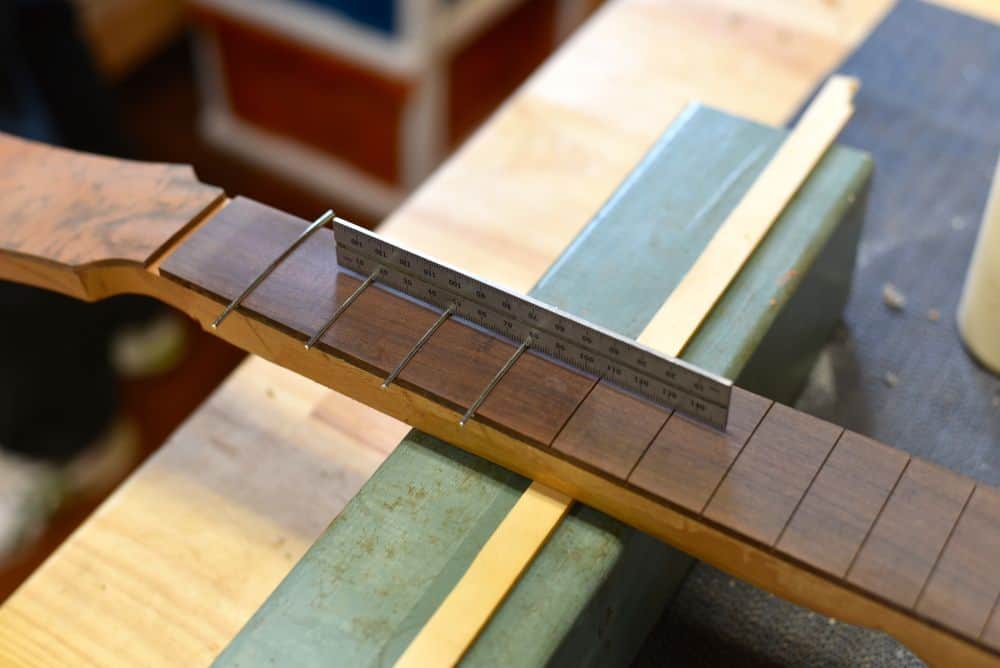
The process goes as follows:
Cue the photos…..


You have to keep eyeballing the frets as you go to make sure both sides are going in OK. When you’ve done three, you get out a straight edge and balance it across all three frets. If you can rock the straight edge, it means the middle fret is too high and you have to tap it down a little further. You repeat this test for every new fret that you add after #3
Some time later, your frets are all in!
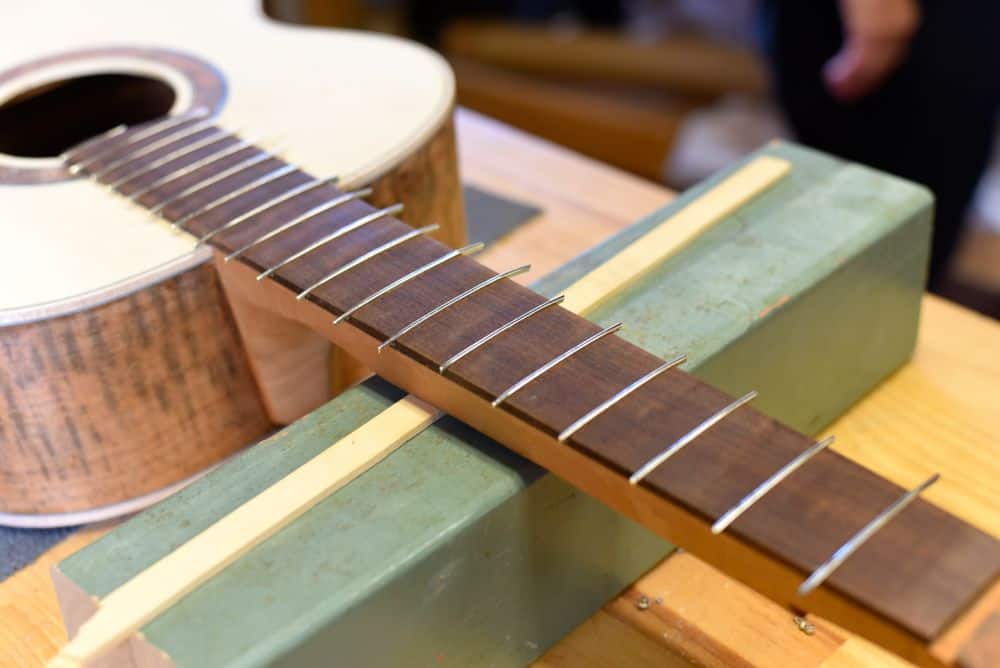
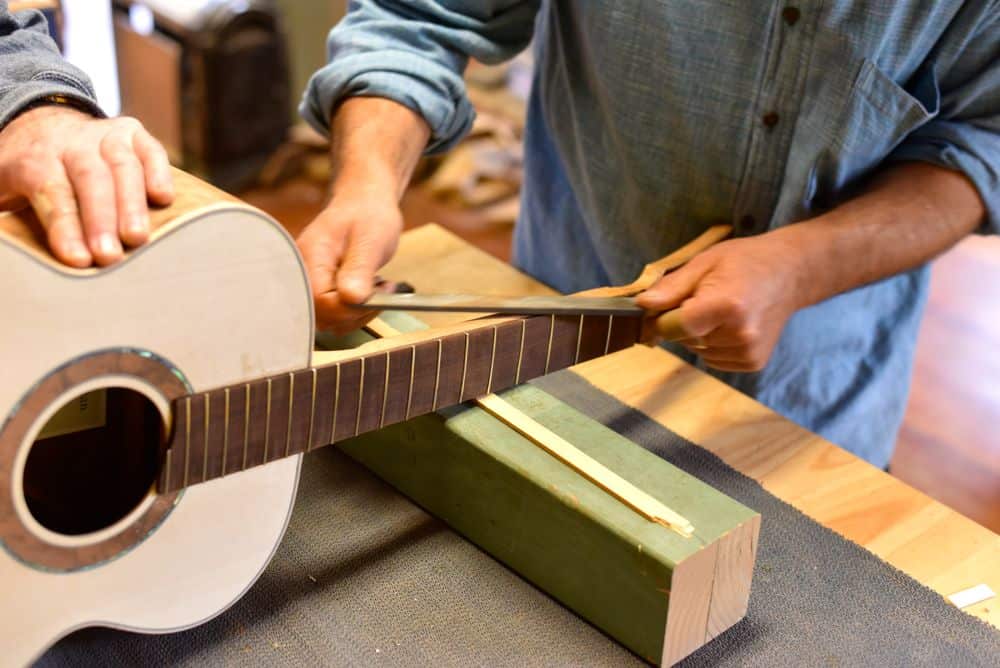
The next step is to trim the fretwire down to the fingerboard. The key here is to apply downward pressure as you cut the fretwire so as to not lift it out of the slot or disturb the fingerboard.
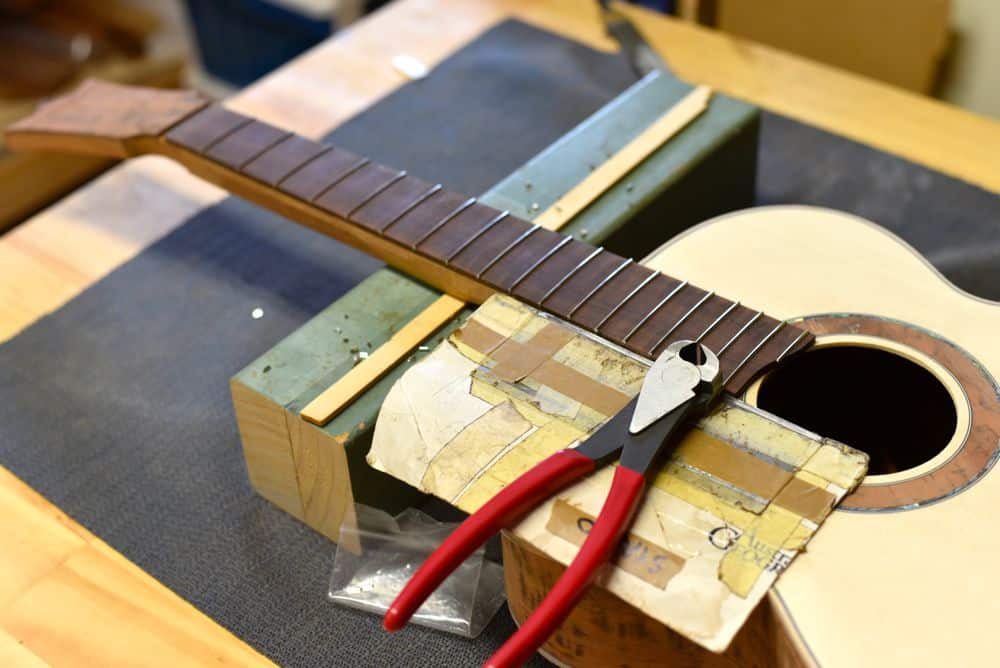
And finally, you file the edges of the frets…..
——
I trimmed the neck down to fingerboard width earlier in the day. The last job for today was to begin shaping the neck.
I used the spoke shave for this job once again. The target depth was around 23mm at the nut end of the neck and around 24-25mm at the body end. I went a little under this at the nut end (22.6mm) but it’ll be OK.
After you get your depth sorted, you start to shape the neck into that rounded shape needed for playing. The spoke shave was used for this, too.
The neck had a rough but rounded profile when I finally left the workshop today. Sandpaper will complete the process when I get in tomorrow.


——
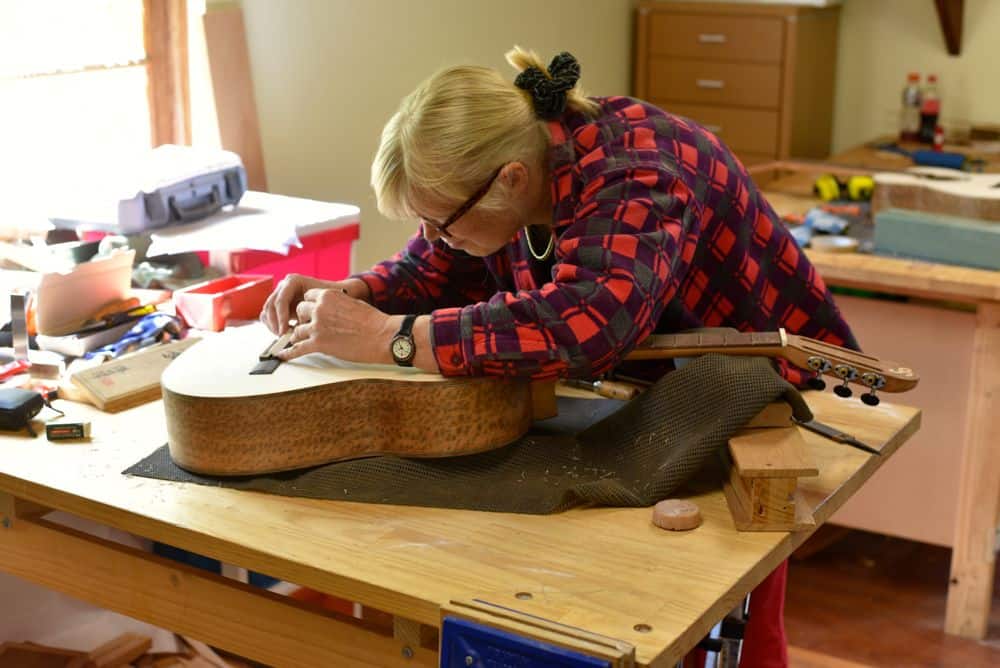
One of my fellow guitar makers in the course finished her classical guitar to a point of it being played today. It was a very exciting moment for Christiana as the instrument was tuned and then finally played for the first time. She’s making the instrument for her son, who is one very, very lucky man.
Christiana hard at work on her masterpiece…..
Strato giving the instrument it’s first real play…..
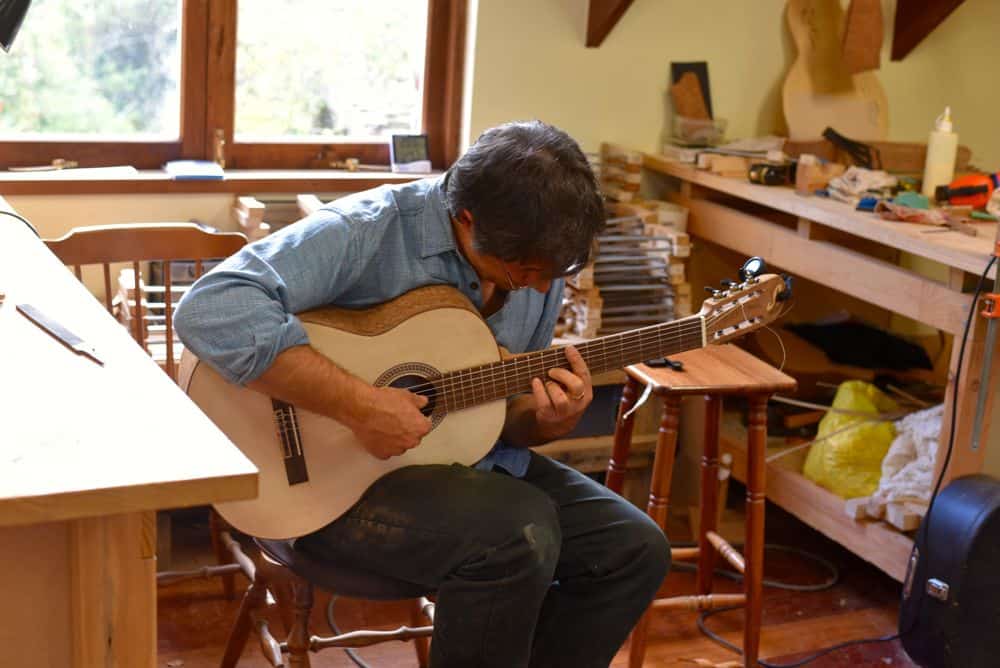
The guitar sounded AMAZING. The volume and tone were outstanding and it was a significant moment to hear a guitar that you’ve seen under construction for three weeks finally come to life. To see and hear Christiana’s reaction to the instrument in the hands of an expert was wonderful, too. I’m pretty sure that she knew she was making something special but to see, hear and understand just how special was something else all together.
It was a privilege to hear our first instrument played. On Friday, we hope to play them all together. That’ll be special indeed.
I’ve got some video of today’s impromptu performance, which I’ll try to post in the next few days.
——
We did a little work preparing the saddle and the nut today, both of which are made of bone. They’ll go in tomorrow. There’ll be plenty of sanding and other finishing work going on, too. If everything goes super-well, we might even install the tuning pegs and string the guitar!
Thanks for reading.
This is the entry for Day 14 of a three week intensive guitar building course I’m doing through the Australian Guitar Making School.
There’s a new button for this series on the menu at the top of this (or any) page. Simply click on the “Guitar” button. Or for now, click here.
——
We got SO much done today. It really was a big one.
A the end of Day 13, the binding was on and the guitar was covered in tape, Which held the binding in place.
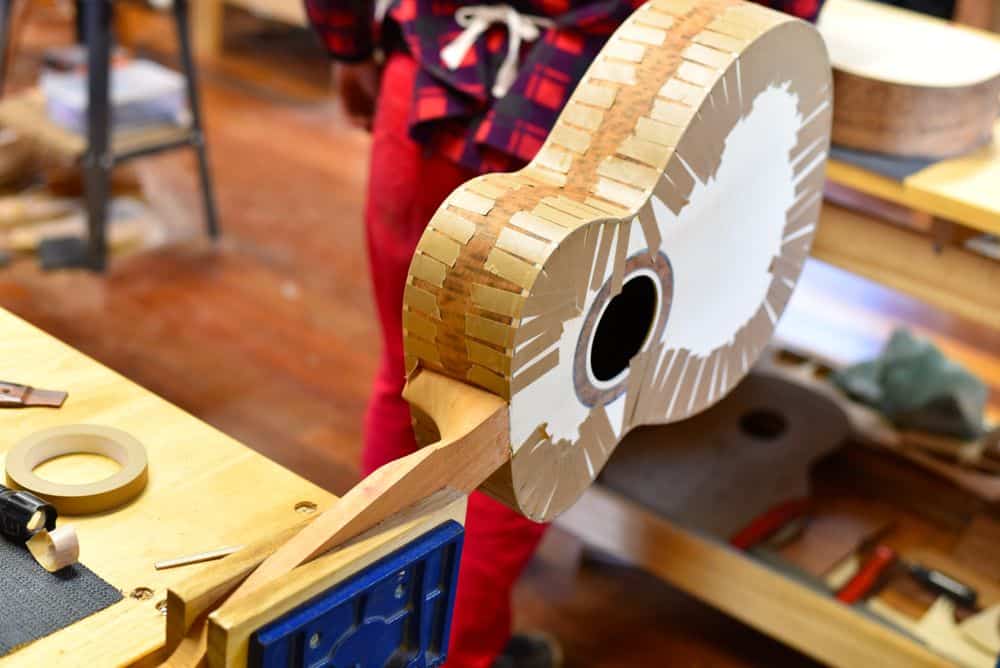
The first job today was to remove this tape but as always, there’s a special way to do that. The tape is quite sticky and the spruce is quite weak, so you have to make sure you pull off the tape with the grain rather than against it. Best to do it slowly, too.


The binding sits a little proud of the front and the back edges of the guitar so in various spare moments throughout the day (waiting to be assigned a job, or waiting for some assistance), there was some scraping to be done.
Scraping involves a piece of metal with a sharp, burred edge. You scrape the metal along the bit of binding that’s poking out from the face of the instrument – whether it be the top or the back that you’re working on – and scrape off some of the excess height. Think of it as a faster, more targeted but slightly riskier form of sanding.
The technique in action…..
In the following photos you’ll see some edges, before and after being scraped. The raised edges are before scraping, of course. It’s a time consuming and laborious process, but it’s still faster than sanding on it’s own (I’ll do plenty of that tomorrow).


The next job was to prepare the fingerboard, or fretboard.
The dimensions of the fingerboard are quite specific and my first fingerboard task today involved trimming and planing the edges. The fingerboard is 46mm wide at the nut (the end furthest away from the body of the guitar) and 58mm wide at the 12th fret (where the neck joins the body). Dimensions were drawn on to my rectangular piece of timber and cut accordingly.
Next it was time to make the first cuts for the frets. We used a specially designed jig for this task. The saw has a bar on the top that runs against the bearings on the jig, meaning that you can only saw so deep. It keeps you sawing in a straight line, too.


The next task is to apply a radius to the fingerboard. I’m building a steel-string guitar so having a slight curve in the fingerboard makes it much more comfortable to play, especially when playing bar chords, etc.
The radius is made using sandpaper and a sanding block with a special profile. You sand from side to side for a very, very long time. Care has to be take to ensure you keep things even, with the same amount of timber taken off each side.


The truss rod sits in the neck of the guitar. It comprises two thin steel rods, threaded into a small block at each end. The rods twist against each other when under pressure, helping to maintain the strength of the neck. The rod can be tightened using a hex key via a hole inside the guitar.
Installing the truss rod involved routing a trench in the neck for the truss rod to sit in. The trench is routed to a precise depth so that the top of the truss rod sits flush with the top surface of the neck. The truss rod is not attached directly to anything. It just sits in this trench and does its thing. The fingerboard is glued over this trench later on.


The first cuts were made into the fingerboard before it was profiled. Now that the radius has been applied, the cuts aren’t as deep as they were at first. Therefore, you have to cut again using another saw with a special guard on it. Some wax is applied to the blade before each cut. It’s important to get a uniform depth of cut along the whole fingerboard and you can check the depth of each cut by look at the side of the fingerboard.
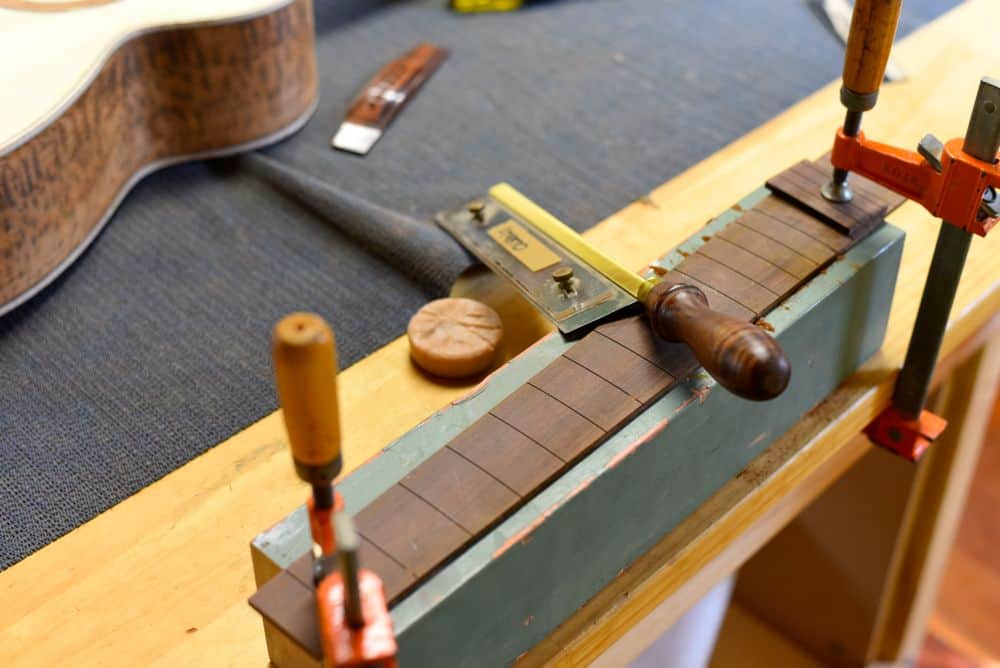
Before gluing the fingerboard on to the neck, you need to decide how you want the fingerboard to end. Some people have a straight end, or a slightly rounded end. Some people curve the end to mimic the diameter of the sound hole.
I took my inspiration from this guitar and went for an extra fret on the high strings:
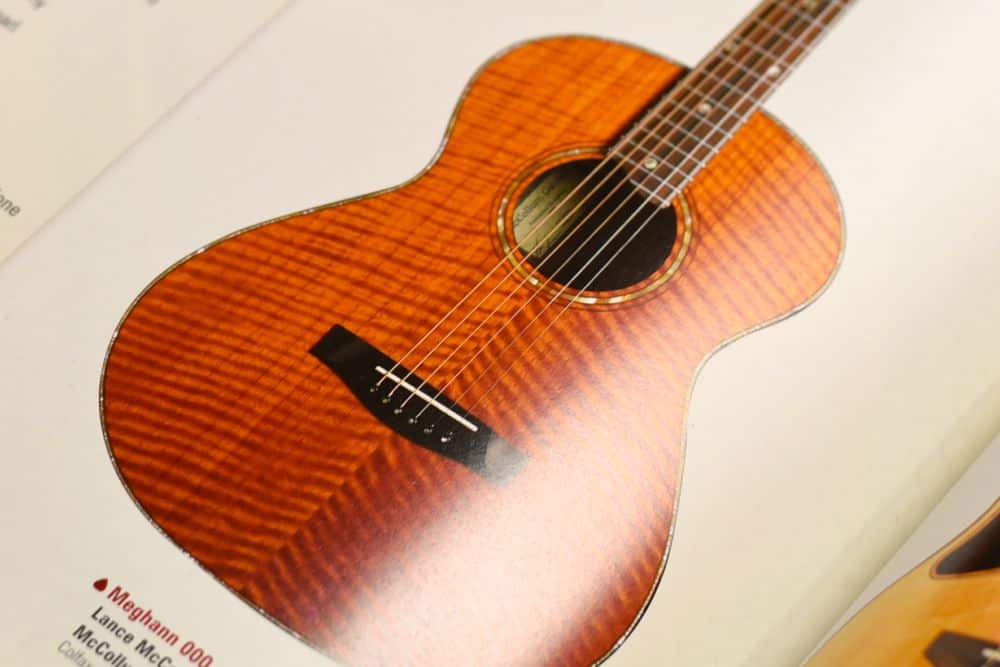
The cut is made on a bandsaw but you’ve got to have a reliable pattern to cut to. Thankfully, the bridge I’m using had a perfect edge to use as a stencil. A quick cut on the bandsaw and some sandpaper and it’s looking fantastic!
Given that my guitar isn’t a cutaway, it’s highly unlikely that this extra fret will ever be used. But it looks cool 🙂


The bridge – which is where the string ends after the sound hole – is one of the few bits of the guitar that we’re not making from scratch. Apparently it’s a very technical process and we just don’t have that much time. Consequently, we’re using a pre-formed bridge.
In preparation for gluing the bridge, you have to apply a very slight curve to the bottom. This is done via a very slightly curved sanding jig. After that, you have to get all the oils out of the surface you’ll be be gluing by rubbing the bottom of the bridge piece with acetone for a long, long, long time.
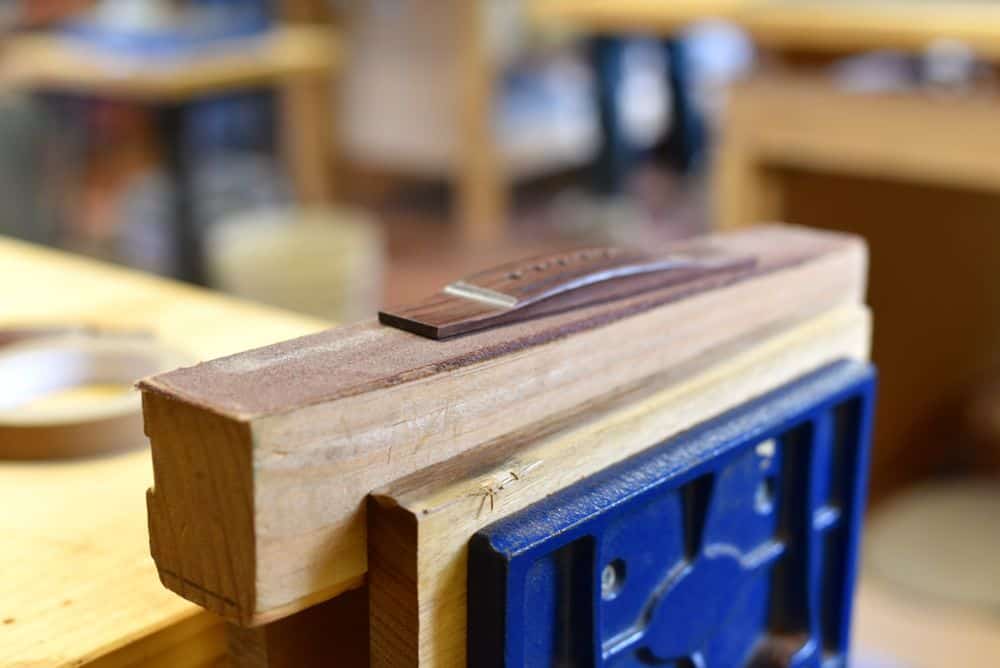
There’s a whole lot of measurement that goes on before the fingerboard and bridge are glued on. The string length is 644mm from the nut to the bridge, plus 2mm allowance for string variation. Things are measured, checked and measured again….
Once all the measurements are confirmed, the glue is applied to the back of the bridge and the fingerboard, and some mighty big clamping takes place.
This is how things looked when I left the workshop tonight.


——
Tomorrow’s work will include either some or all of the following:
I think that’ll take more than a day……
Thanks for reading!
Remember, you can see all the posts related to my guitar build here, or using the “Guitar” button on the menu at the top of every page of this site.
This is the entry for Day 13 of a 3-week intensive guitar building course I’m taking through the Australian Guitar Making School.
Click to view the entry for days 10, 11 and 12.
Click here to view Day 8’s entry.
Click here to view Day 7’s entry.
Click here to view all of Week #1.
——
At the end of day 12, the guitar was sitting ready to receive its binding.
Binding is the thin strip of timber that forms the border between the sides of the car and the top and bottom surfaces. It looks pretty, but it also plays a role in the structural integrity of the instrument so it’s important to get it right.
Before I got to glue in the binding, though, there are a few other detail jobs that had to be done.
First I had to chisel out a triangle of timber at the tail of the guitar. I’m going to insert some patterned timber here in a few days from now (when I finally nail down the pattern!).


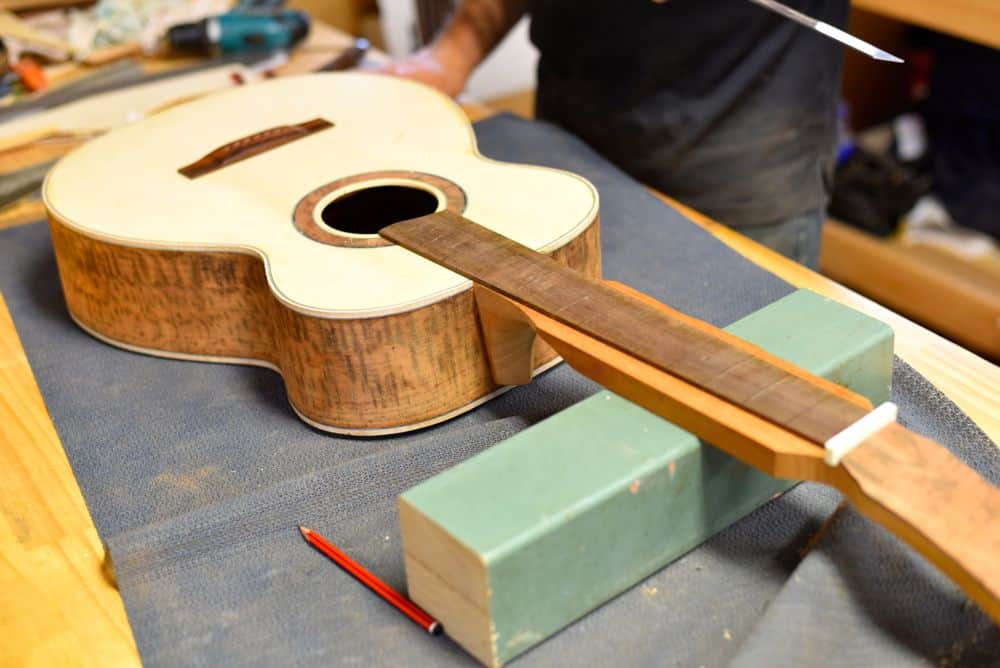
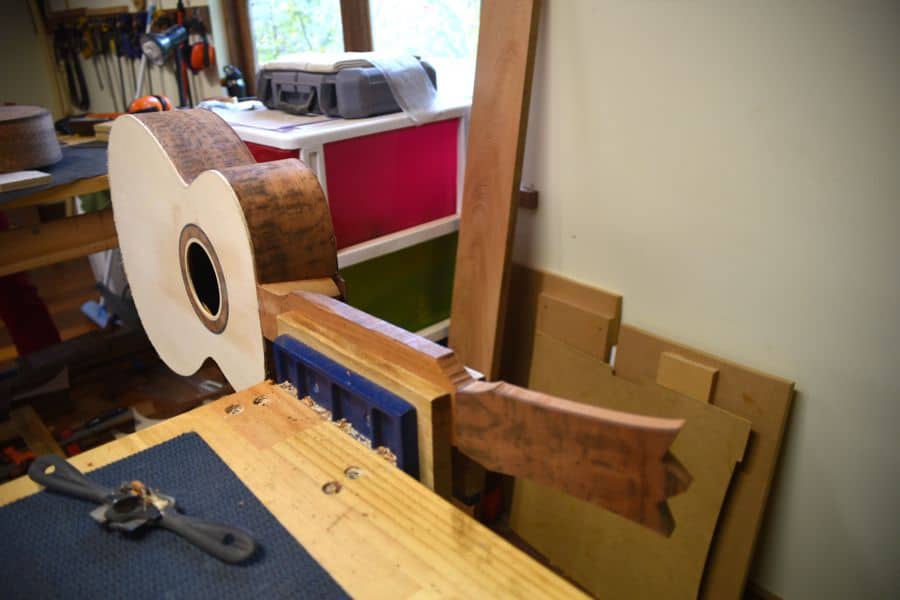
I also had to remove a leftover piece of timber on the back of the guitar, near the heel. This piece couldn’t be cleared with the router because of the heel behind it, so I had to cut it out manually with a Japanese saw and then clean up the timber in the binding channel behind it, with a chisel.
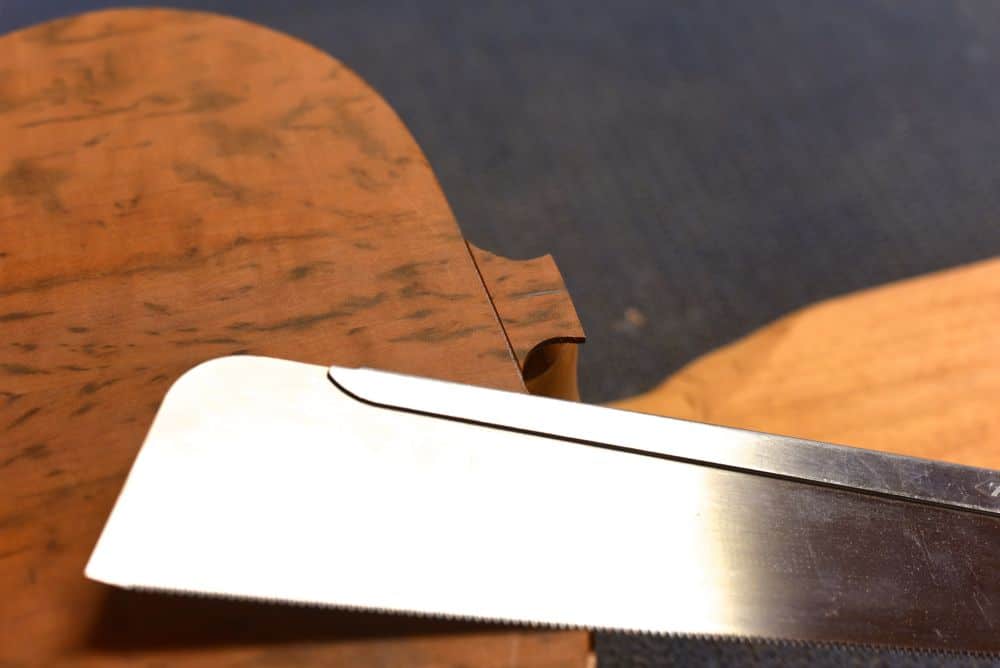
The next job in preparation for the binding is to clear a channel where the neck joins the top of the guitar, at the front. This is a precision job as the channel has to be just big enough to fit the binding and a strip of black/white/black.
Strato did a demo on one guitar and we were then let loose to do it ourselves. The job involves making progressively deep cuts in the spruce using is a scalpel, then some meticulous chisel work with a tool that’s specially customised for the job…


With those jobs done, it’s time to glue the binding into the channel routed around the edges of the guitar.
My binding is made from maple. It’s a thin strip of timber around 5mm wide by 2mm thick and it has a strip of black/white/black trim on one side to provide a nice visual effect. The light color of the maple’s going to look great as a divider between the darker tiger myrtle used on the back and sides of the guitar. The maple will blend with the light colored spruce top, so we use another strip of black/white/black to form a border around the top.
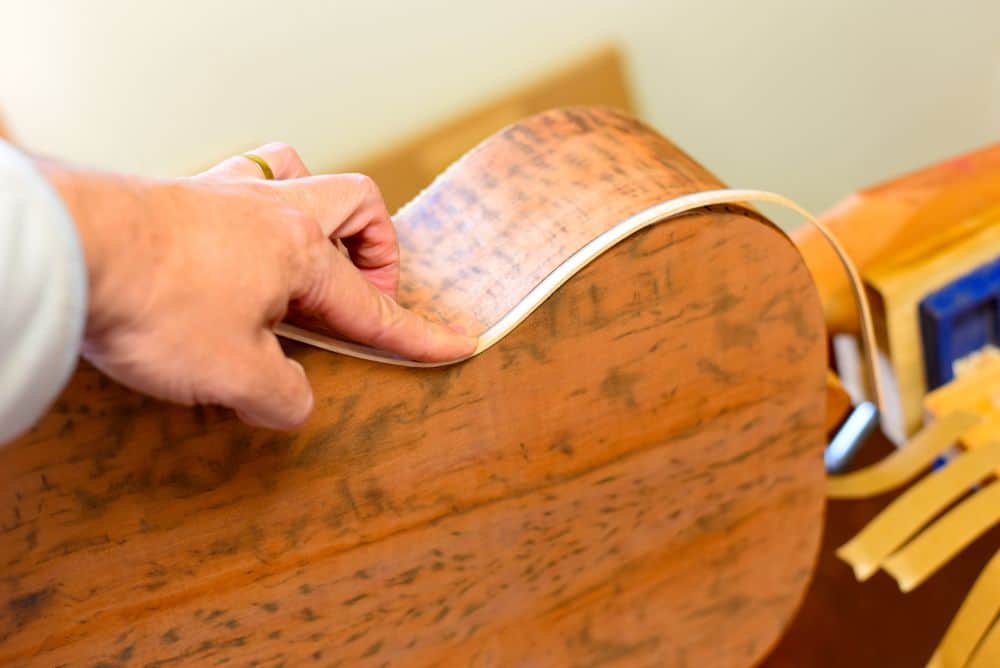
First, we need a lot of 4-inch pieces of tape…..
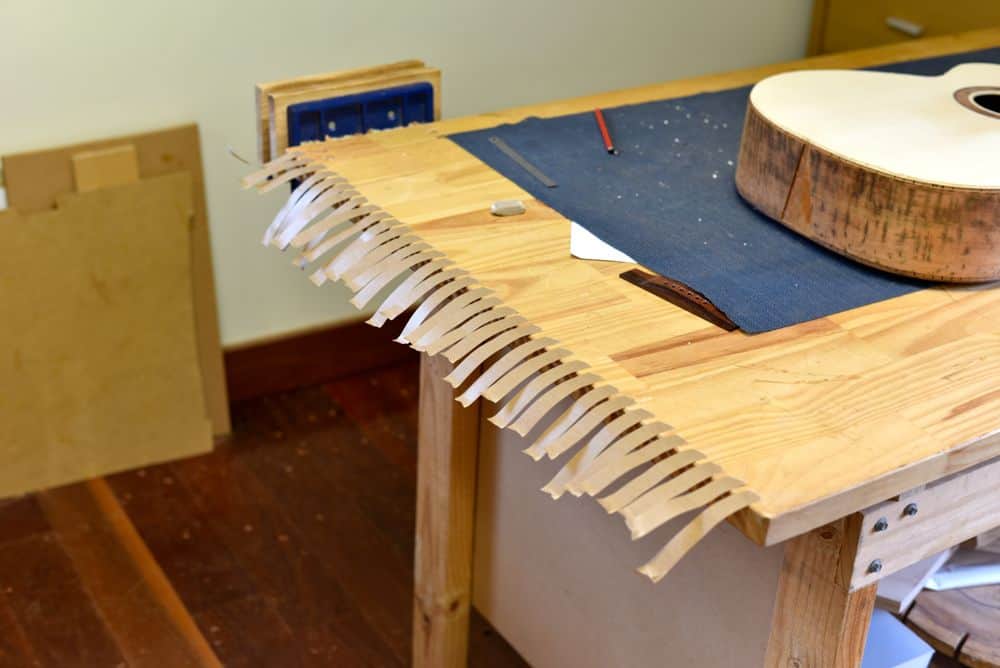
When I say we needed a lot of these, I mean we needed a LOT of them.
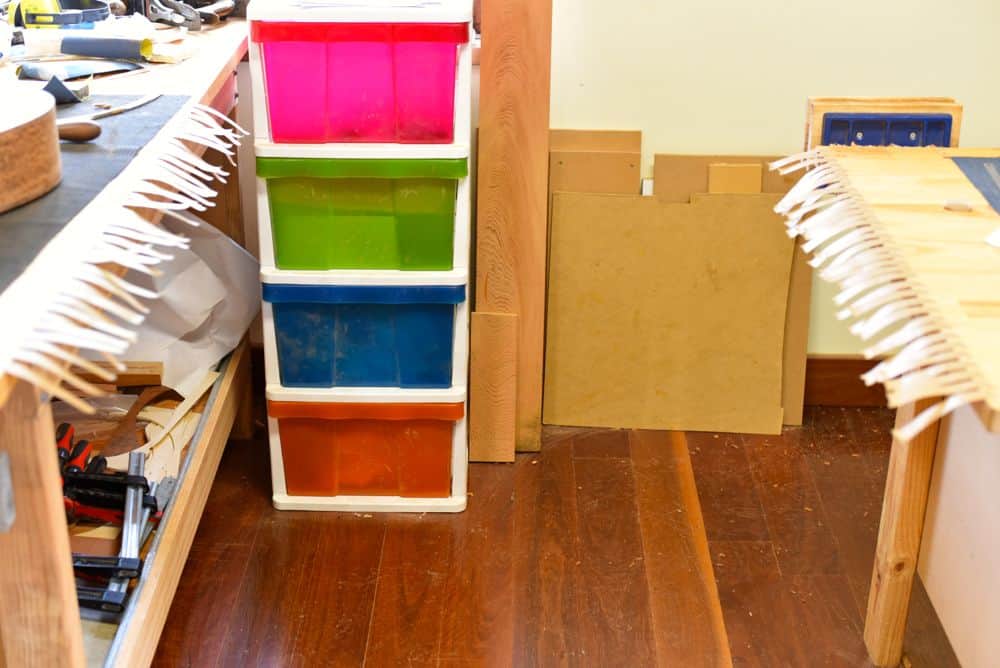
There are 4 bindings to be glued to the guitar (left/right for both front and back). The tape you see above will do about 1.5 bindings.
The rear bindings come first. The rear is simpler than the front on my guitar so it makes for good practice. With the binding measured and trimmed to size, you smear a whole lot of glue into the binding channel.
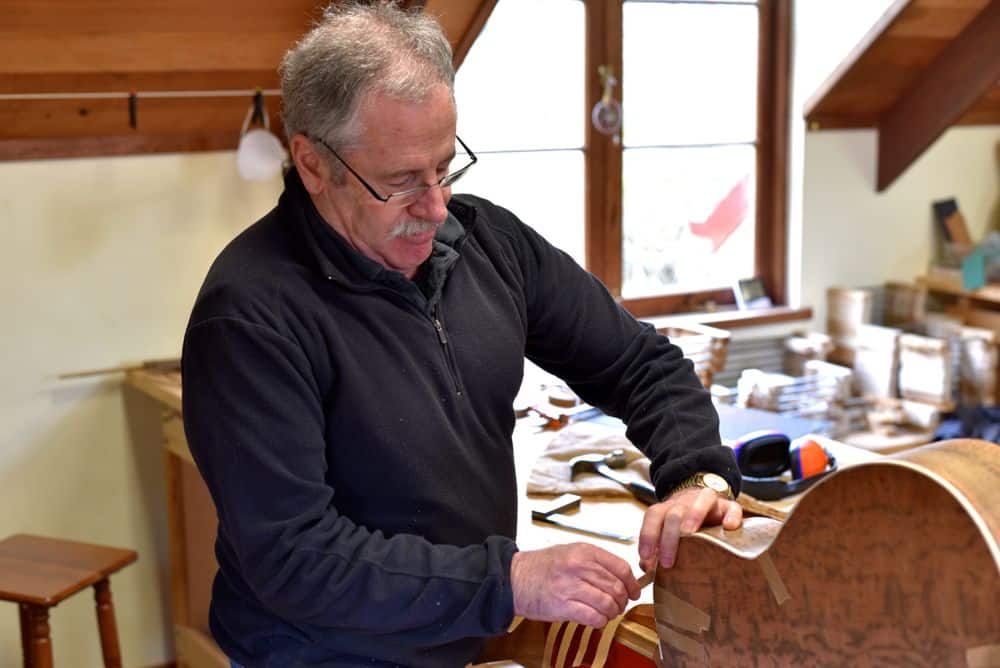
When it’s all glued up, it’s time to apply the binding and tape it down as quick as you can.
This is a pressure job. In fact, it was the most stressful job we’ve done in the last few weeks. The binding has to be positioned in exactly the right place. It has to be pressed in to the channel as hard as possible and then taped down tight. Really tight. You have to clean off excess glue as you go and all of this is being done on the clock because you have to get the binding jammed in and taped down before the glue begins to set.
Graeme from our class shows the technique…..
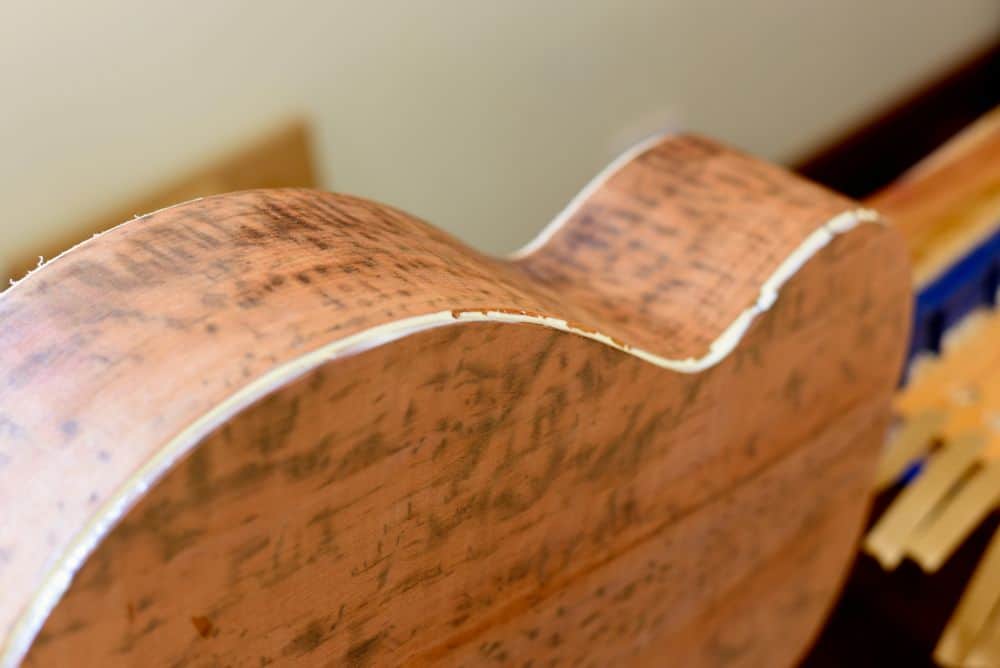
And here’s my guitar with the bindings on the back glued and taped in place:
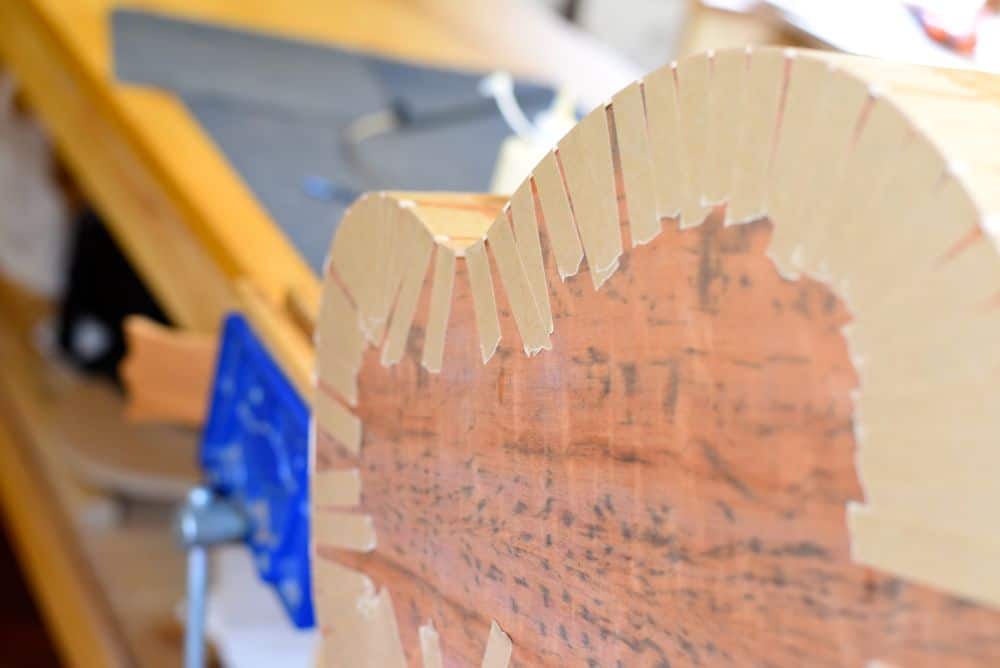
Next we turn to the front of the guitar. Because the top (i.e. the front) is made from spruce, it has some ‘hairy’ bits leftover from the router. It doesn’t respond to routing as cleanly as the tiger myrtle, probably because it has a more open grain (my guess).
Those hairy bits have to be sanded down so that they don’t plug up the channel for the binding and the extra strip of black/white/black.


This is the binding and the strip of black/white/black that will be applied to the front. They both get glued in at the same time and as you can see, they’re quite thin and delicate. It’s a messy, awkward job that works much better with two people than one.
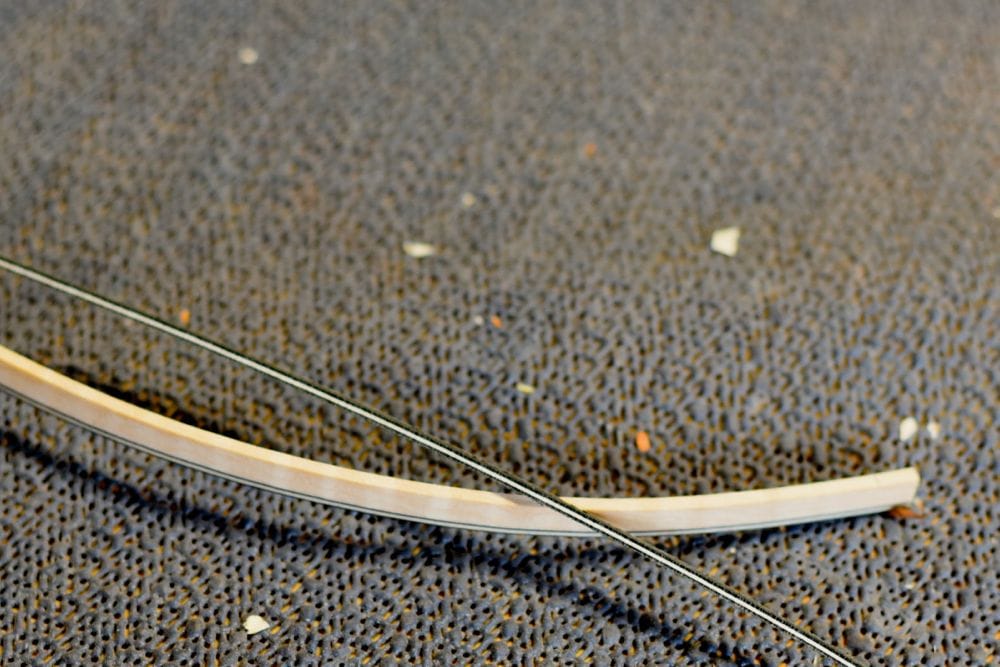
Sorry, but the process was too rushed for an action photo, but here’s the finished product. We’ll remove the tape tomorrow morning. Hopefully the close-up shots of the front will give you an idea of how the extra black/white/black forms the border and separates the spruce top from the maple binding.


That’s basically where we left things for today.
You can see from the first photo below how the binding currently sits a bit proud from the spruce top. Tomorrow we’ll remove the tape from the binding and file the excess down with a metal scraper to form a nice, clean edge along the front of the guitar.
Then we start on the fingerboard, which I measured and prepared for cutting just before going home. If we get time we might attach the bridge, too. It’s going to be another big day!
Thanks for reading.


With the whole guitar thing going on, there hasn’t been much time to play with the Lancia Fulvia but we got a little time today. It was Classics By The Beach in the morning, followed by a little Fiat X19 time with Geoff and a friend who came over to give us the benefit of his experience with the car – thanks Ant!
After lunch, Geoff and I decided to get working on the Fulvia. I was keen to get a look under its skin to see the real extent of what we’ve got to fix and as expected, there’s plenty to do.
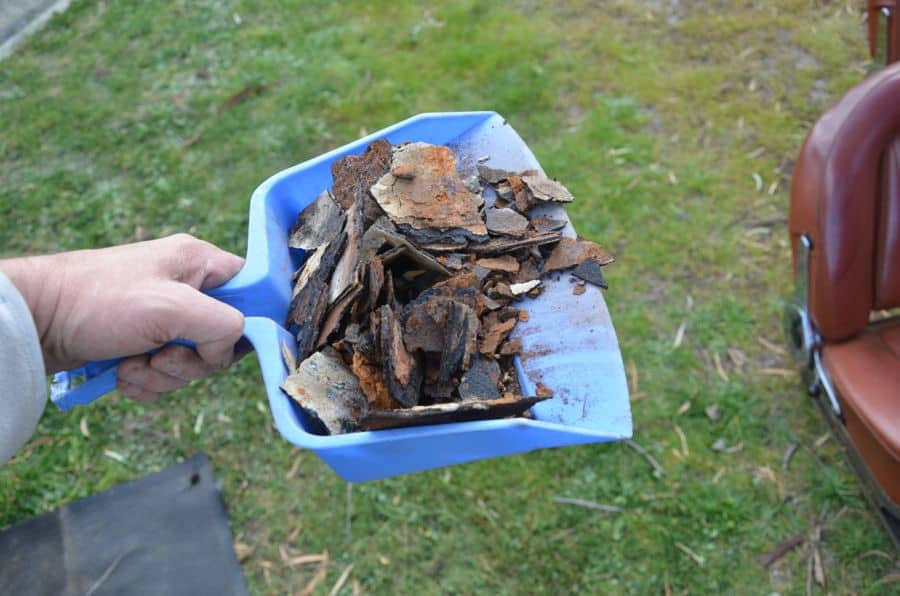
Basically, what we did today was strip out the easy bits of the interior. The seats came out, the seat belts, and then the rubber matting on the floor. The rubber matting had a fibrous underlay underneath and that was a combination of easy and hard to remove. It was easy to remove where the floor was rusted, but harder to remove where the floor was solid. It was mostly easy to remove 🙁
Bottom line: there’s plenty of rust in the floor of the car. The rust has gone right through to become small holes in some places. The rust continues on into the front footwells, too, which was a little further along than I thought would be.
Deep down, I expected this. But an inspection of the floor from underneath had me holding out some remote hope that things wouldn’t be too bad.
The good news is that the box-type framing that surrounds the floor sections seems to be pretty good. I’m still living in hope that the subframe that supports the engine is OK.
New, replacement floor sections are readily available from a various suppliers, as are the inner and outer sills. You just have to buy them and get them shipped, which is a reasonable amount of money. Now that I know how bad it is, I guess I can proceed with that order.
Here are some photos from Sunday’s “Fun With The Lancia Fulvia.”